Android WunderLINQ App Documentation
Version 2.0
Introduction
First of all, Thank you for your purchase. The WunderLINQ was designed for riders by riders.
This documentation is to help you setup the WunderLINQ and to describe the functionality available in the WunderLINQ app.
Requirements
You will need the following to use the WunderLINQ app.
- WunderLINQ
- WunderLINQ App
- Phone or Tablet
Getting Started
With your WunderLINQ installed turn on your motorcycle's ignition.
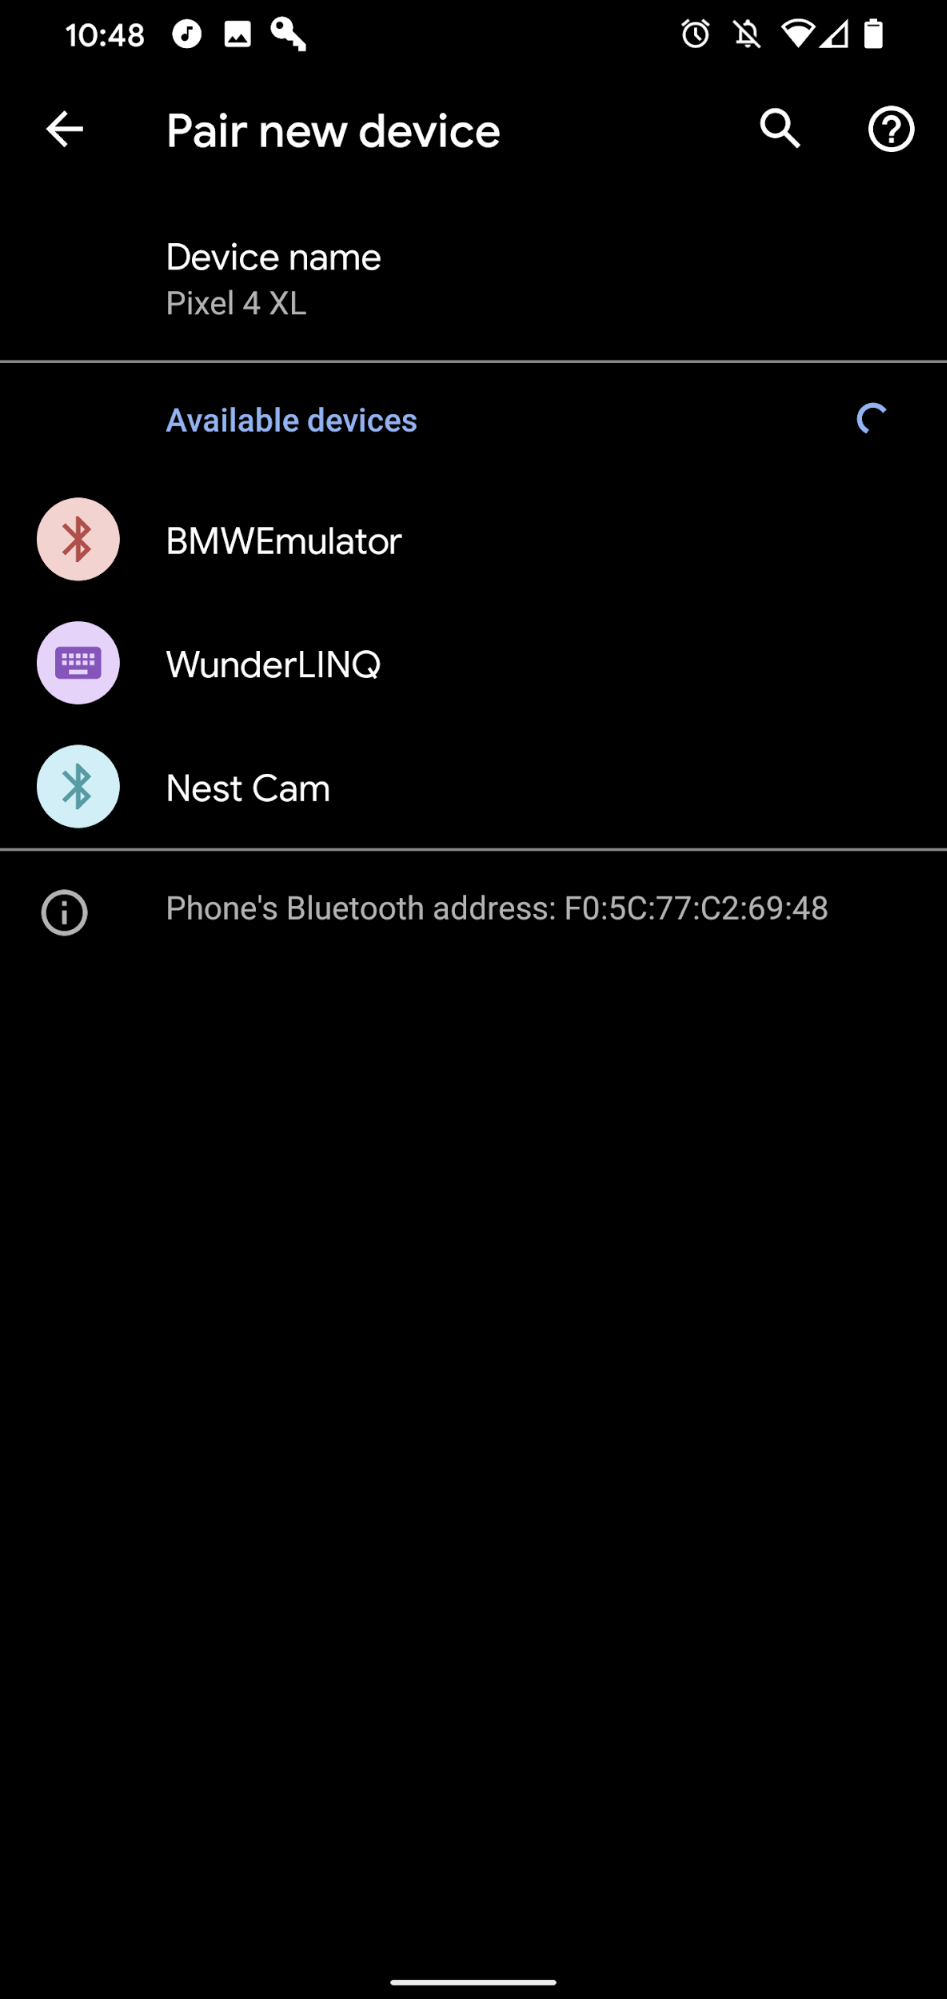
Pair to the WunderLINQ hardware.
Go into your mobile device’s Bluetooth settings and pair it with the WunderLINQ. Select the WunderLINQ device to pair with.
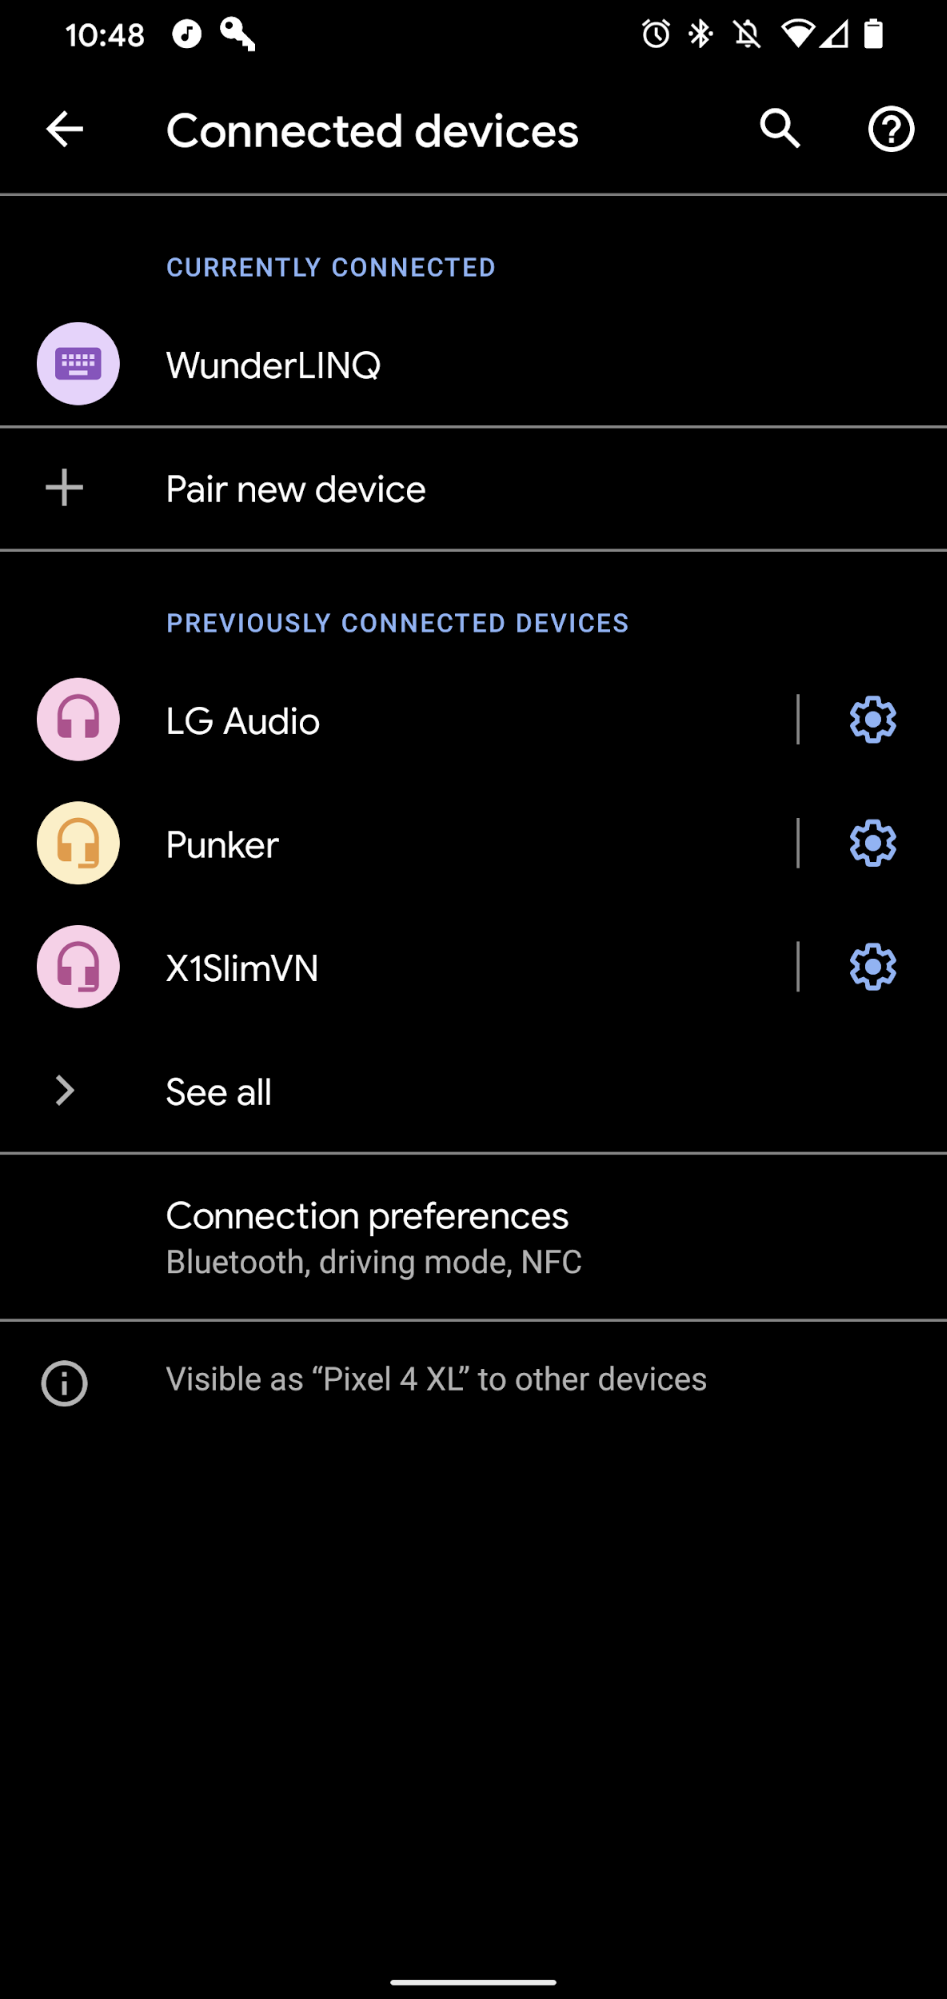
The WunderLINQ should now show as “Connected” in your Bluetooth settings and the WunderLINQ status light should be solid blue.
Install the WunderLINQ App
Initial WunderLINQ App Setup
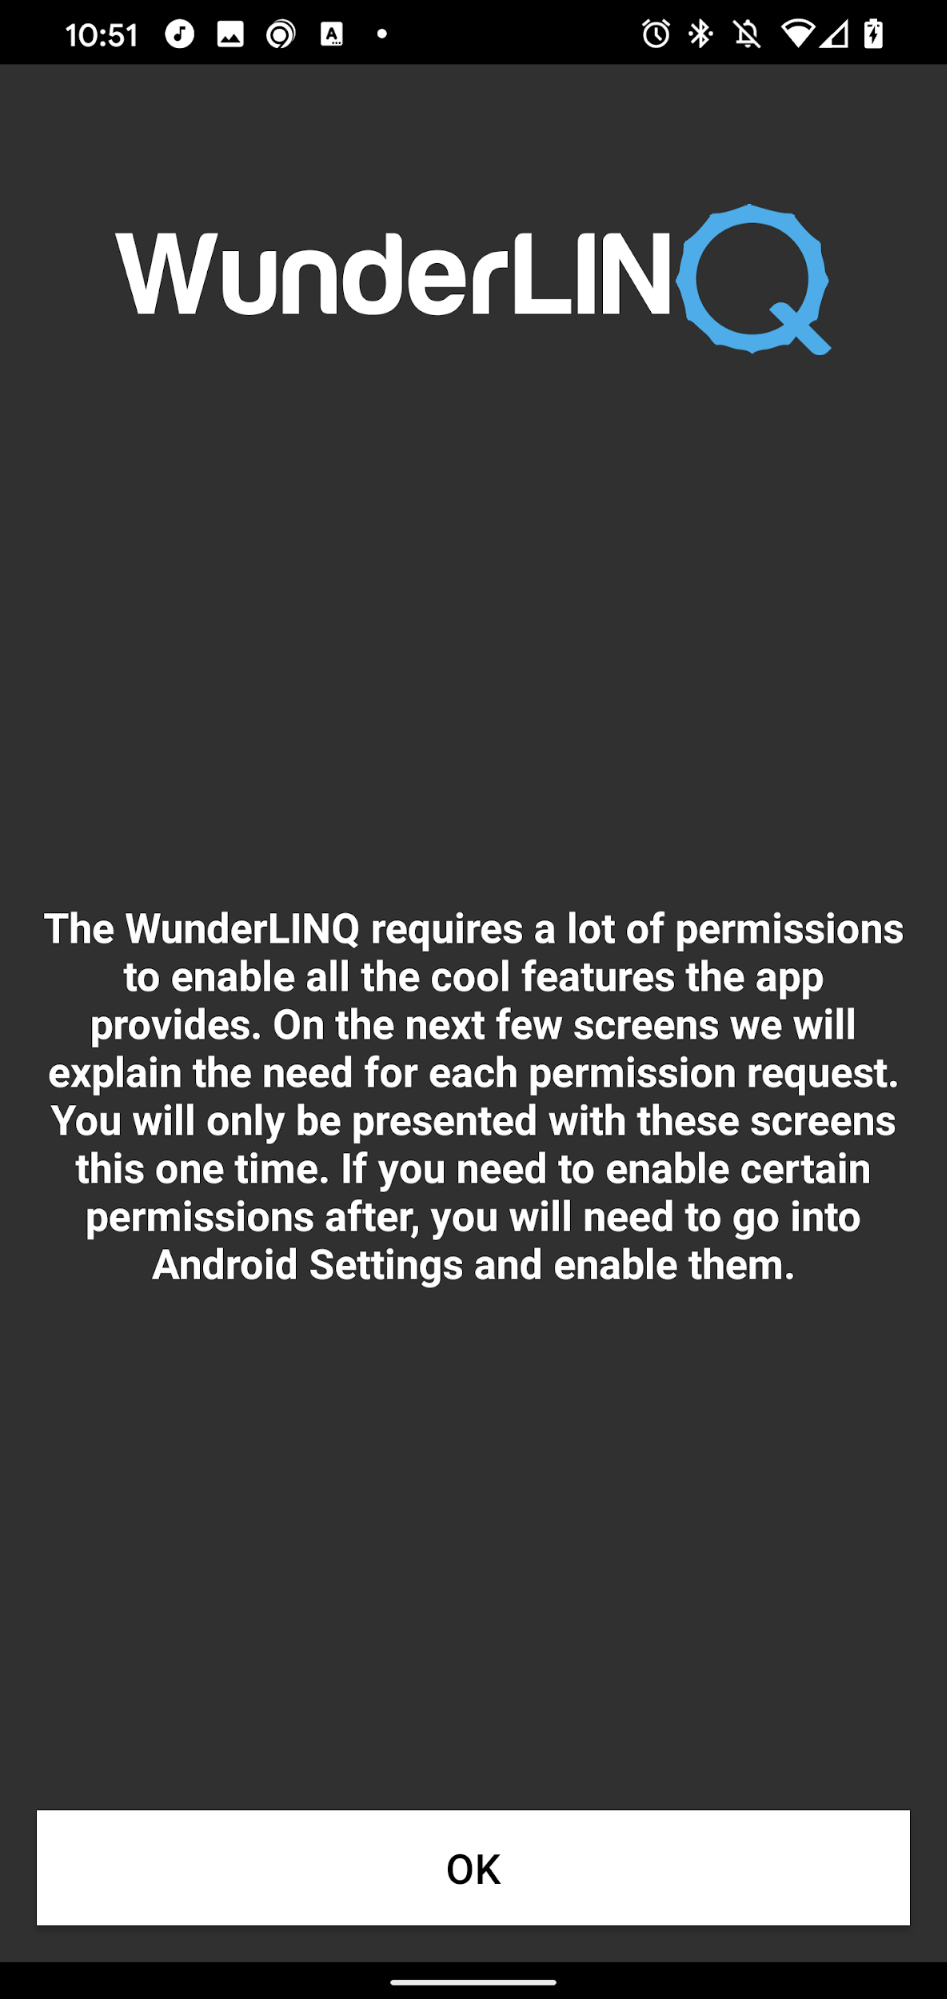
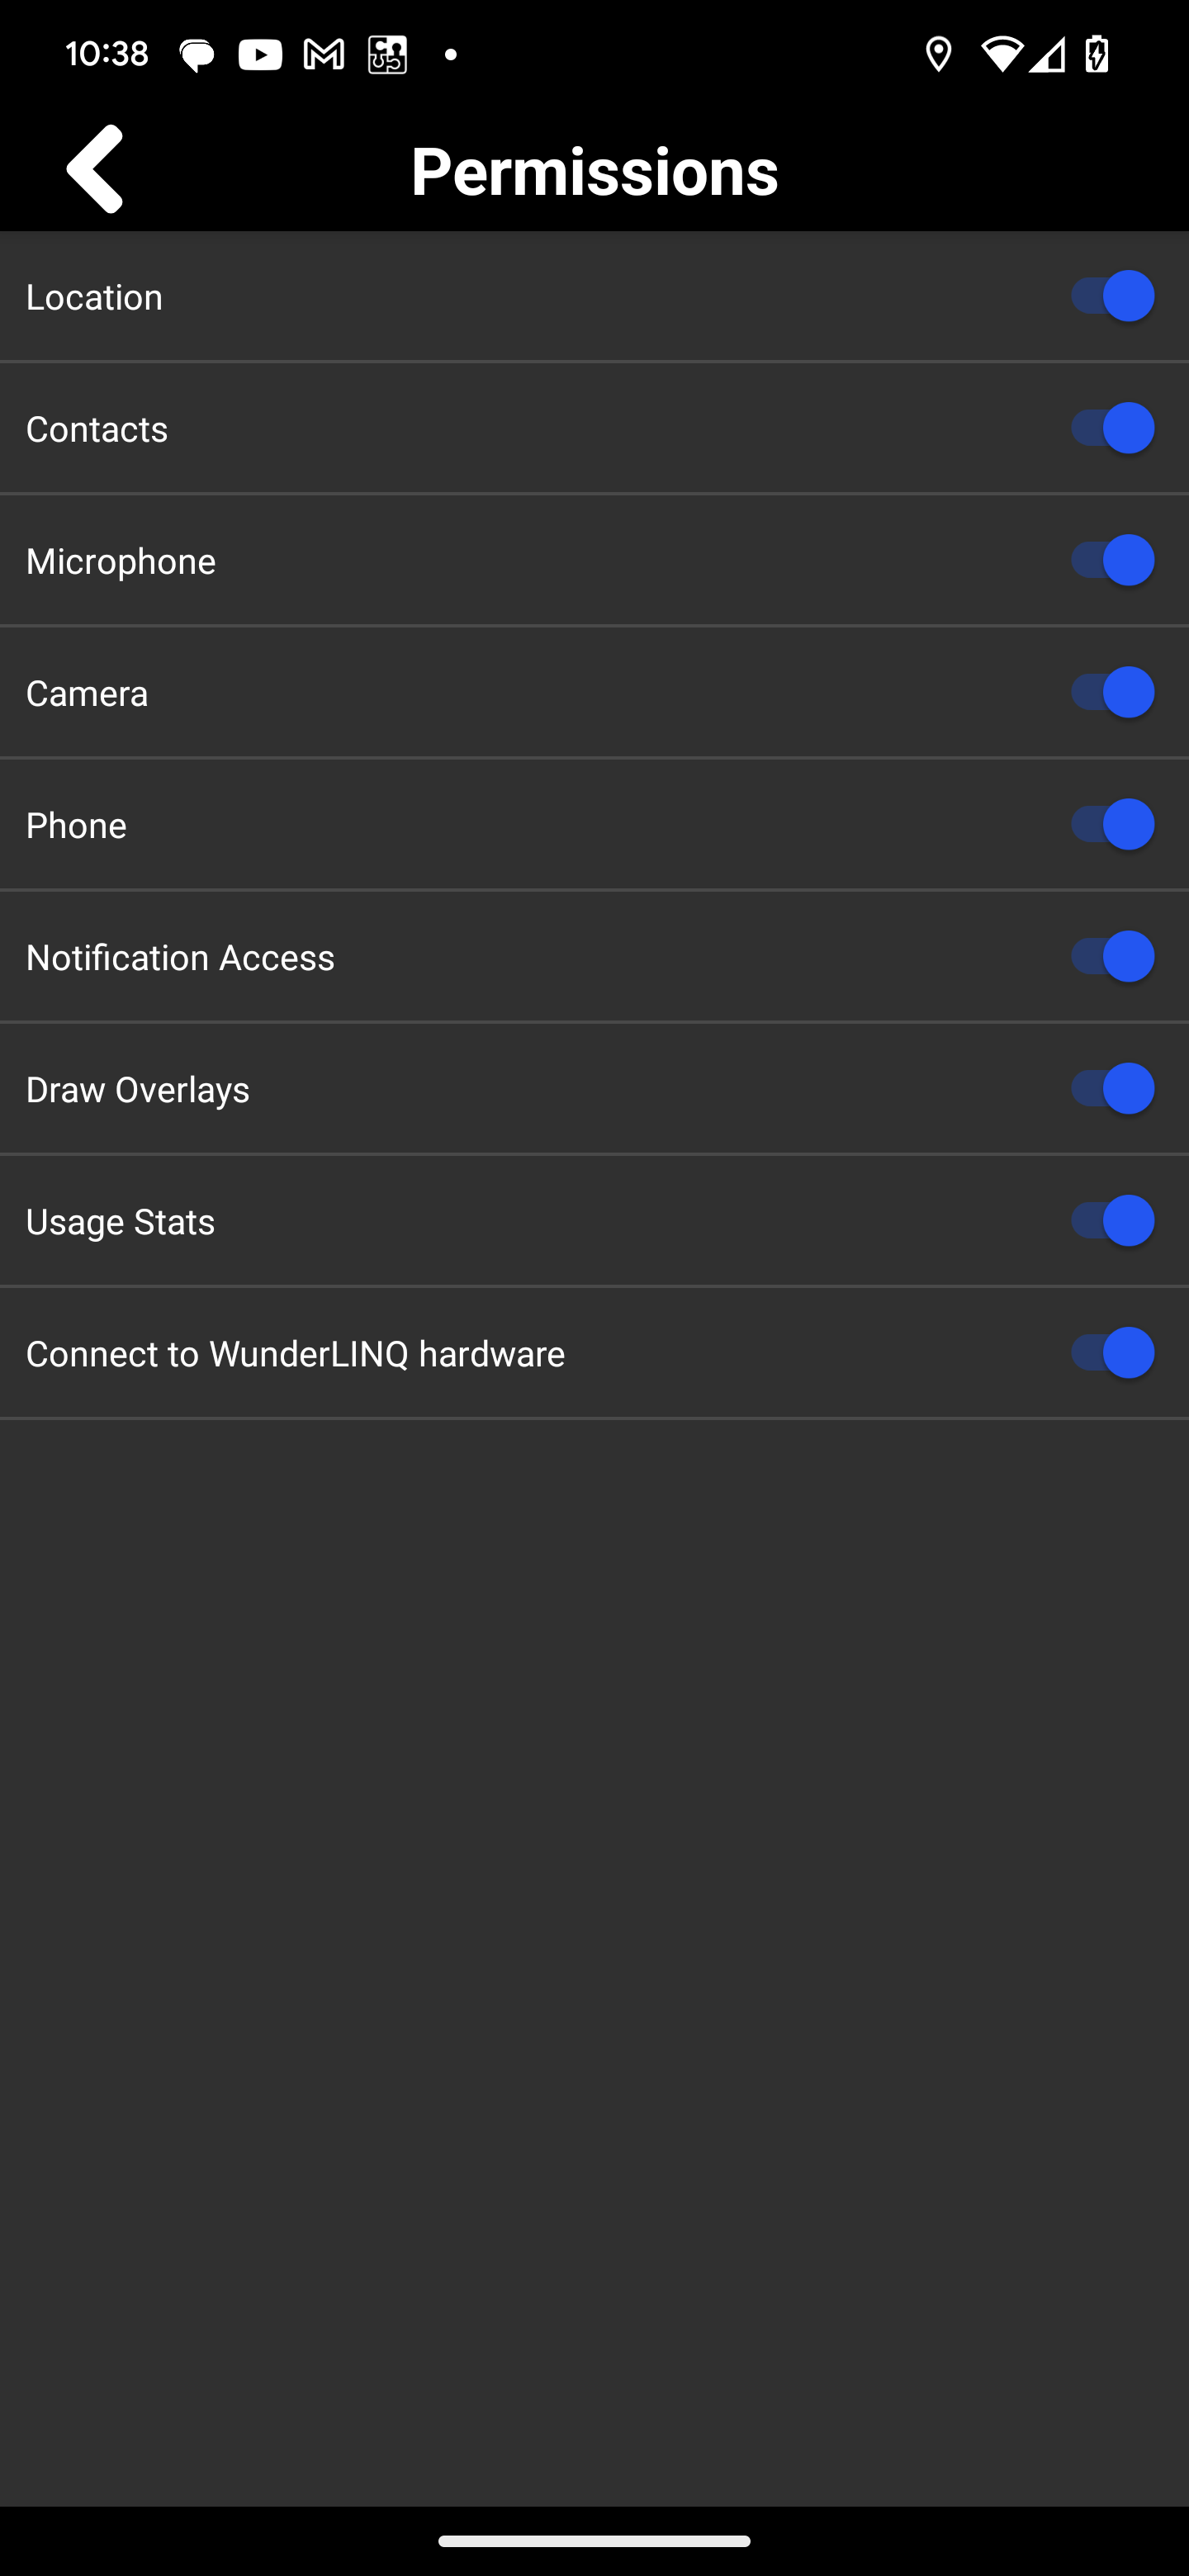
Grant Permissions
On the first launch of the WunderLINQ App, you will be presented with the first start wizard. The wizard walks you through all the permissions that the WunderLINQ App requires to function. After you’ve completed the wizard you will not be prompted for permissions again. Failure to grant these permissions will result in reduced or no functionality in the WunderLINQ App. To adjust permissions later you must use settings.

Usage Warning
On the first launch of the day, you will be presented with a Warning that you must agree to before using the App.
After completing the Initial Setup, the WunderLINQ hardware should automatically reconnect to your device when powered on. If you have a supported motorcycle with data you should see some data populated. Please note some values like tire pressure don’t show initial readings until the motobike has moved some distance.
App Usage
General Screen Navigation
You can navigate through the main WunderLINQ App screens using one of three methods.
- WunderLINQ Left and Right Arrow Key Presses
- Left and Right Swipe Gestures
-


 App buttons
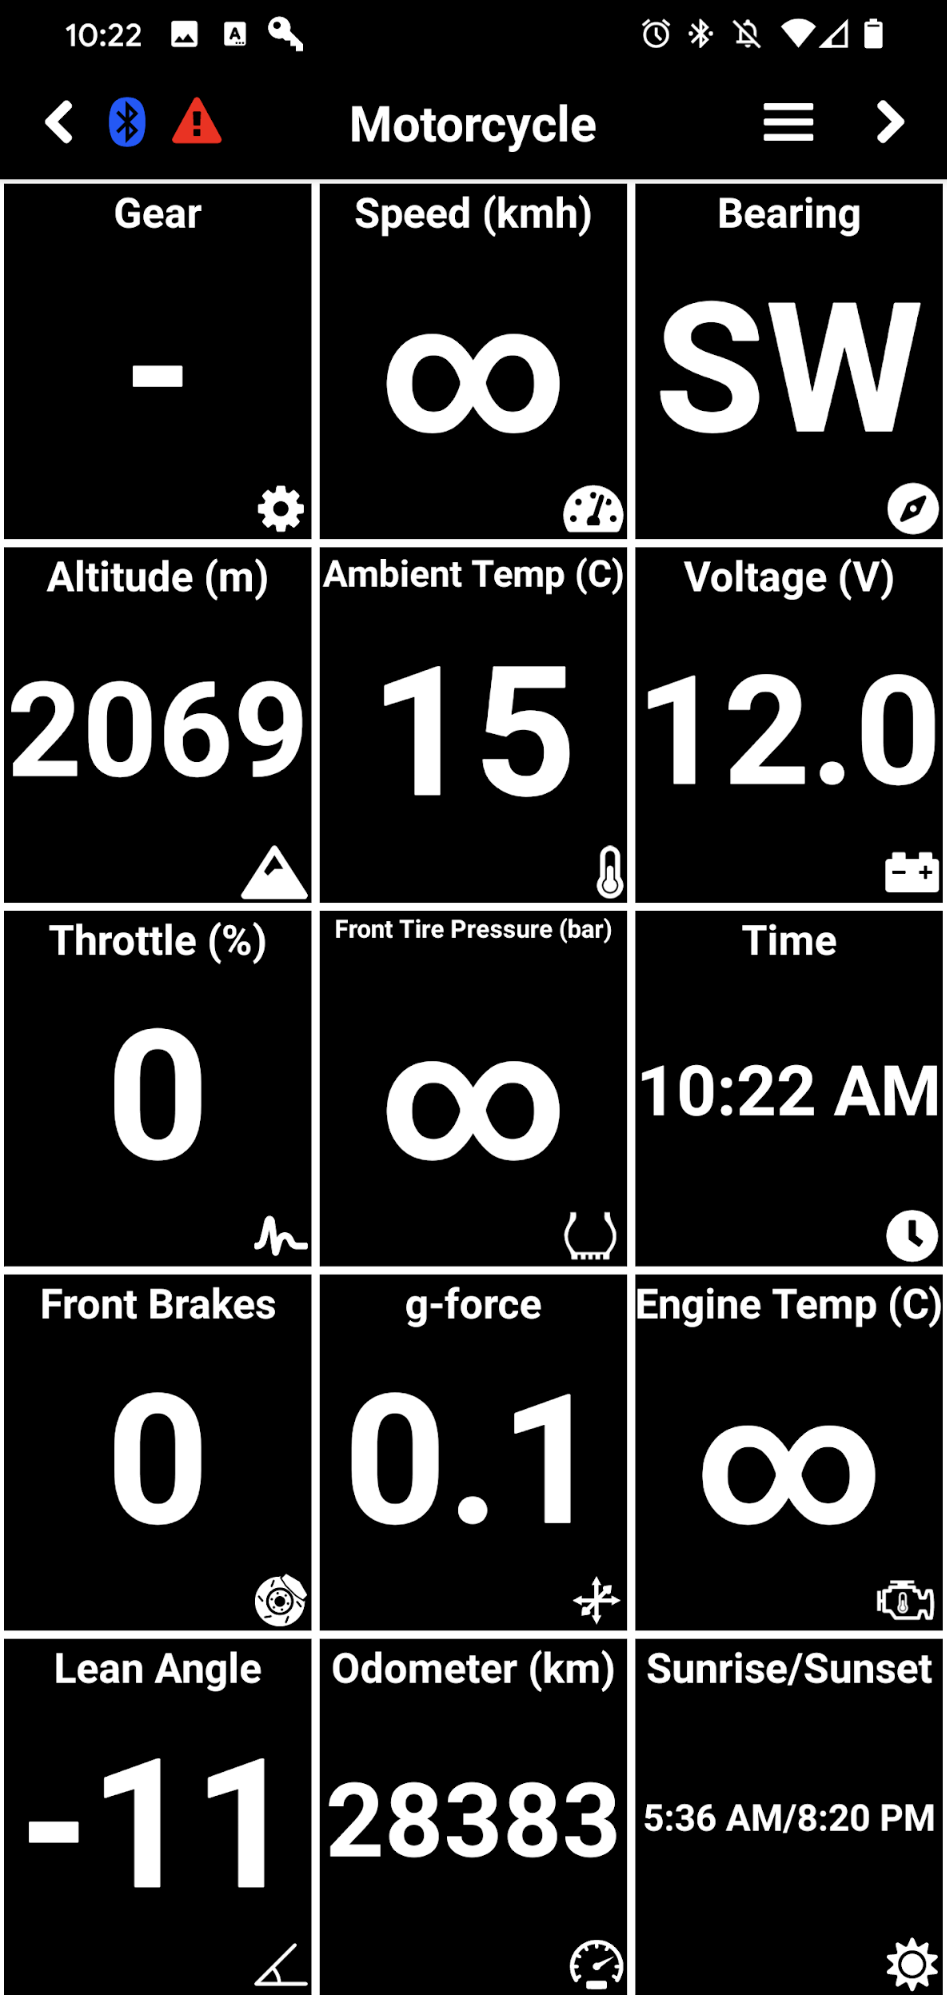
Motorcycle Screen
The Motorcycle screen displays a customizable grid of data points provided by your motorcycle and phone. Bluetooth connection status, active fault status, and buttons to a few other functions are also available. To customize the grid you can by long-pressing a cell or under the App Settings.
Motorcycle Screen Controls
| Scroll Wheel Up/Swipe Up | Increase cell count |
| Scroll Wheel Down/Swipe Down | Decrease cell count |
| Long Press cell | Long Press cell |
| Previous screen button | |
| Denotes active connection to the WunderLINQ hardware. | |
| Denotes no connection to the WunderLINQ hardware. | |
| Denotes active motorcycle faults, it can be pressed to view a list of Active Faults. | |
| Menu button | |
| Next screen button |
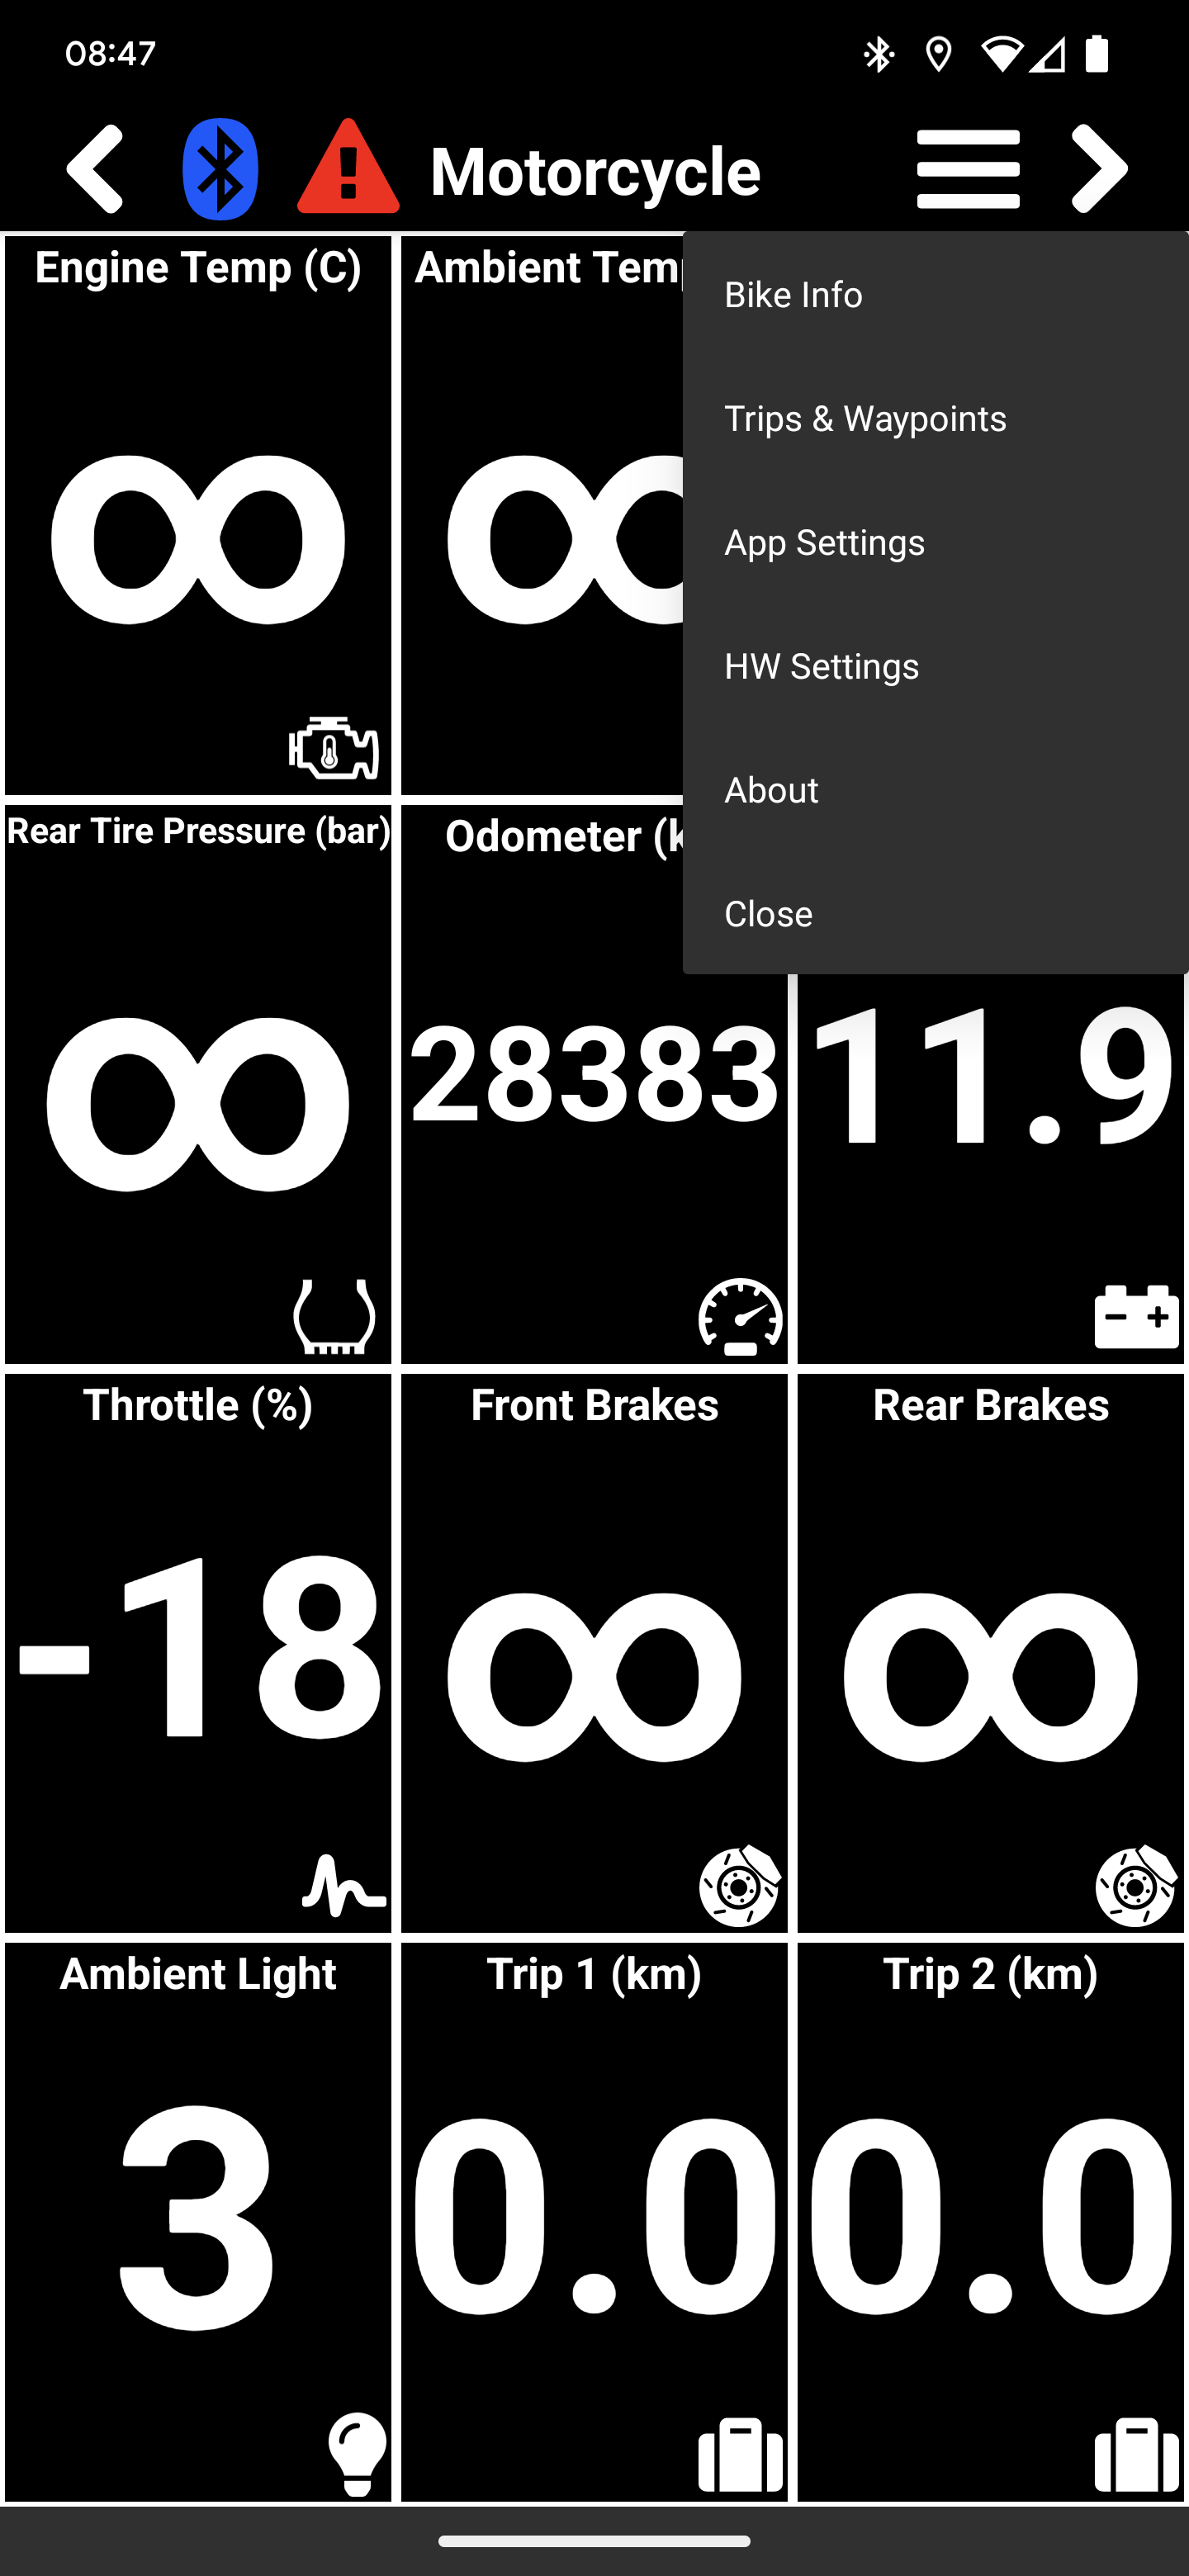
![]() button will display a popup menu that includes options to:
button will display a popup menu that includes options to:
| Bike Info* | Displays motorbike VIN, next service information and cluster reset options. |
| Trips & Waypoints | View and manage saved data. |
| App Settings | Settings that impact the app. |
| HW Settings* | Settings that impact the WunderLINQ hardware. |
| About | Displays information about the app and includes links to the WunderLINQ web site. |
| Close | Closes App. |
* Only available while connected to the WunderLINQ hardware.
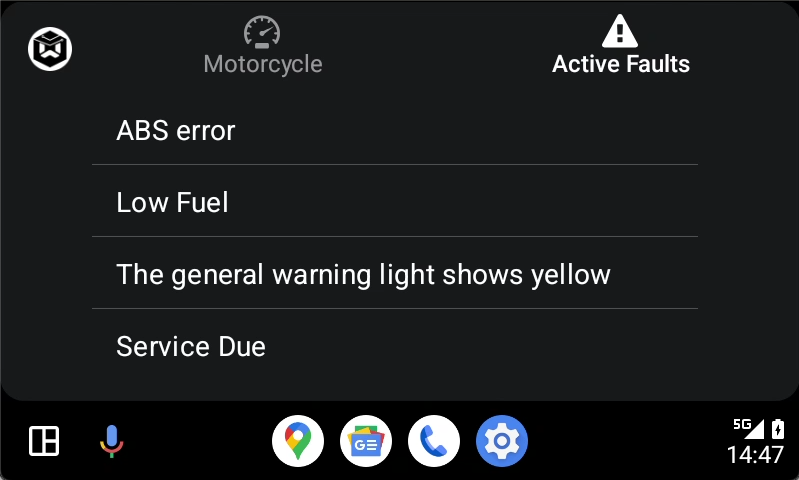
Active Fault Screen
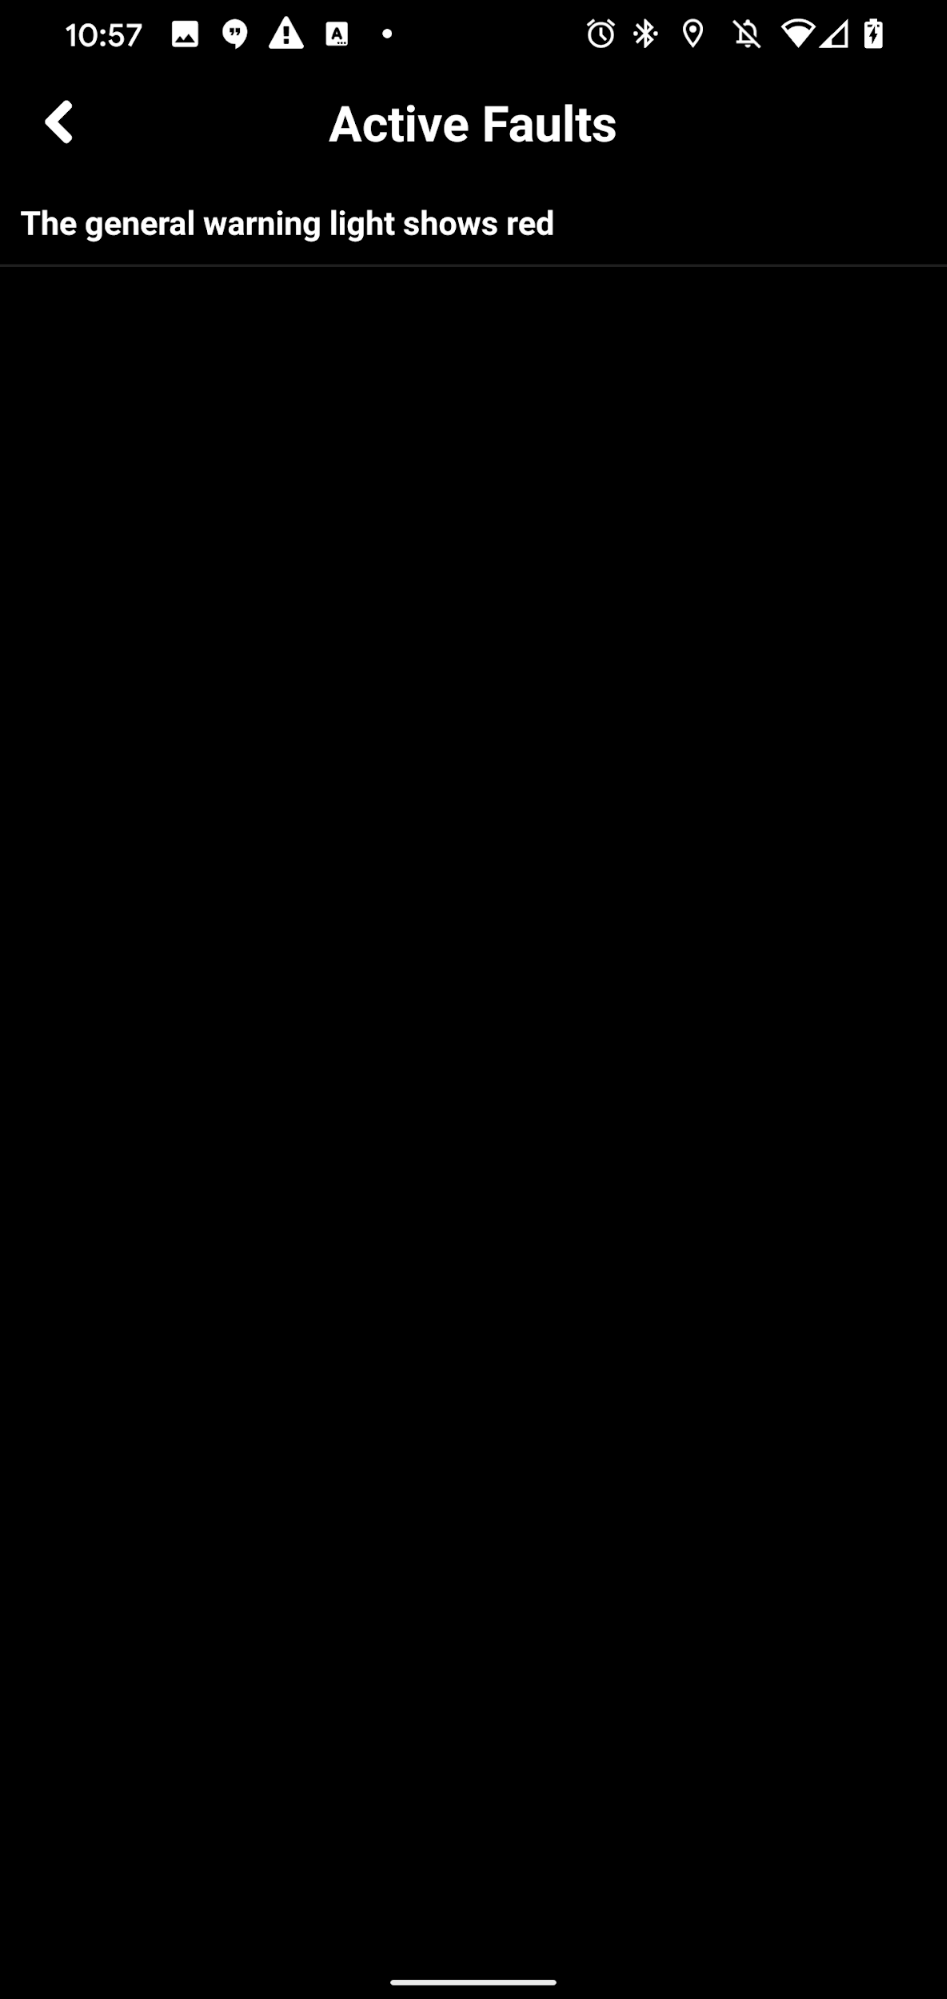
The Active Faults screen displays a list of currently active faults. Below are a list of possible faults.
| ABS self-diagnosis not completed |
| ABS error |
| ABS deactivated |
| ASC self-diagnosis not completed |
| ASC intervention |
| ASC error |
| ASC deactivated |
| Low Fuel |
| Additional front light 1 |
| Additional front light 2 |
| Daytime running light |
| Front left indicator |
| Front right indicator |
| Rear left indicator |
| Rear right indicator |
| Front parking light 1 |
| Front parking light 2 |
| Low-beam |
| High-beam |
| Rear Light |
| Brake Light |
| License plate Light |
| Rear Fog Light |
| Additional dipped/high-beam |
| Additional brake light |
| Front lamp 1 |
| Front lamp 2 |
| Ice Warning |
| The general warning light flashes yellow |
| The general warning light shows yellow |
| The general warning light flashes red |
| The general warning light shows red |
| Engine oil level too low |
| Front tire pressure low Warning |
| Front tire pressure high Warning |
| Rear tire pressure low Warning |
| Rear tire pressure high Warning |
| Front tire pressure low Critical |
| Front tire pressure high Critical |
| Rear tire pressure low Critical |
| Rear tire pressure high Critical |
| Service Due |
Check your WunderLINQ compatability matrix if your motorcycle provides this functionality. Not all faults are supported on all motorcycles.
Bike Info Screen
* Only available while connected to the WunderLINQ hardware.

The Bike Info page displays your motorcycles VIN, next service date and distance to next service. Below your motorbike info there is an option to reset some of your motorbike’s cluster data. Currently, you can reset Trip, Fuel Economy and Average Speed Counters.
Only available on the WunderLINQ Navigator and WunderLINQ X.
Trips & Waypoints Screen

The Trips & Waypoints screen allows you to select from your saved trip logs and waypoints.
Recorded Trips Screen

The Recorded Trips screen displays the trip logs recorded using the Start/Stop Trip Recording Quick Task. Touch the trip that you would like to view.
Trip Screen
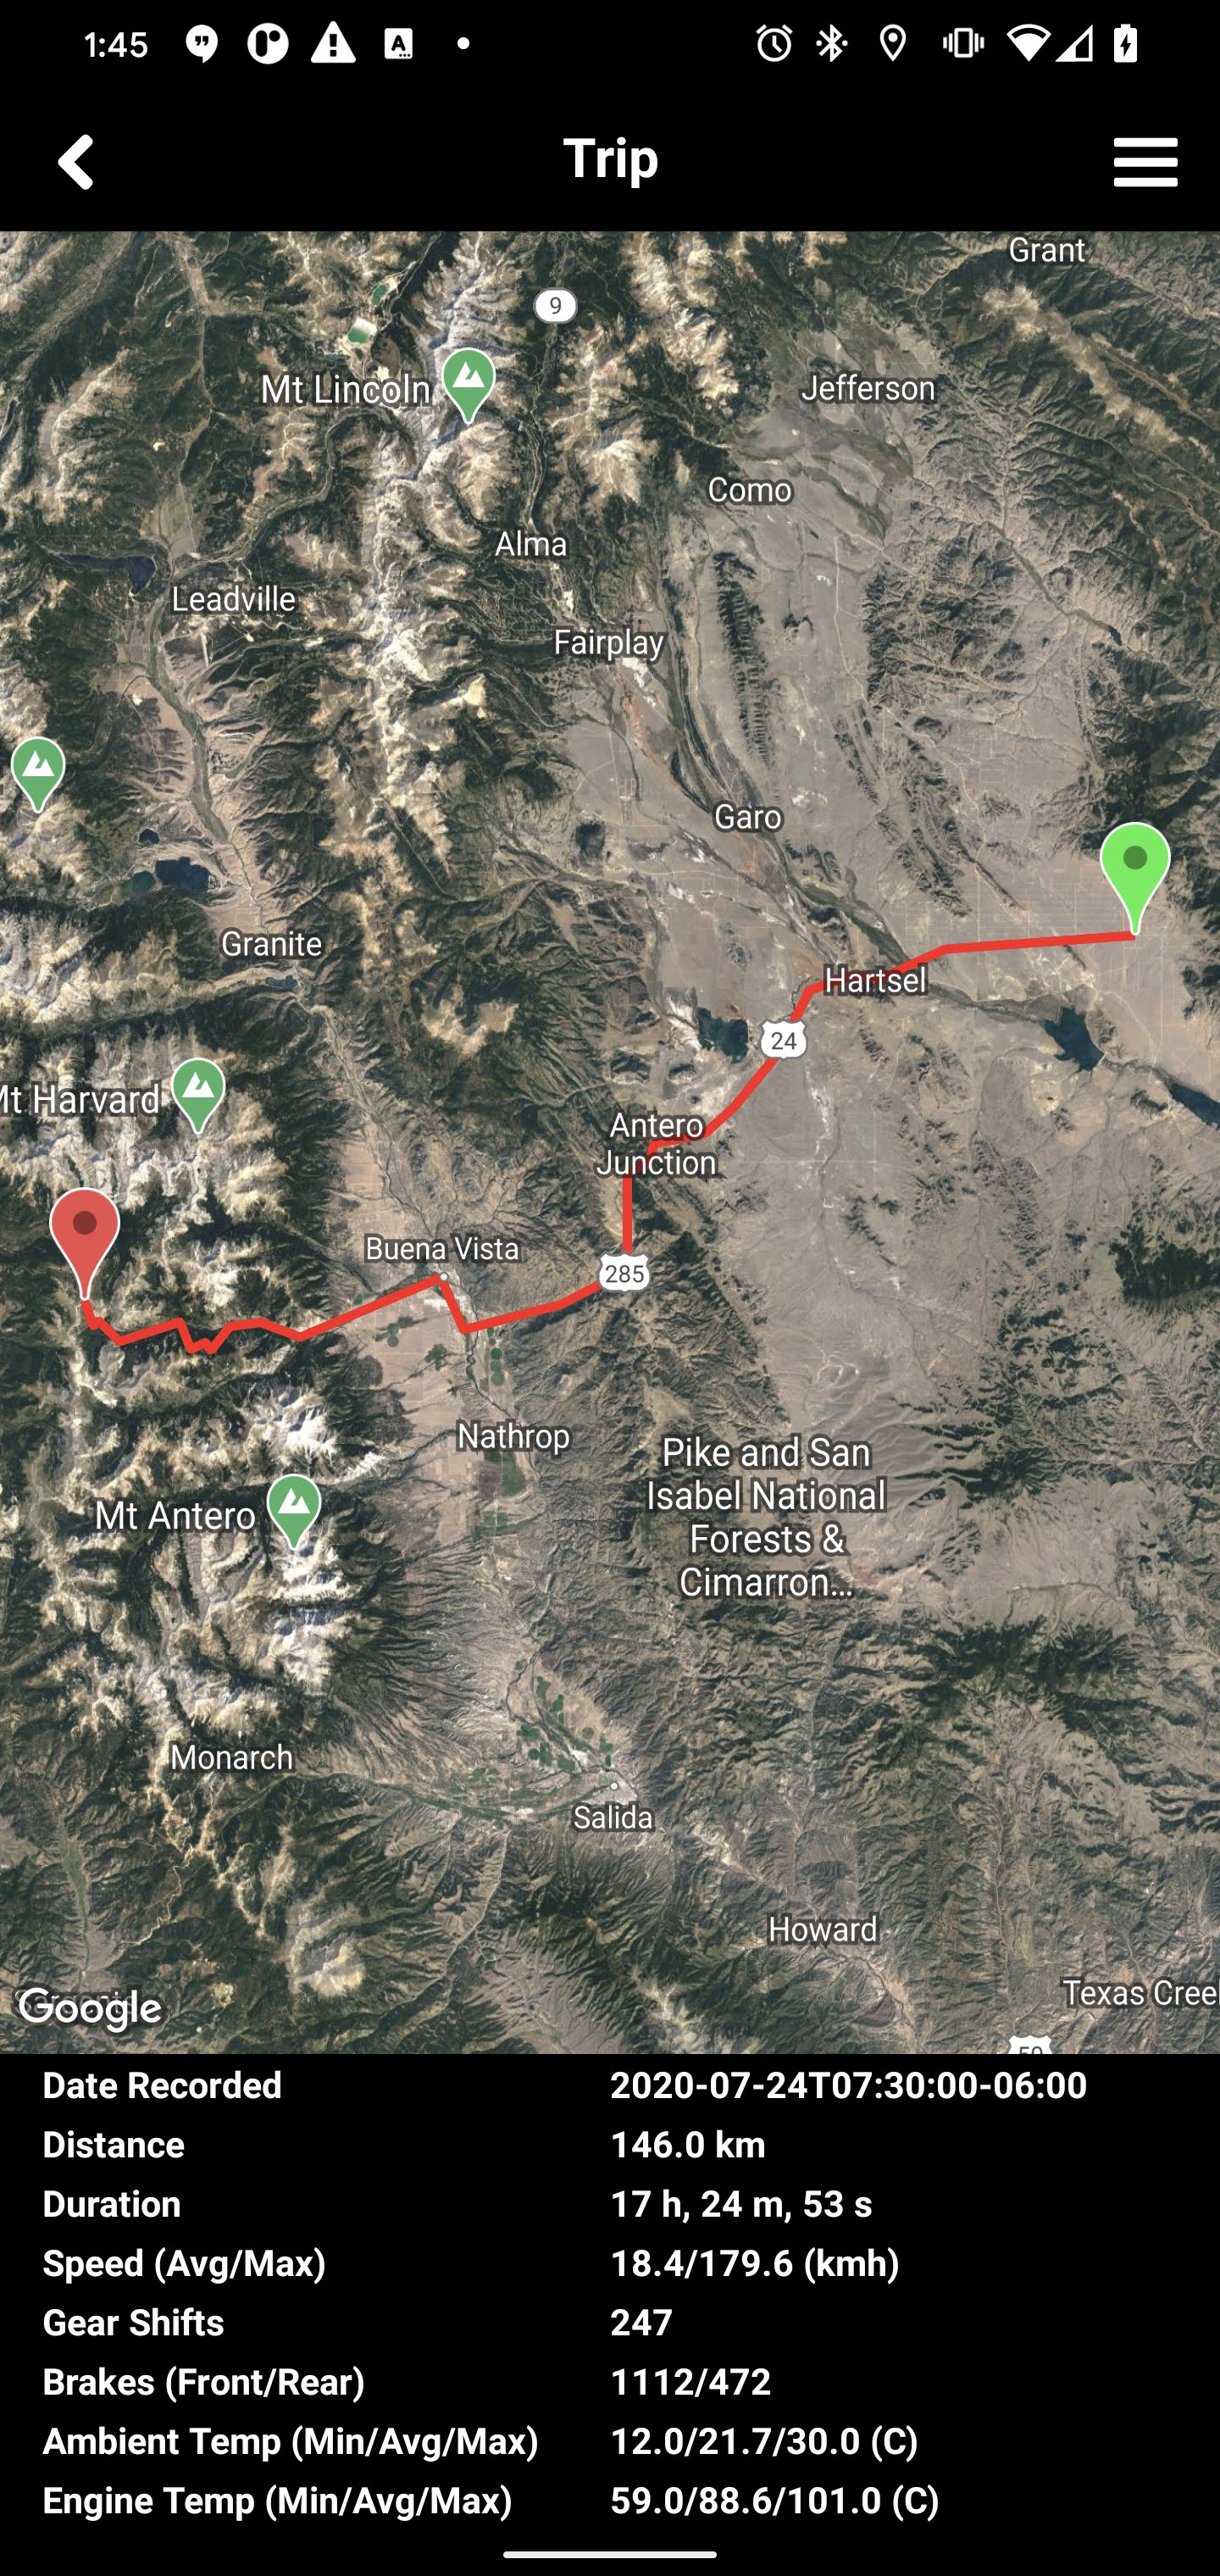
The Trip screen displays a map of the trip and a summary of the data recorded and an editable label. Touch the label to bring up the keyboard.
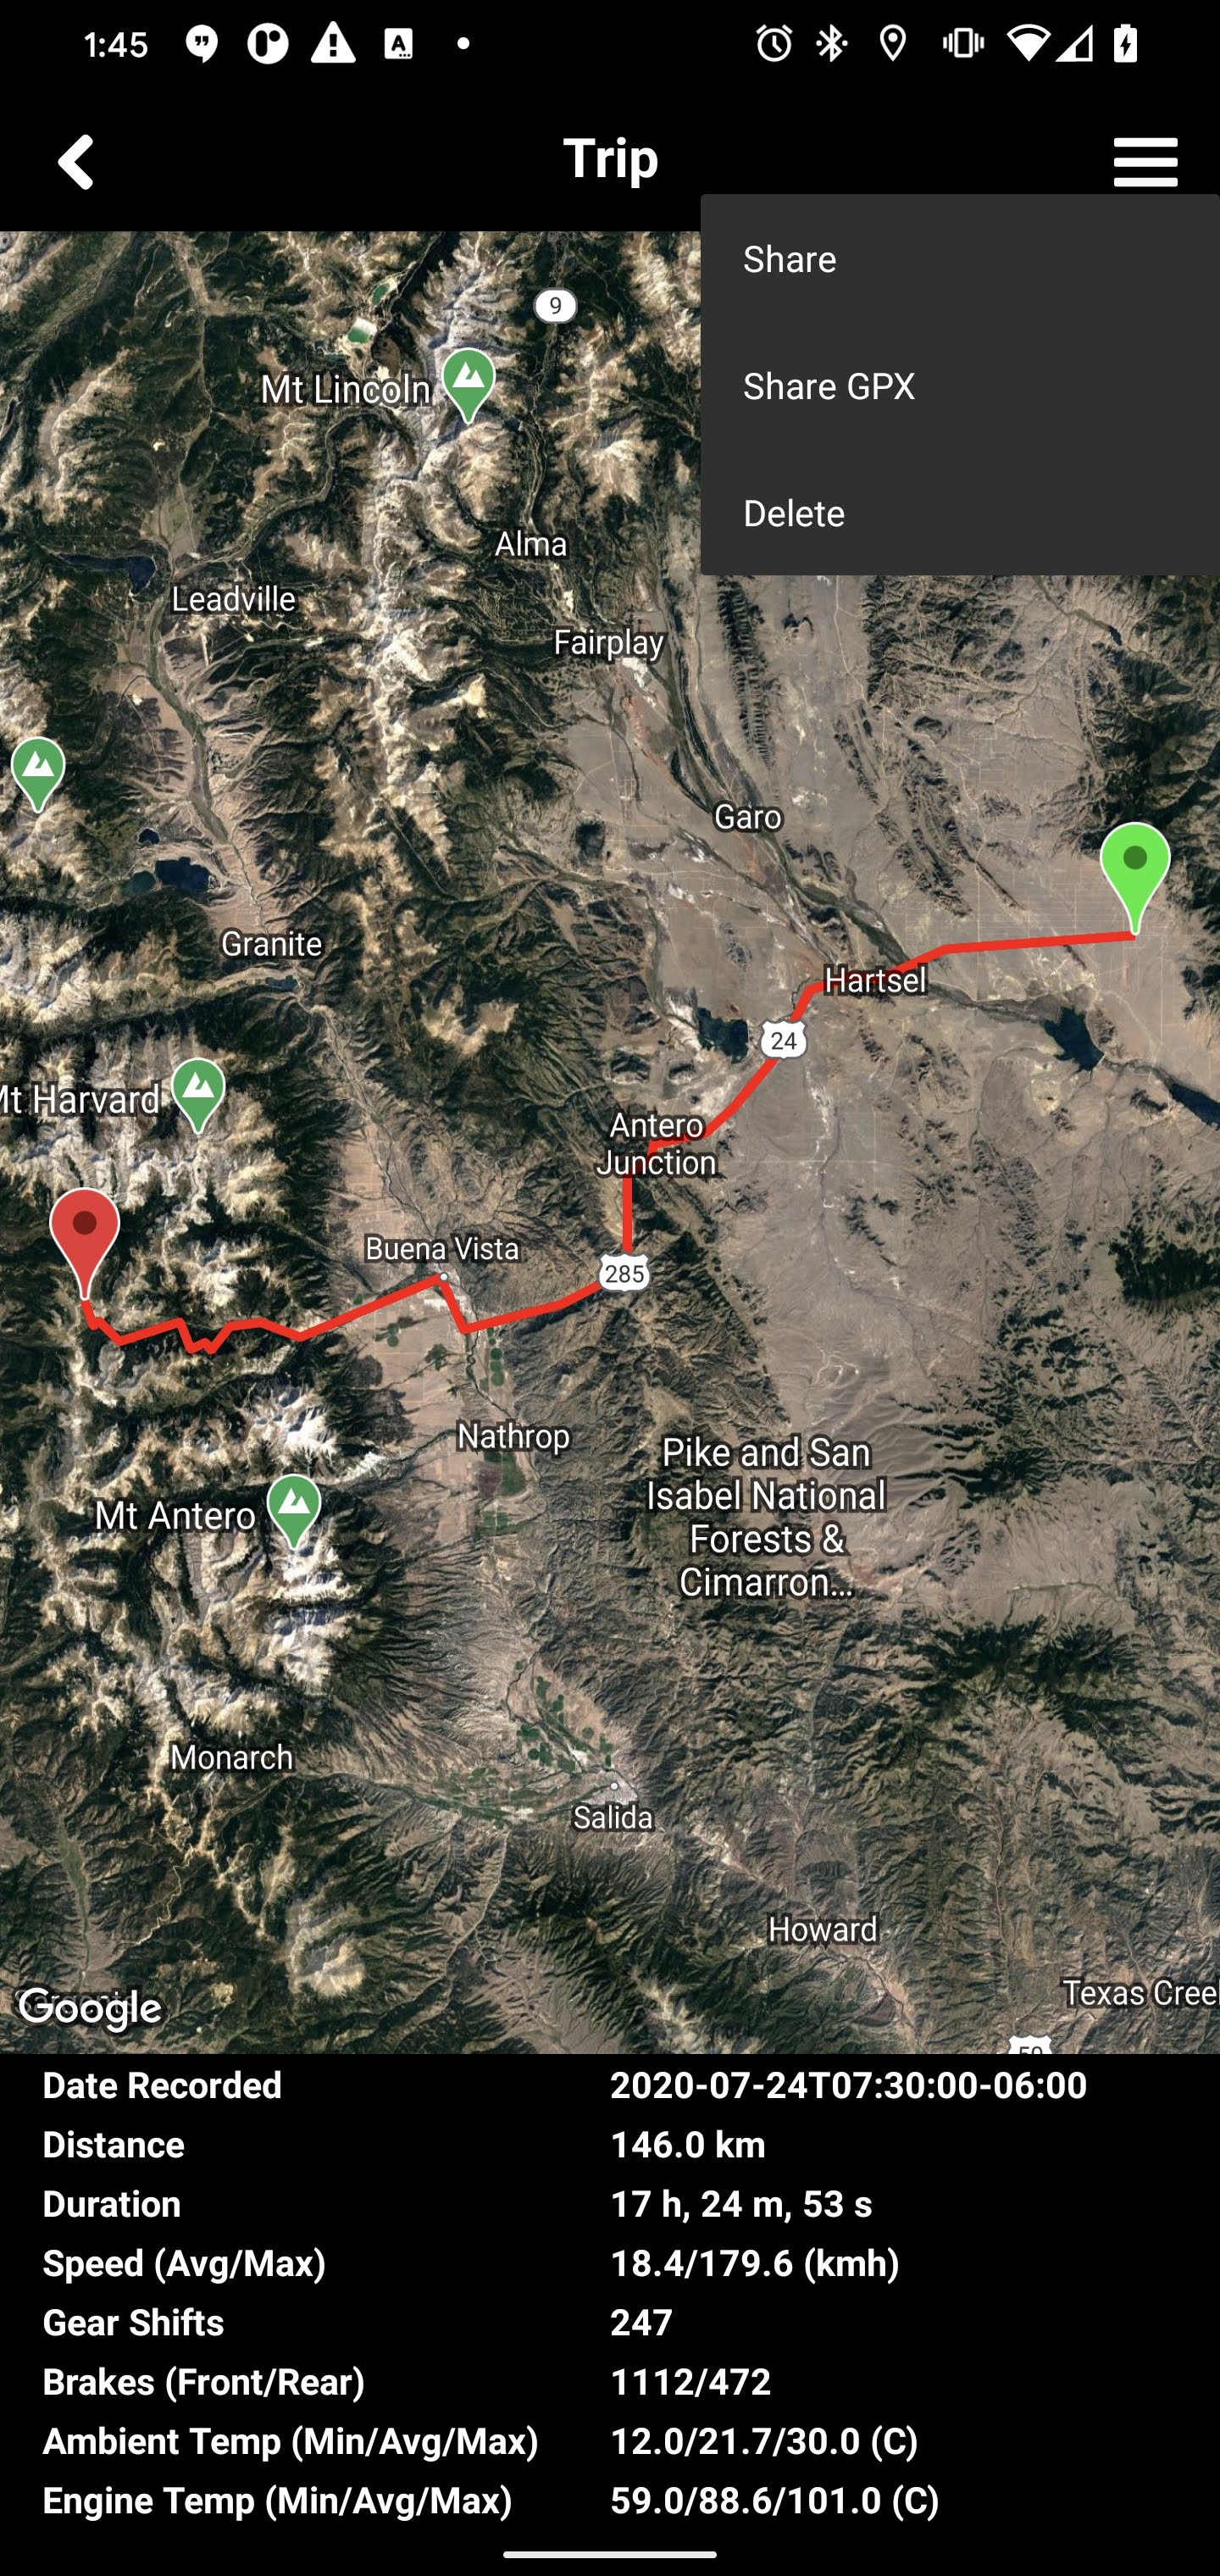
![]() button will display a popup menu that includes options to:
button will display a popup menu that includes options to:
| Share | Sends the trip log in CSV format through a variety of methods. |
| Share GPX | Sends the trip log in GPX format through a variety of methods. |
| Delete | Permanently removes the trip log. |
Saved Waypoints Screen
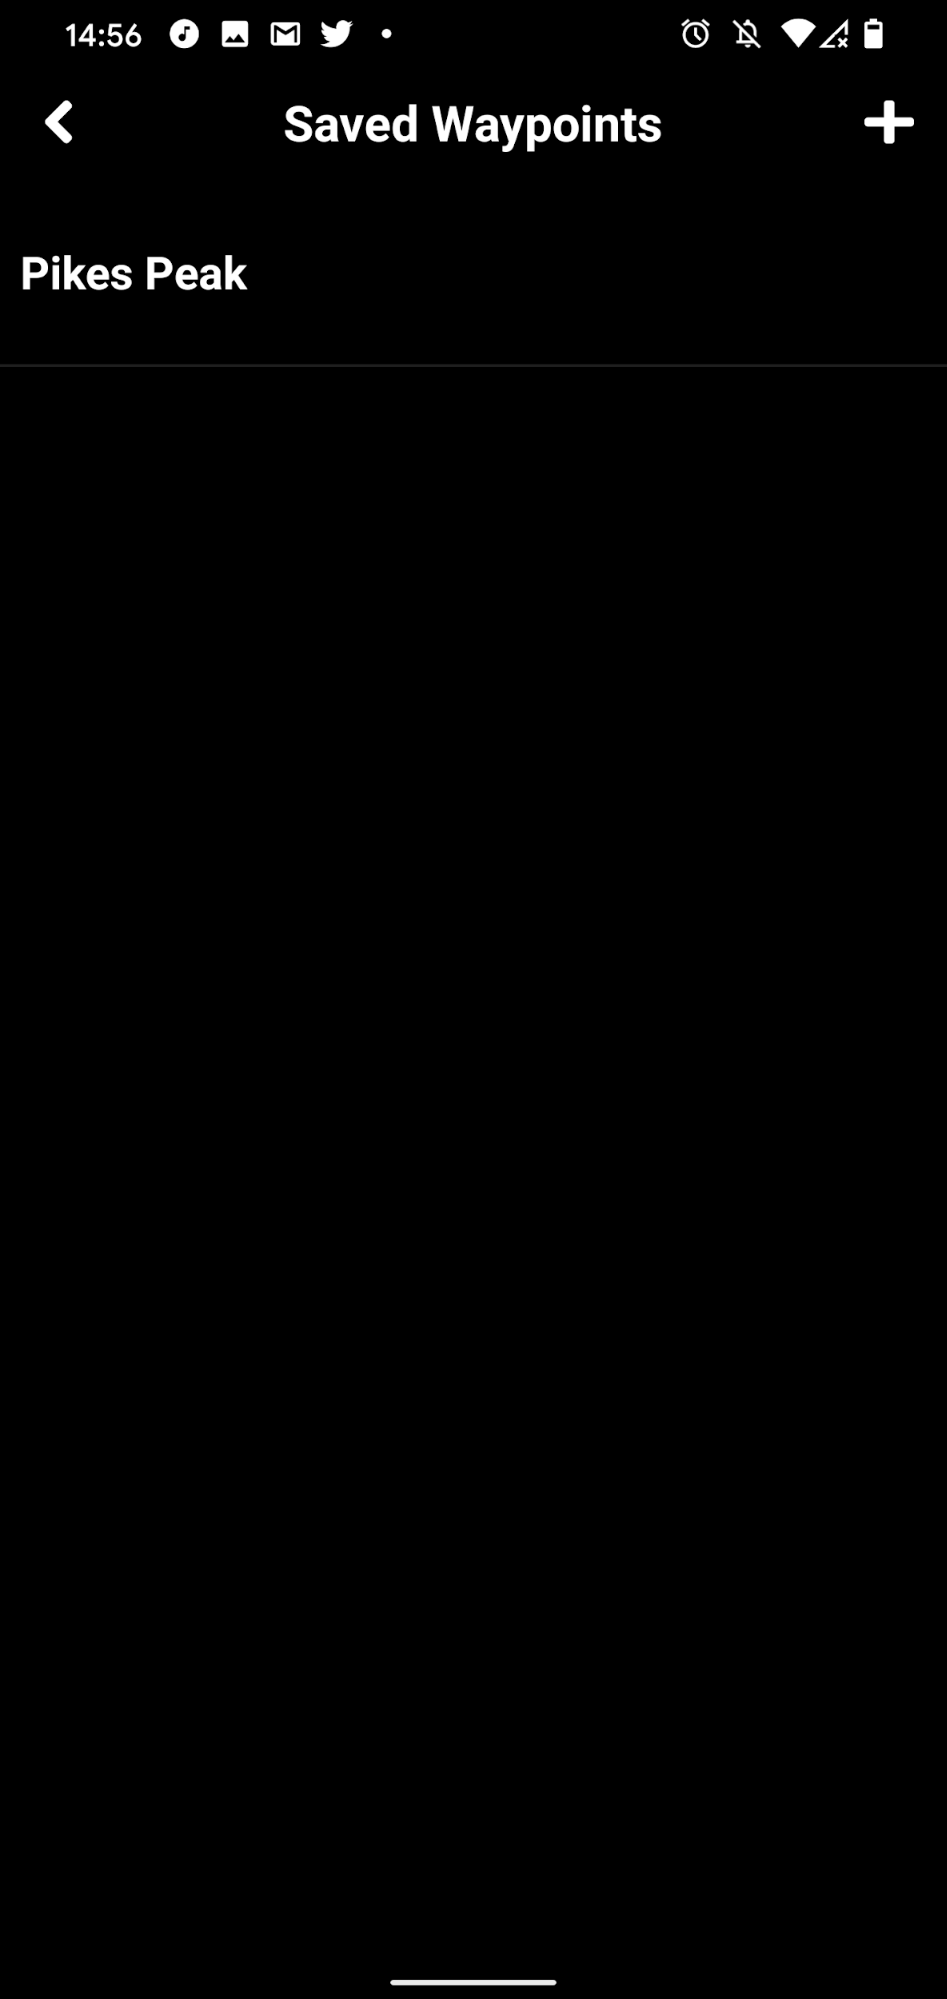
The Saved Waypoints screen displays the waypoints saved using the Save Waypoint Quick Task. Touch the waypoint that you would like to manage. + button will open the Add Waypoint Screen.
Saved Waypoint Screen
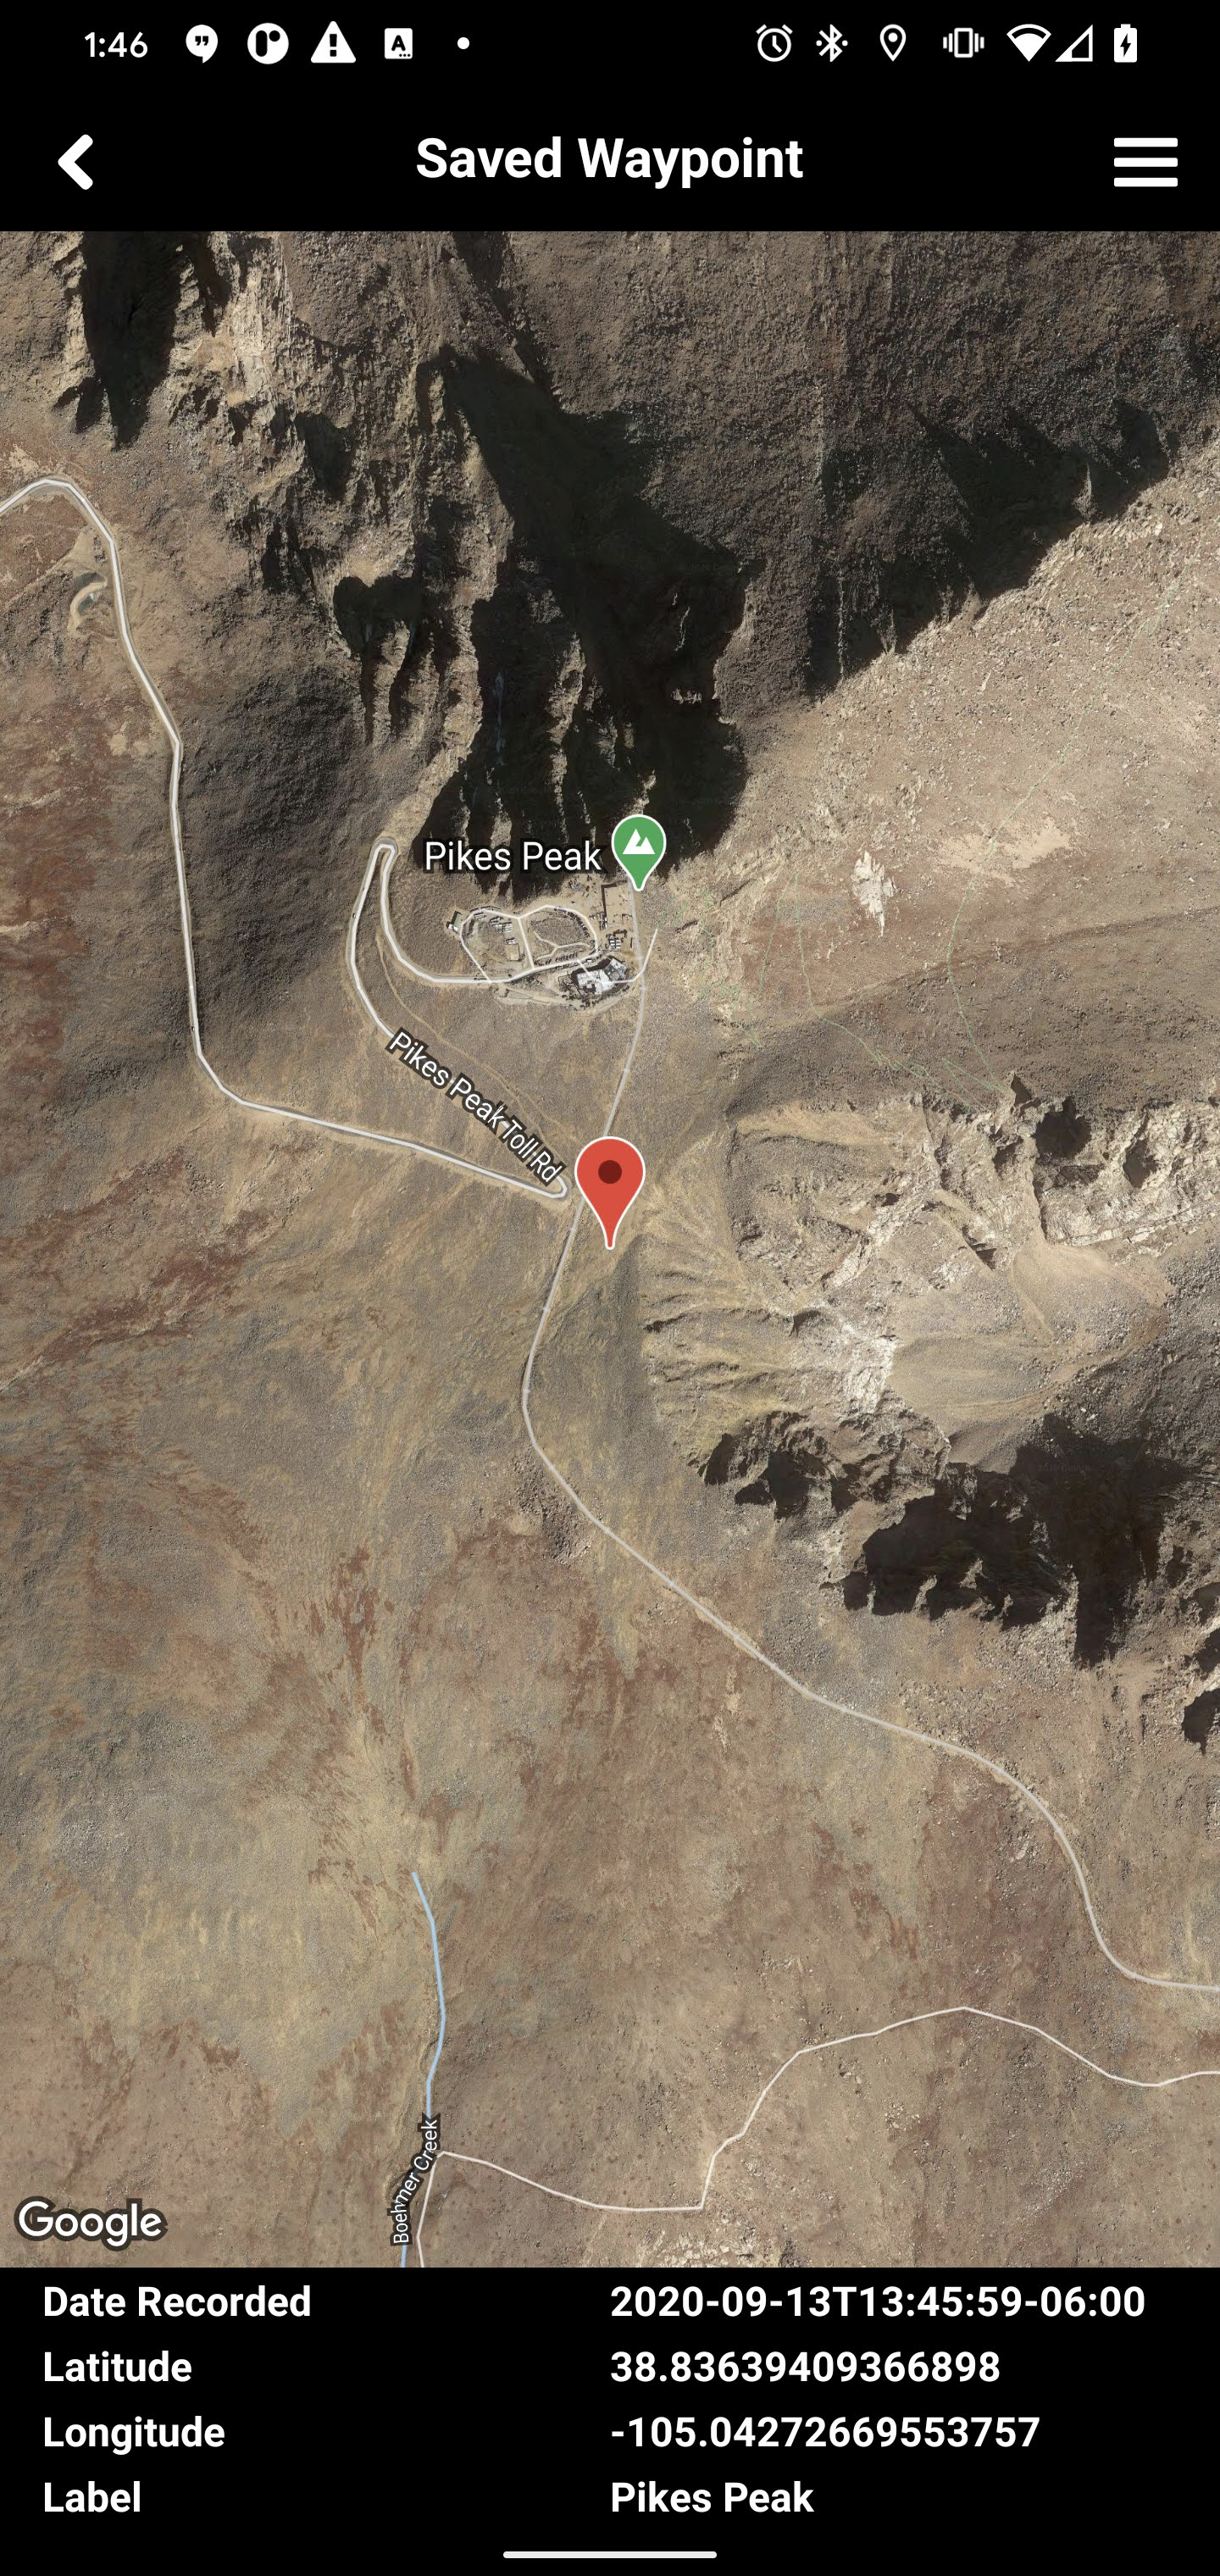
The Saved Waypoint screen displays a map with the waypoint, the date recorded, location and an editable label. Touch the label to bring up the keyboard.
| Label | Field to assign a label to the waypoint. |
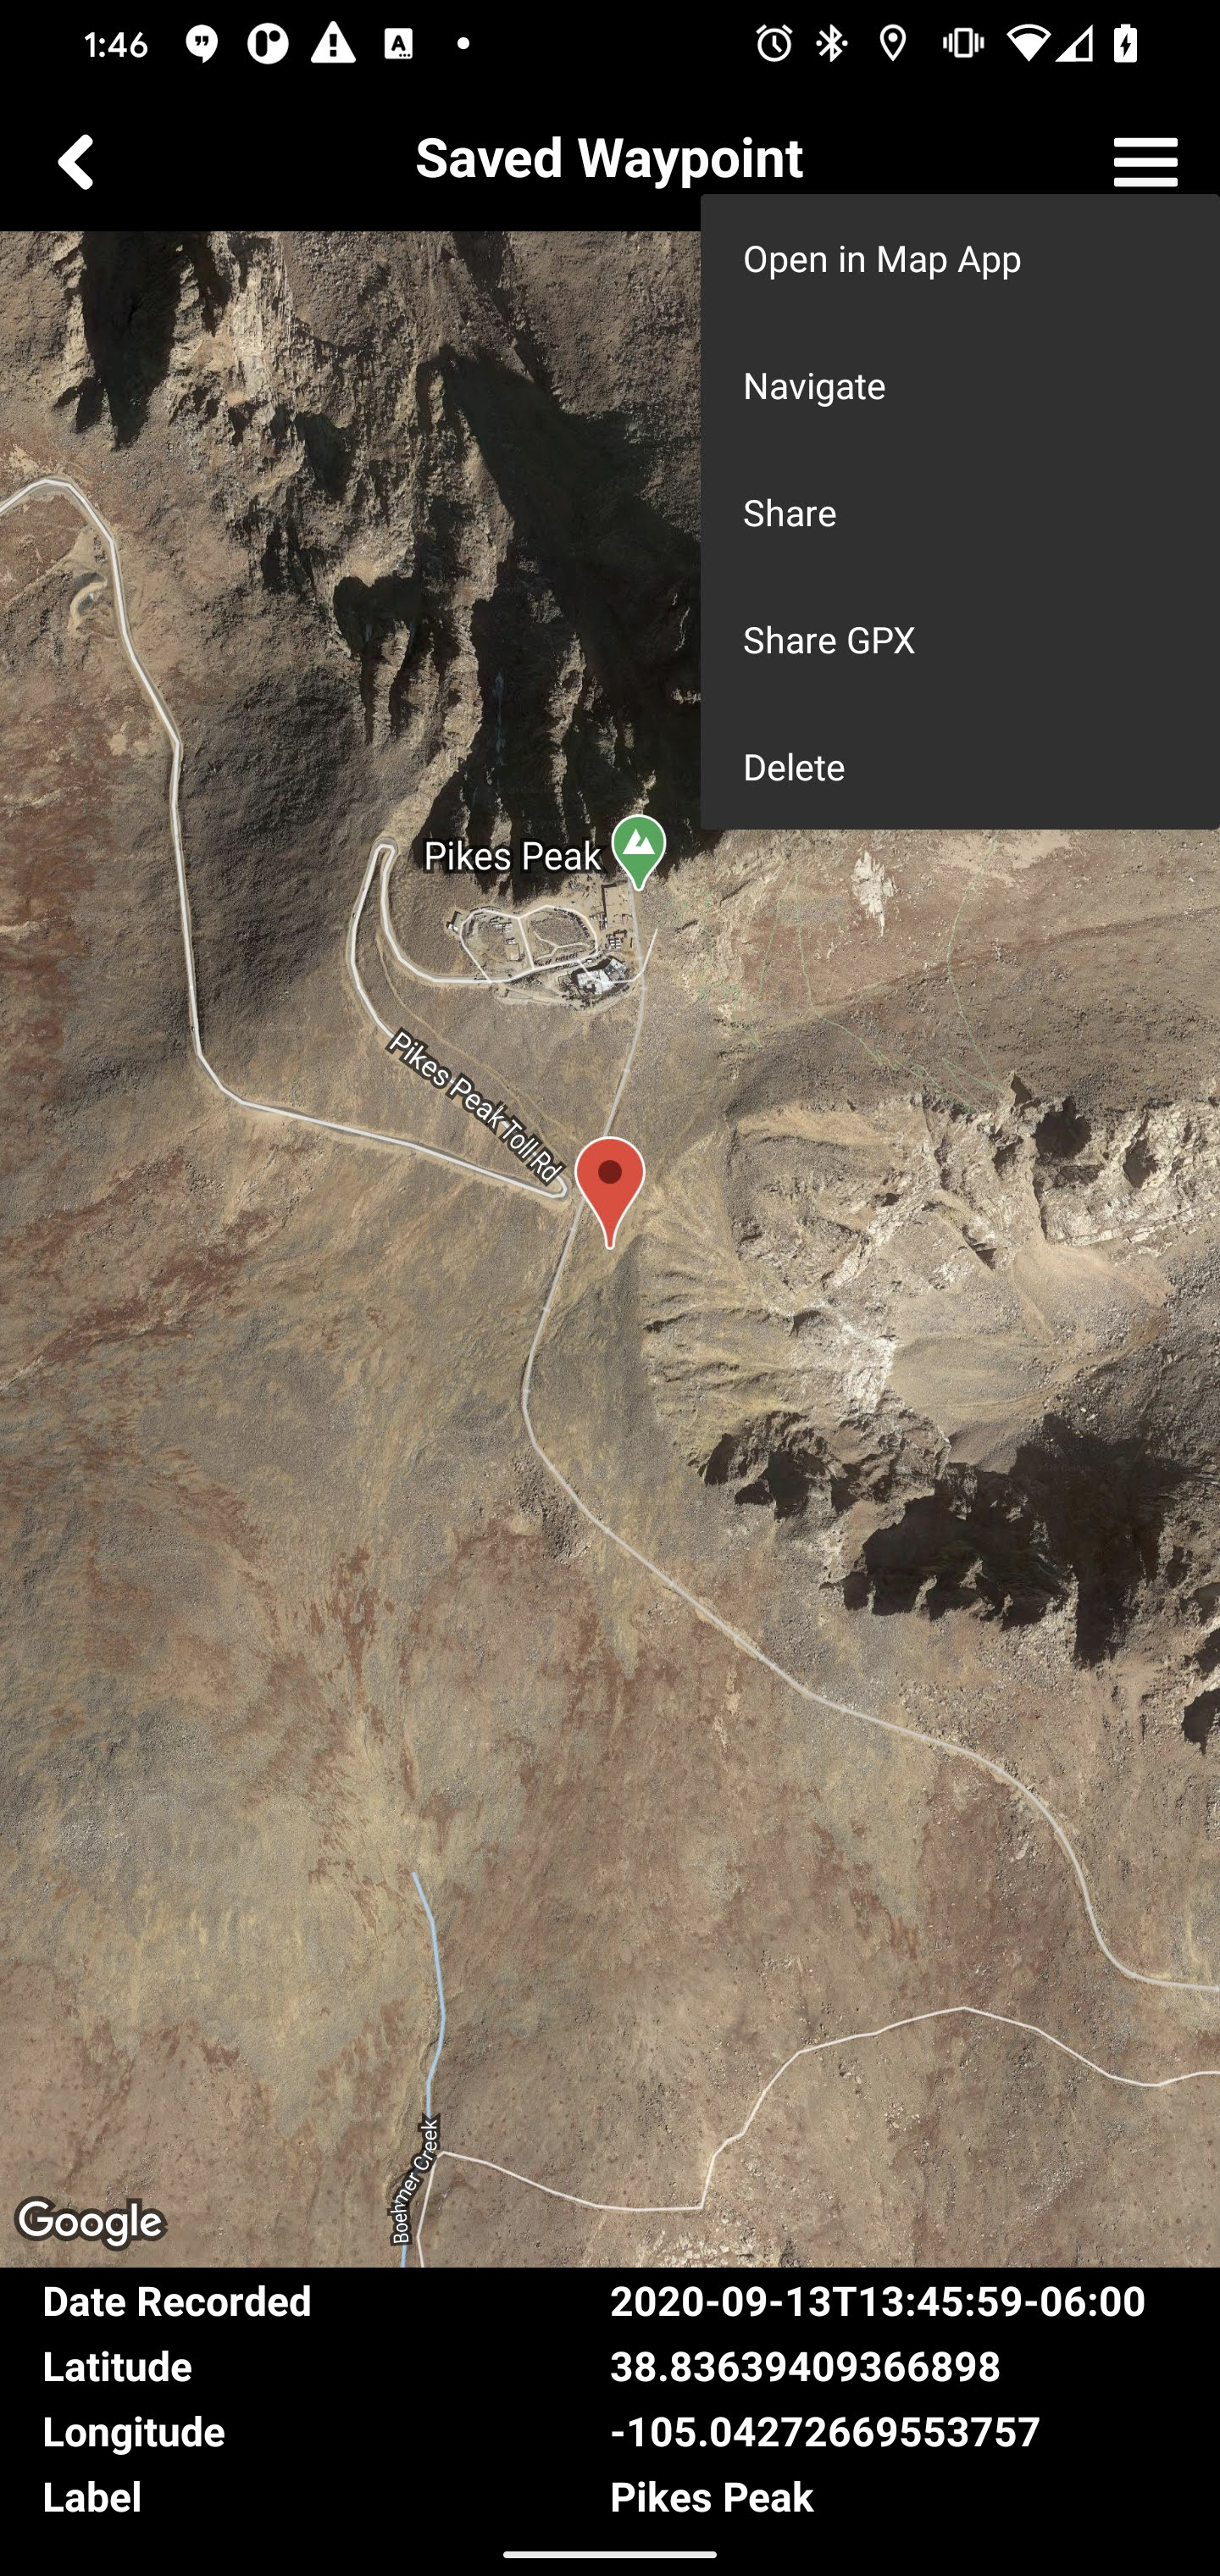
![]() button will display a popup menu that includes options to:
button will display a popup menu that includes options to:
| Share | Sends a Google Maps link through a variety of methods. |
| Share GPX | Sends the waypoint in GPX format through a variety of methods. |
| Navigate | Routes you to the waypoint in your preferred map application. |
| Open In Map App | Open the waypoint in your preferred map application. |
| Delete | Permanently removes the saved waypoint. |
Add Waypoint Screen
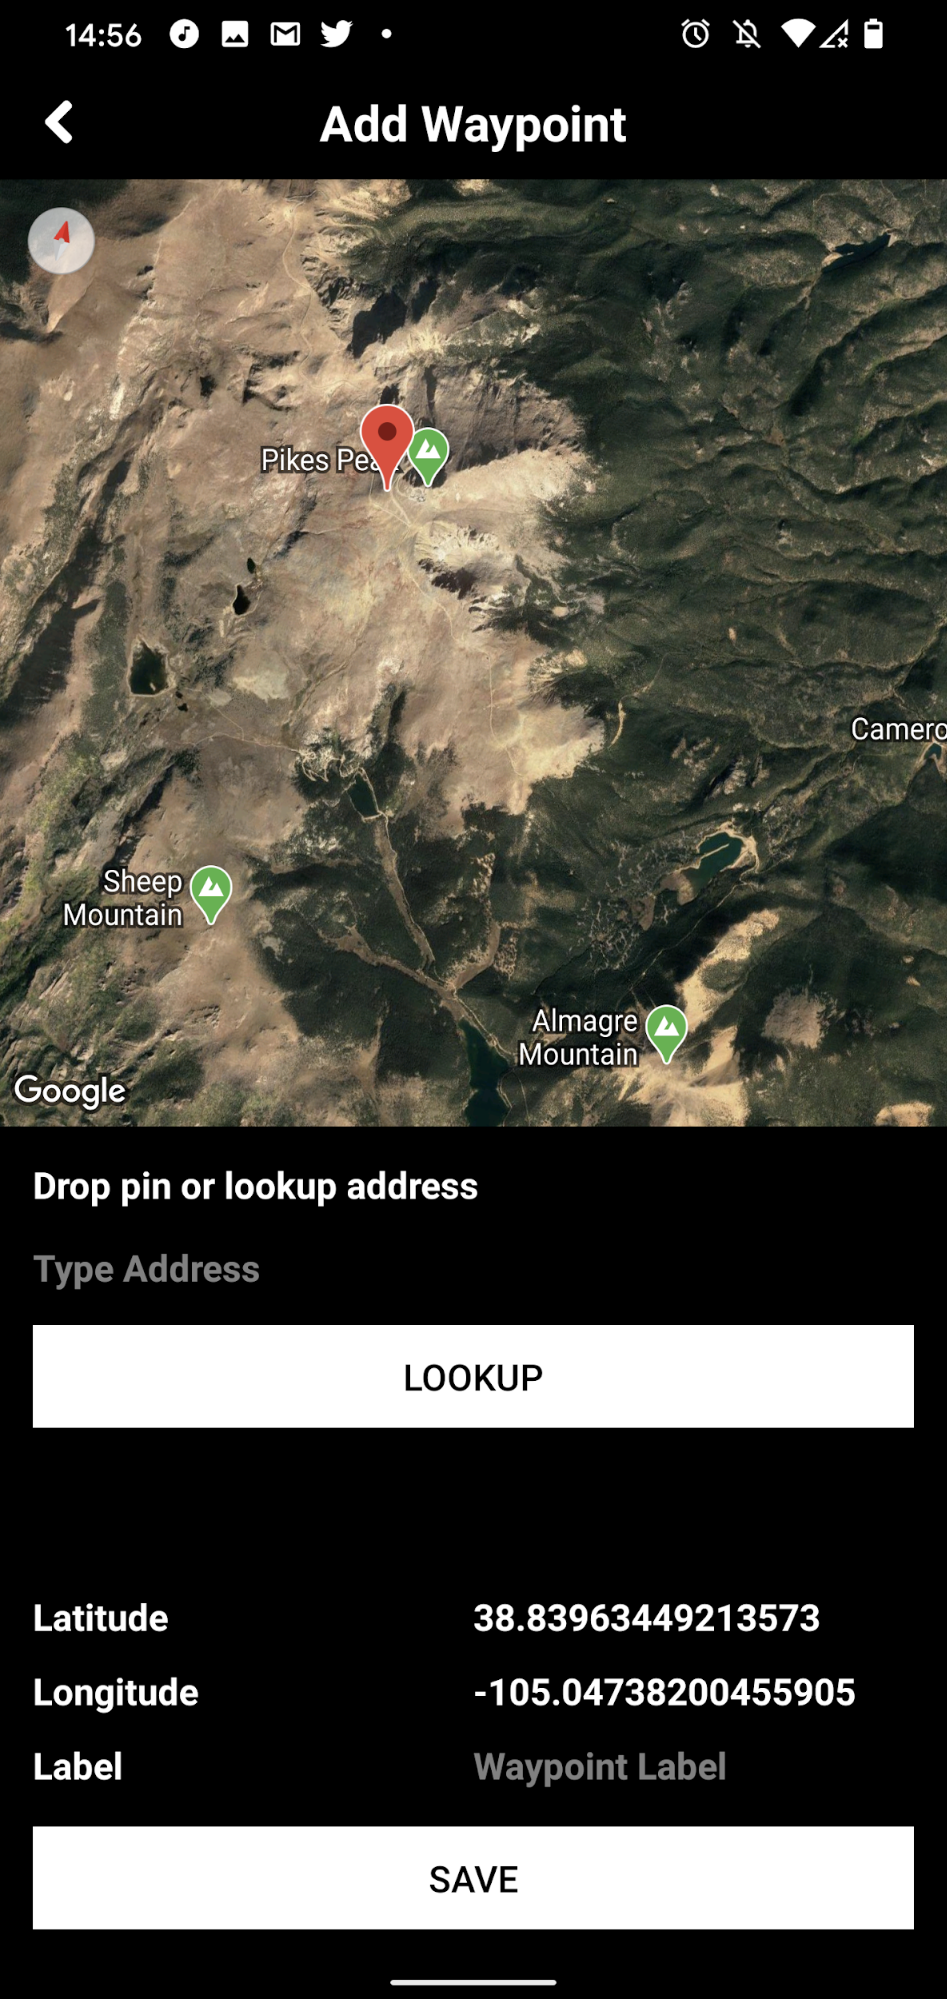
The Add Waypoint screen displays a map with a pin showing the currently selected location. To add a new waypoint either use the address lookup, or enter a lat/long or manually drop the pin on the map by touching the location on the map. When ready touch Save
About Screen
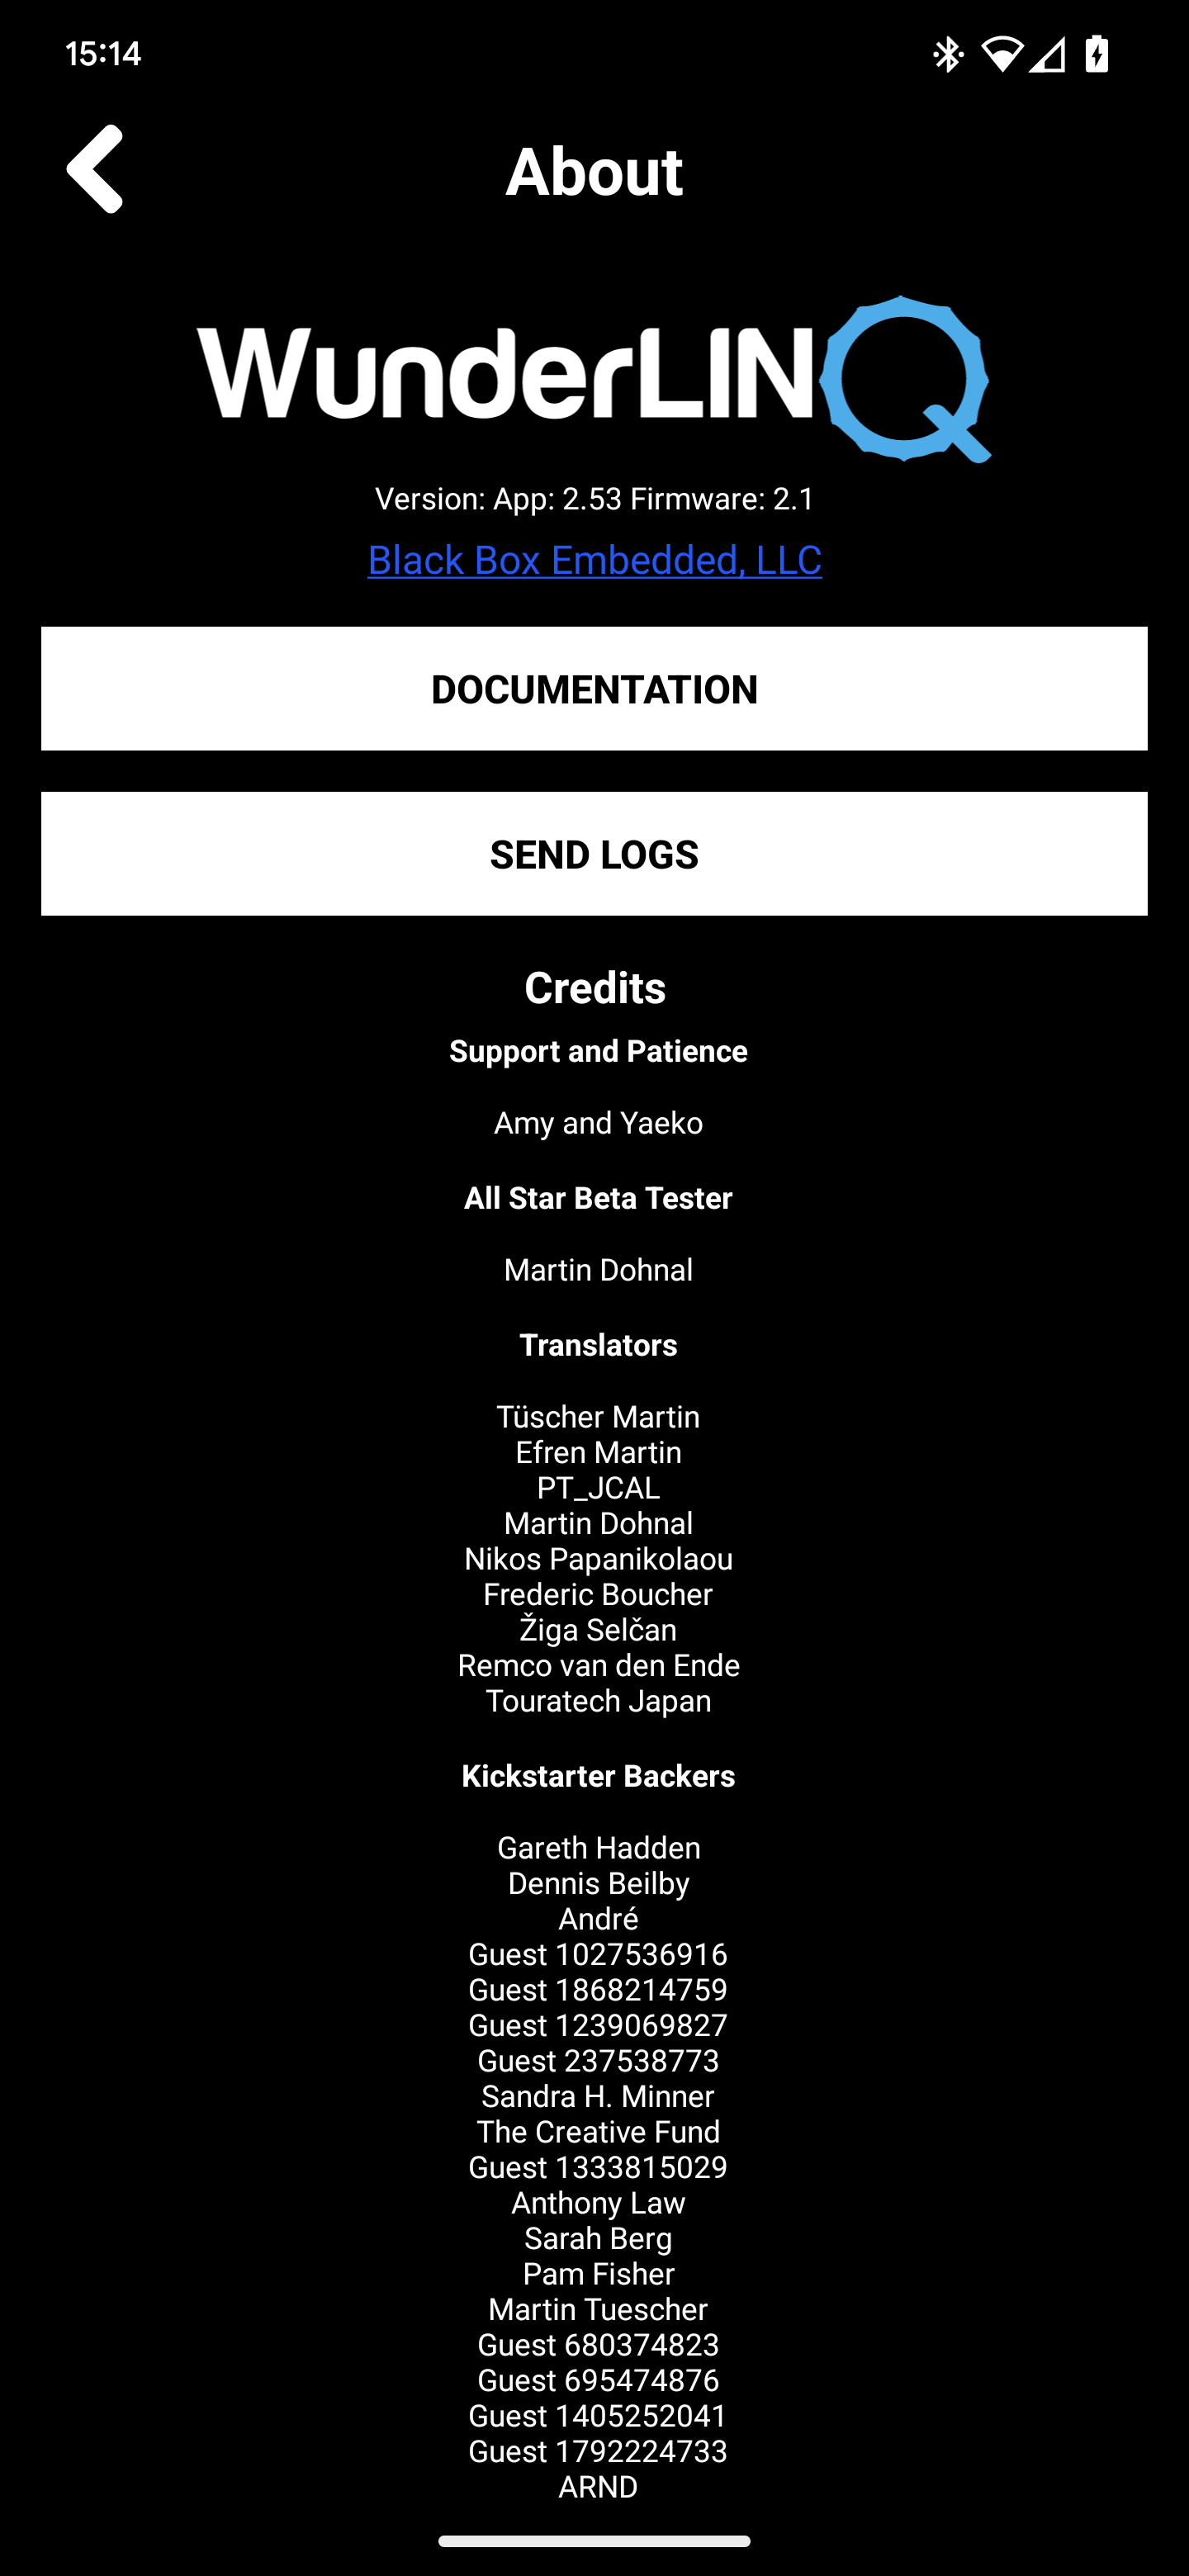
The about screen provides a link to our website and documentation. The Send Logs button will format an email to WunderLINQ support, that includes device information and logs.
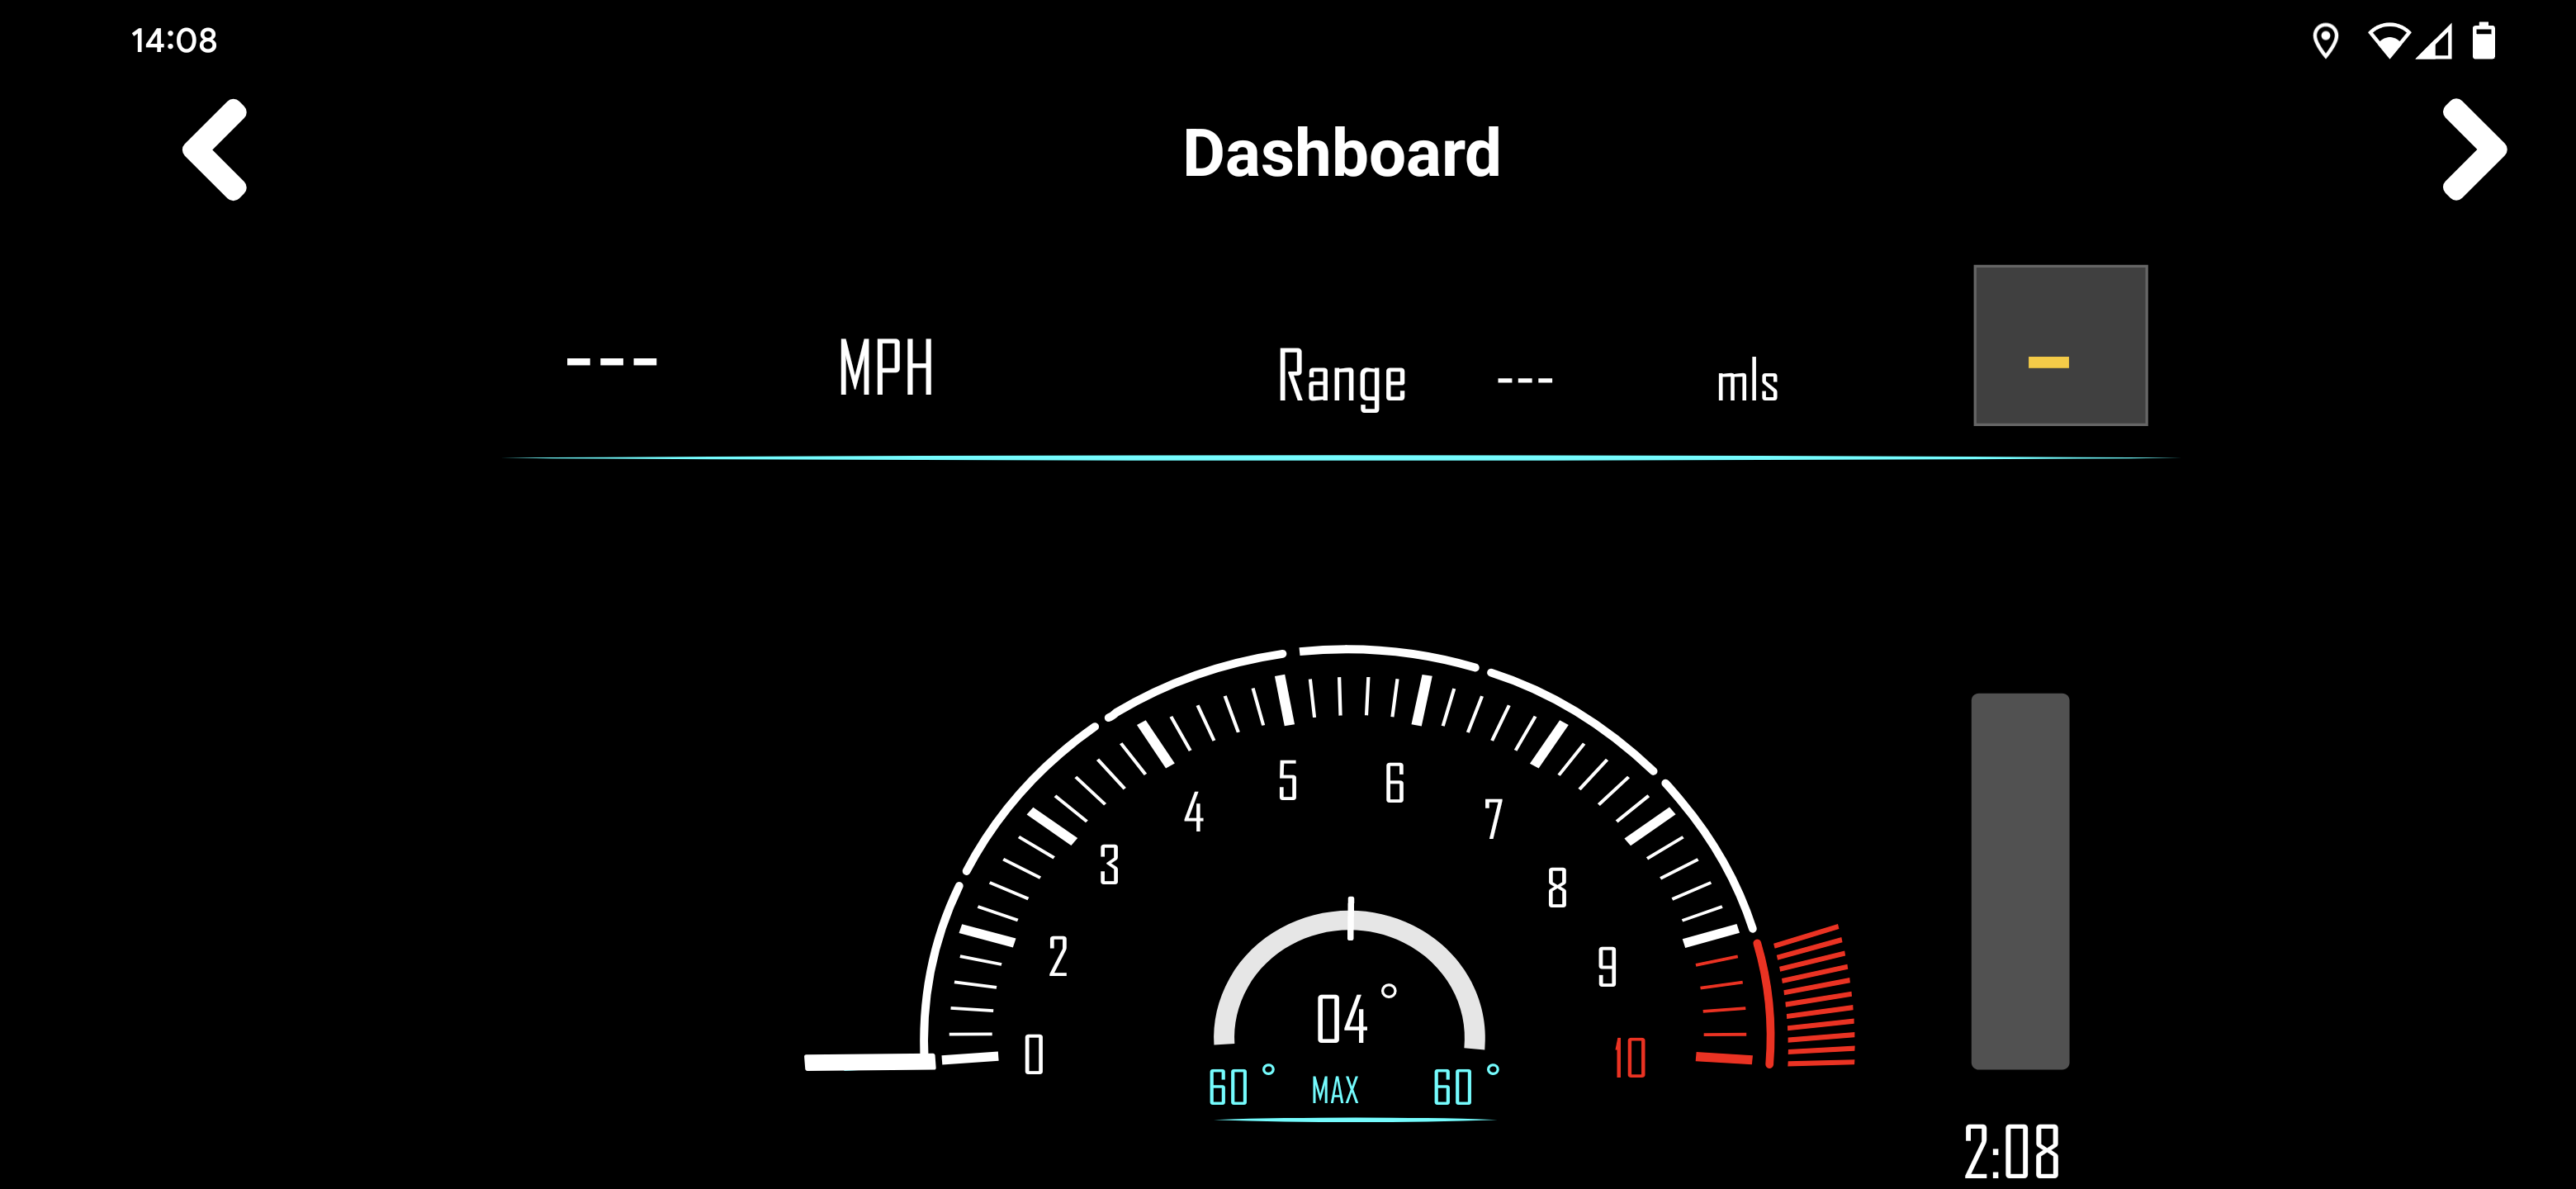
Dashboard Screen
If enabled under settings the Dashboard screen provides one of three TFT like views.
| Scroll Wheel Up/Swipe Up | Next info line data point |
| Scroll Wheel Down/Swipe Down | Previous info line data point |
| Wheel Right Long Press | Next dashboard |


Music Screen
Music Screen Controls
| Scroll Wheel Up/Swipe Up | Next Song |
| Scroll Wheel Down/Swipe Down | Previous Song |
| Wheel Right Long Press | Play/Pause |

The Music Screen will control an active music player that implements Android standard controls. Some tested Apps include Musio, Google Play Music, Spotify, Pandora, and SiriusXM.
Make sure your music player has been launched and your preferred station or playlist started, otherwise you will not have anything for the WunderLINQ App to control.
Quick Tasks Screen
Quick Task Screen Controls
| Scroll Wheel Up/Swipe Up | Previous Task |
| Scroll Wheel Down/Swipe Down | Next Task |
| Wheel Right Long Press | Select Highlighted Task |
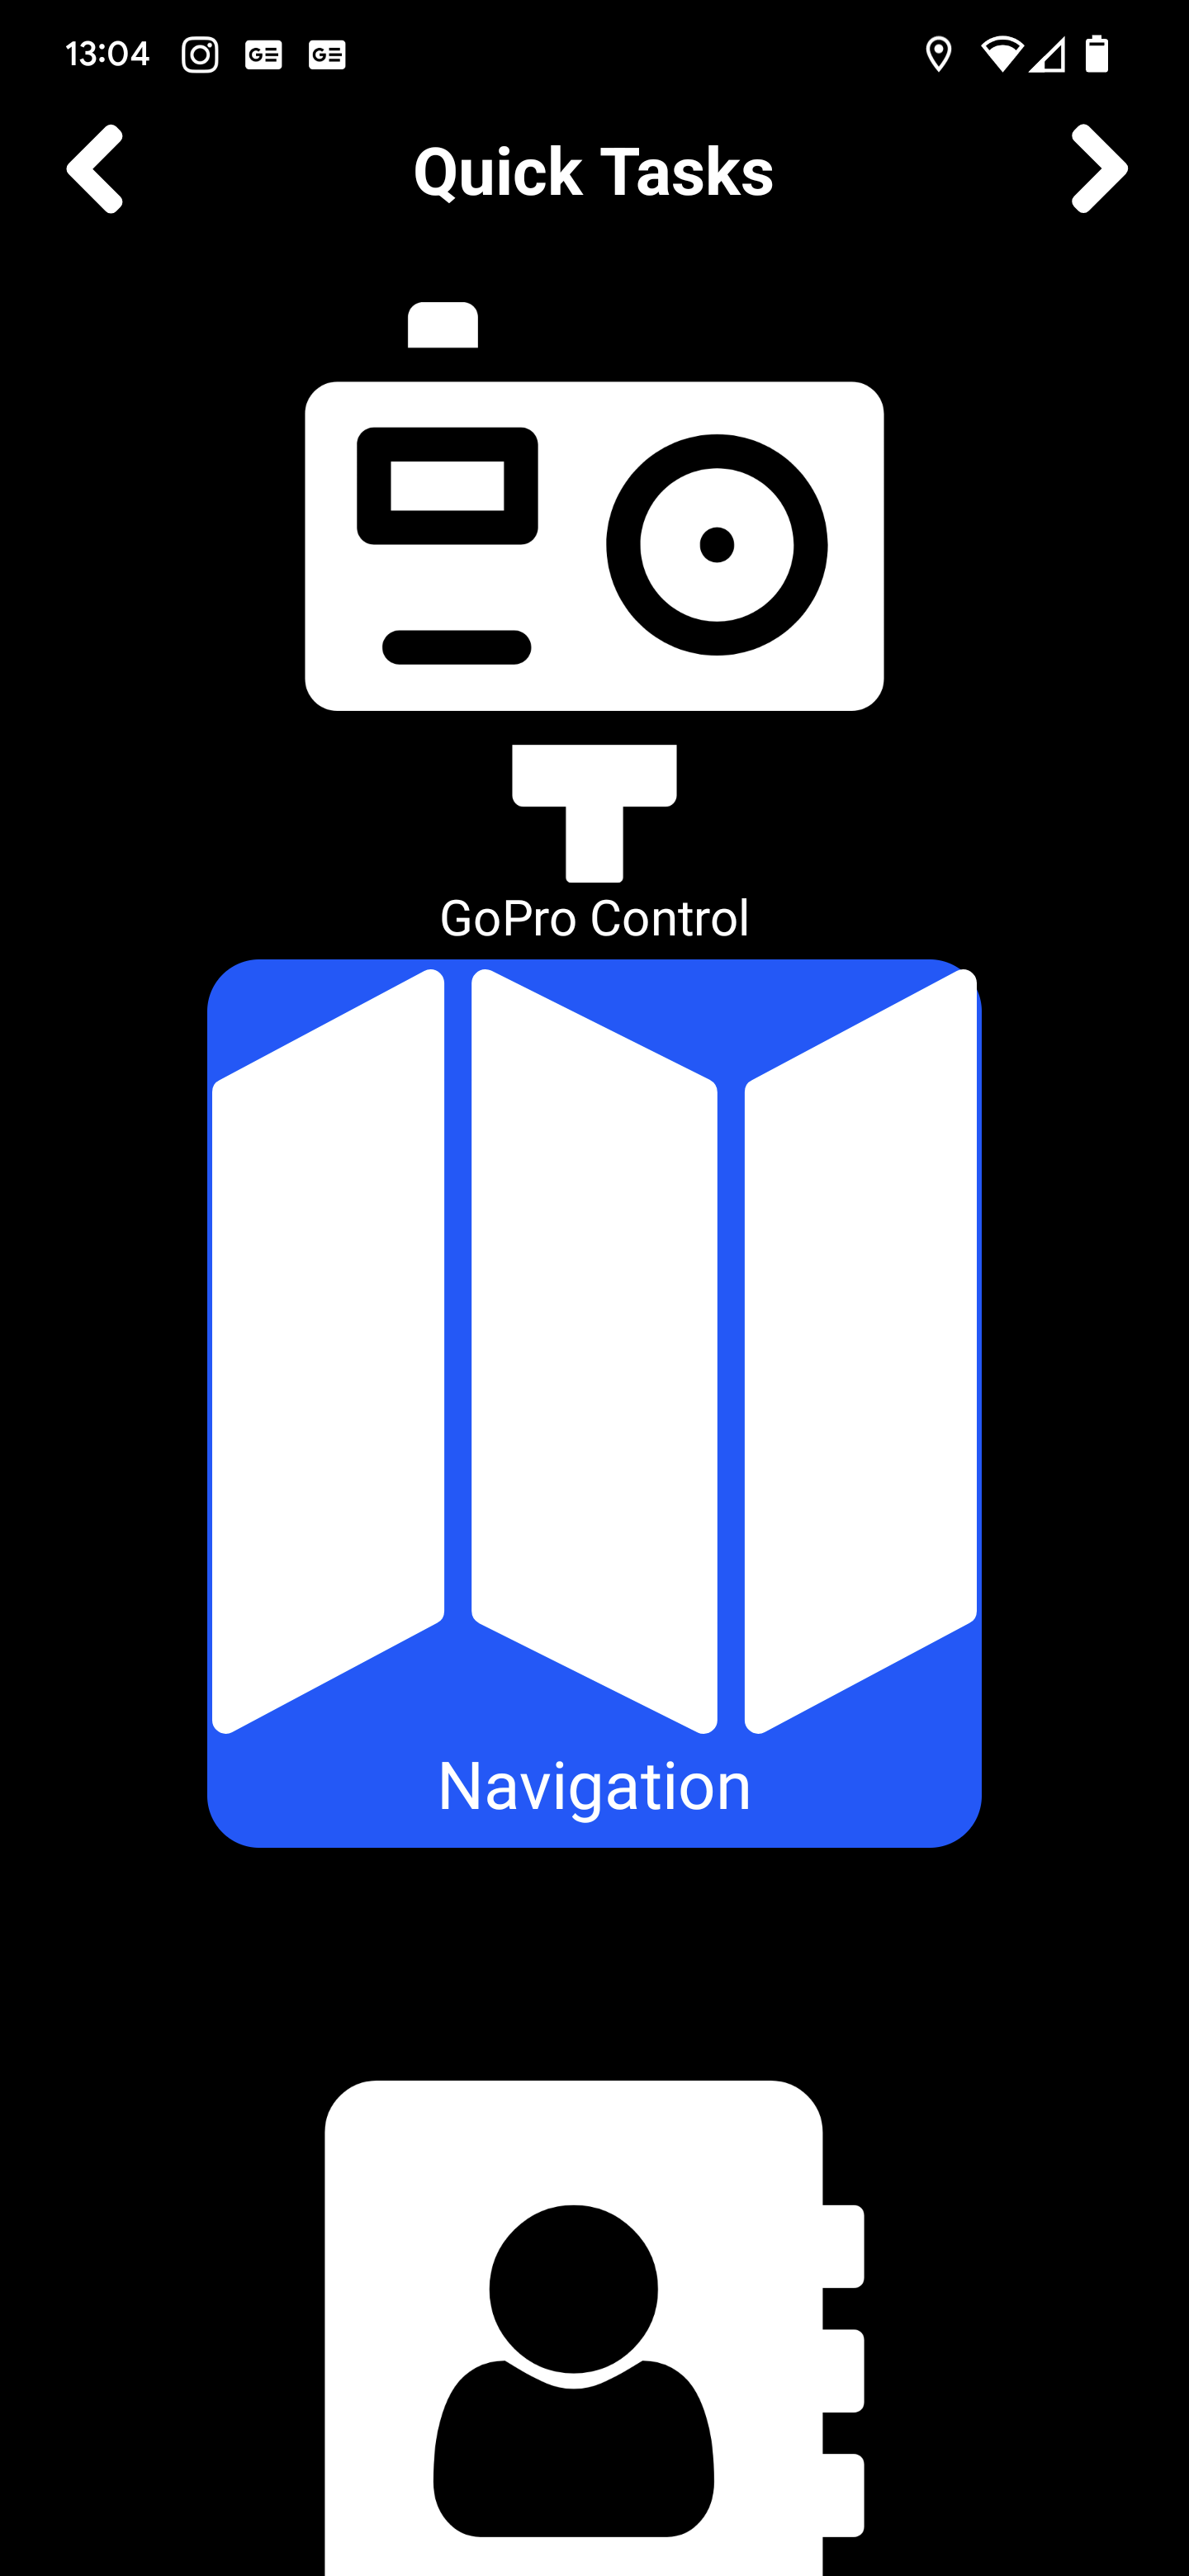
The Quick Tasks screen provides quick access to some convenient functions. The task list can be customized under the App Settings.
Accessory Status Screen
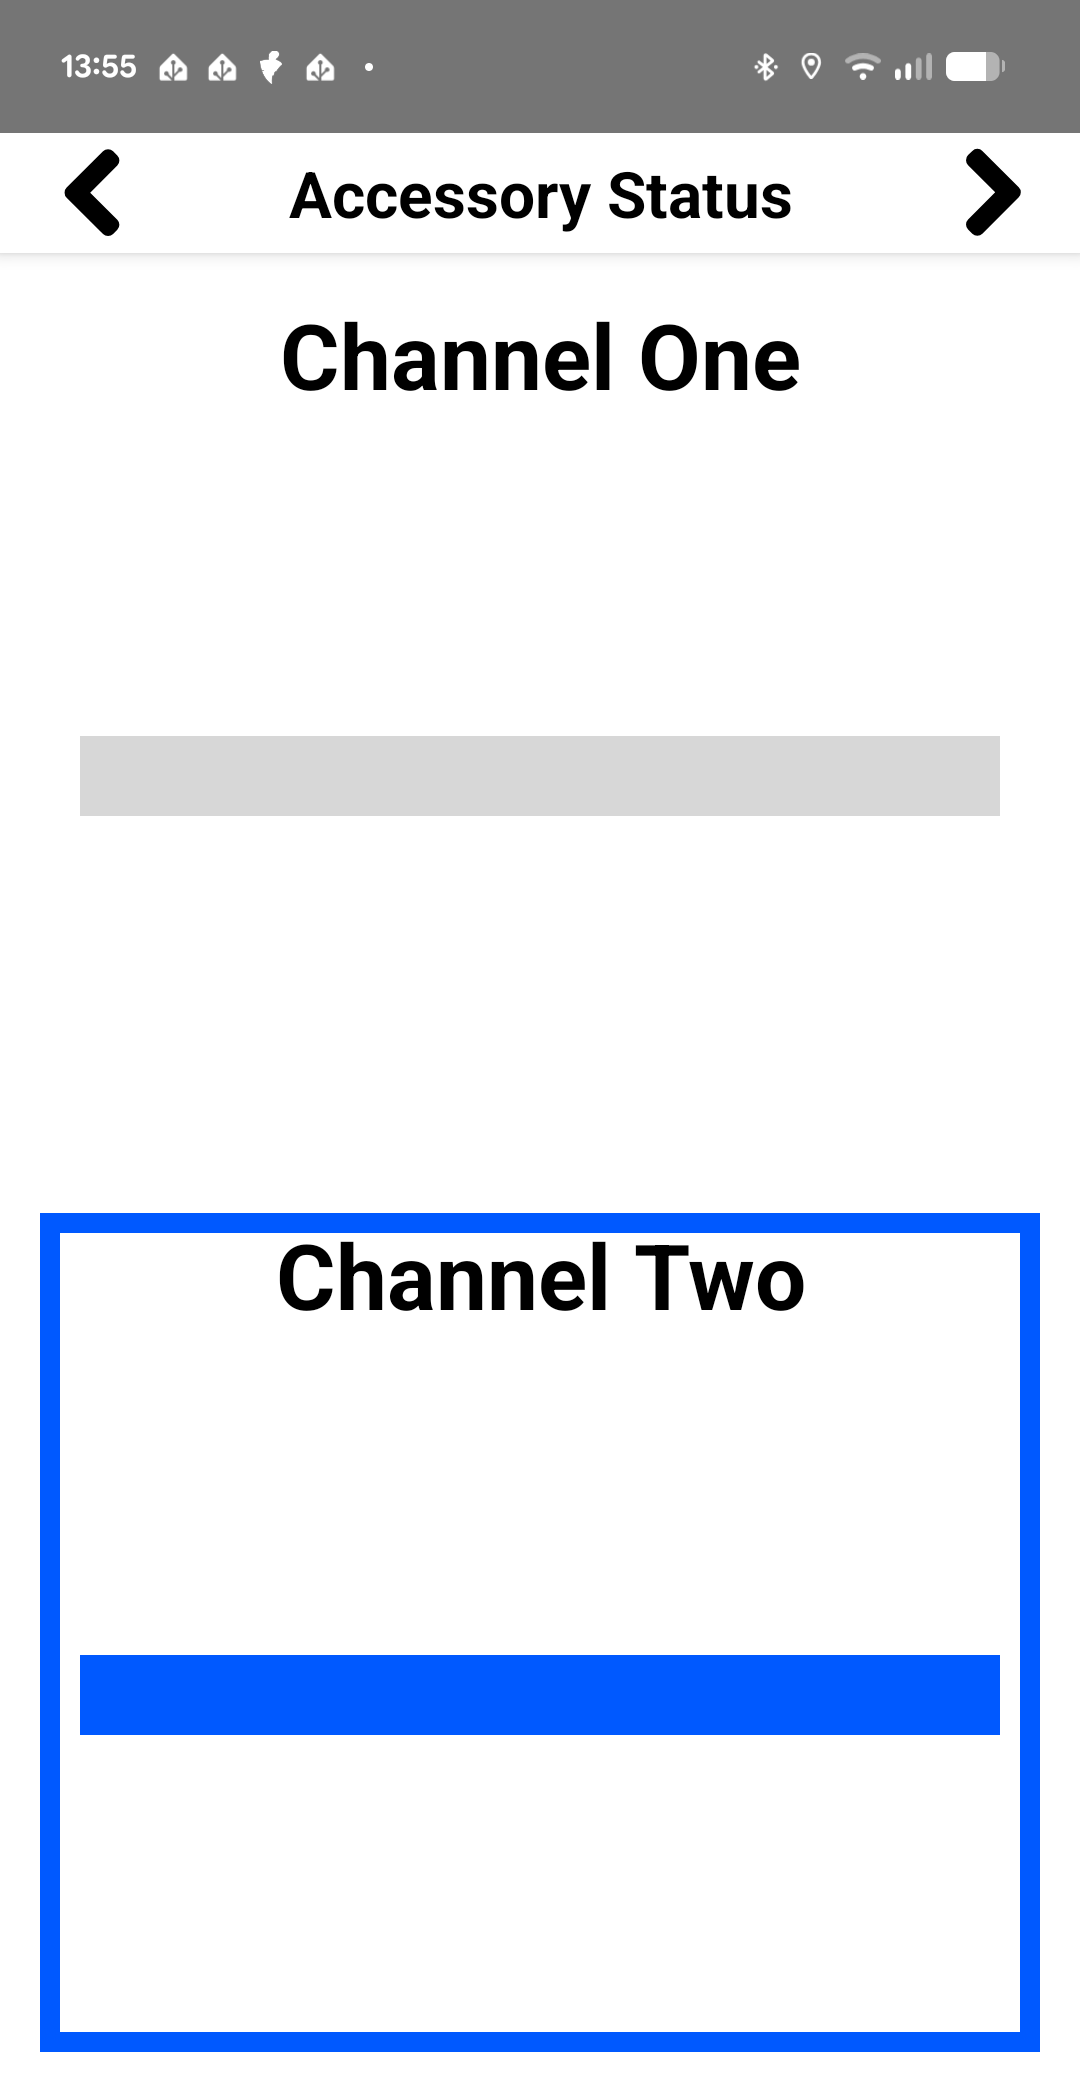
The Accessory Status screen provides displays the current status of your wired accessories. When a wired accessory has control focus it will be highlighted.
Only available on compatible WunderLINQs with installed PowerLINQ accessory.
App Settings Screen
The Settings screen provides access to all of the WunderLINQ App settings.
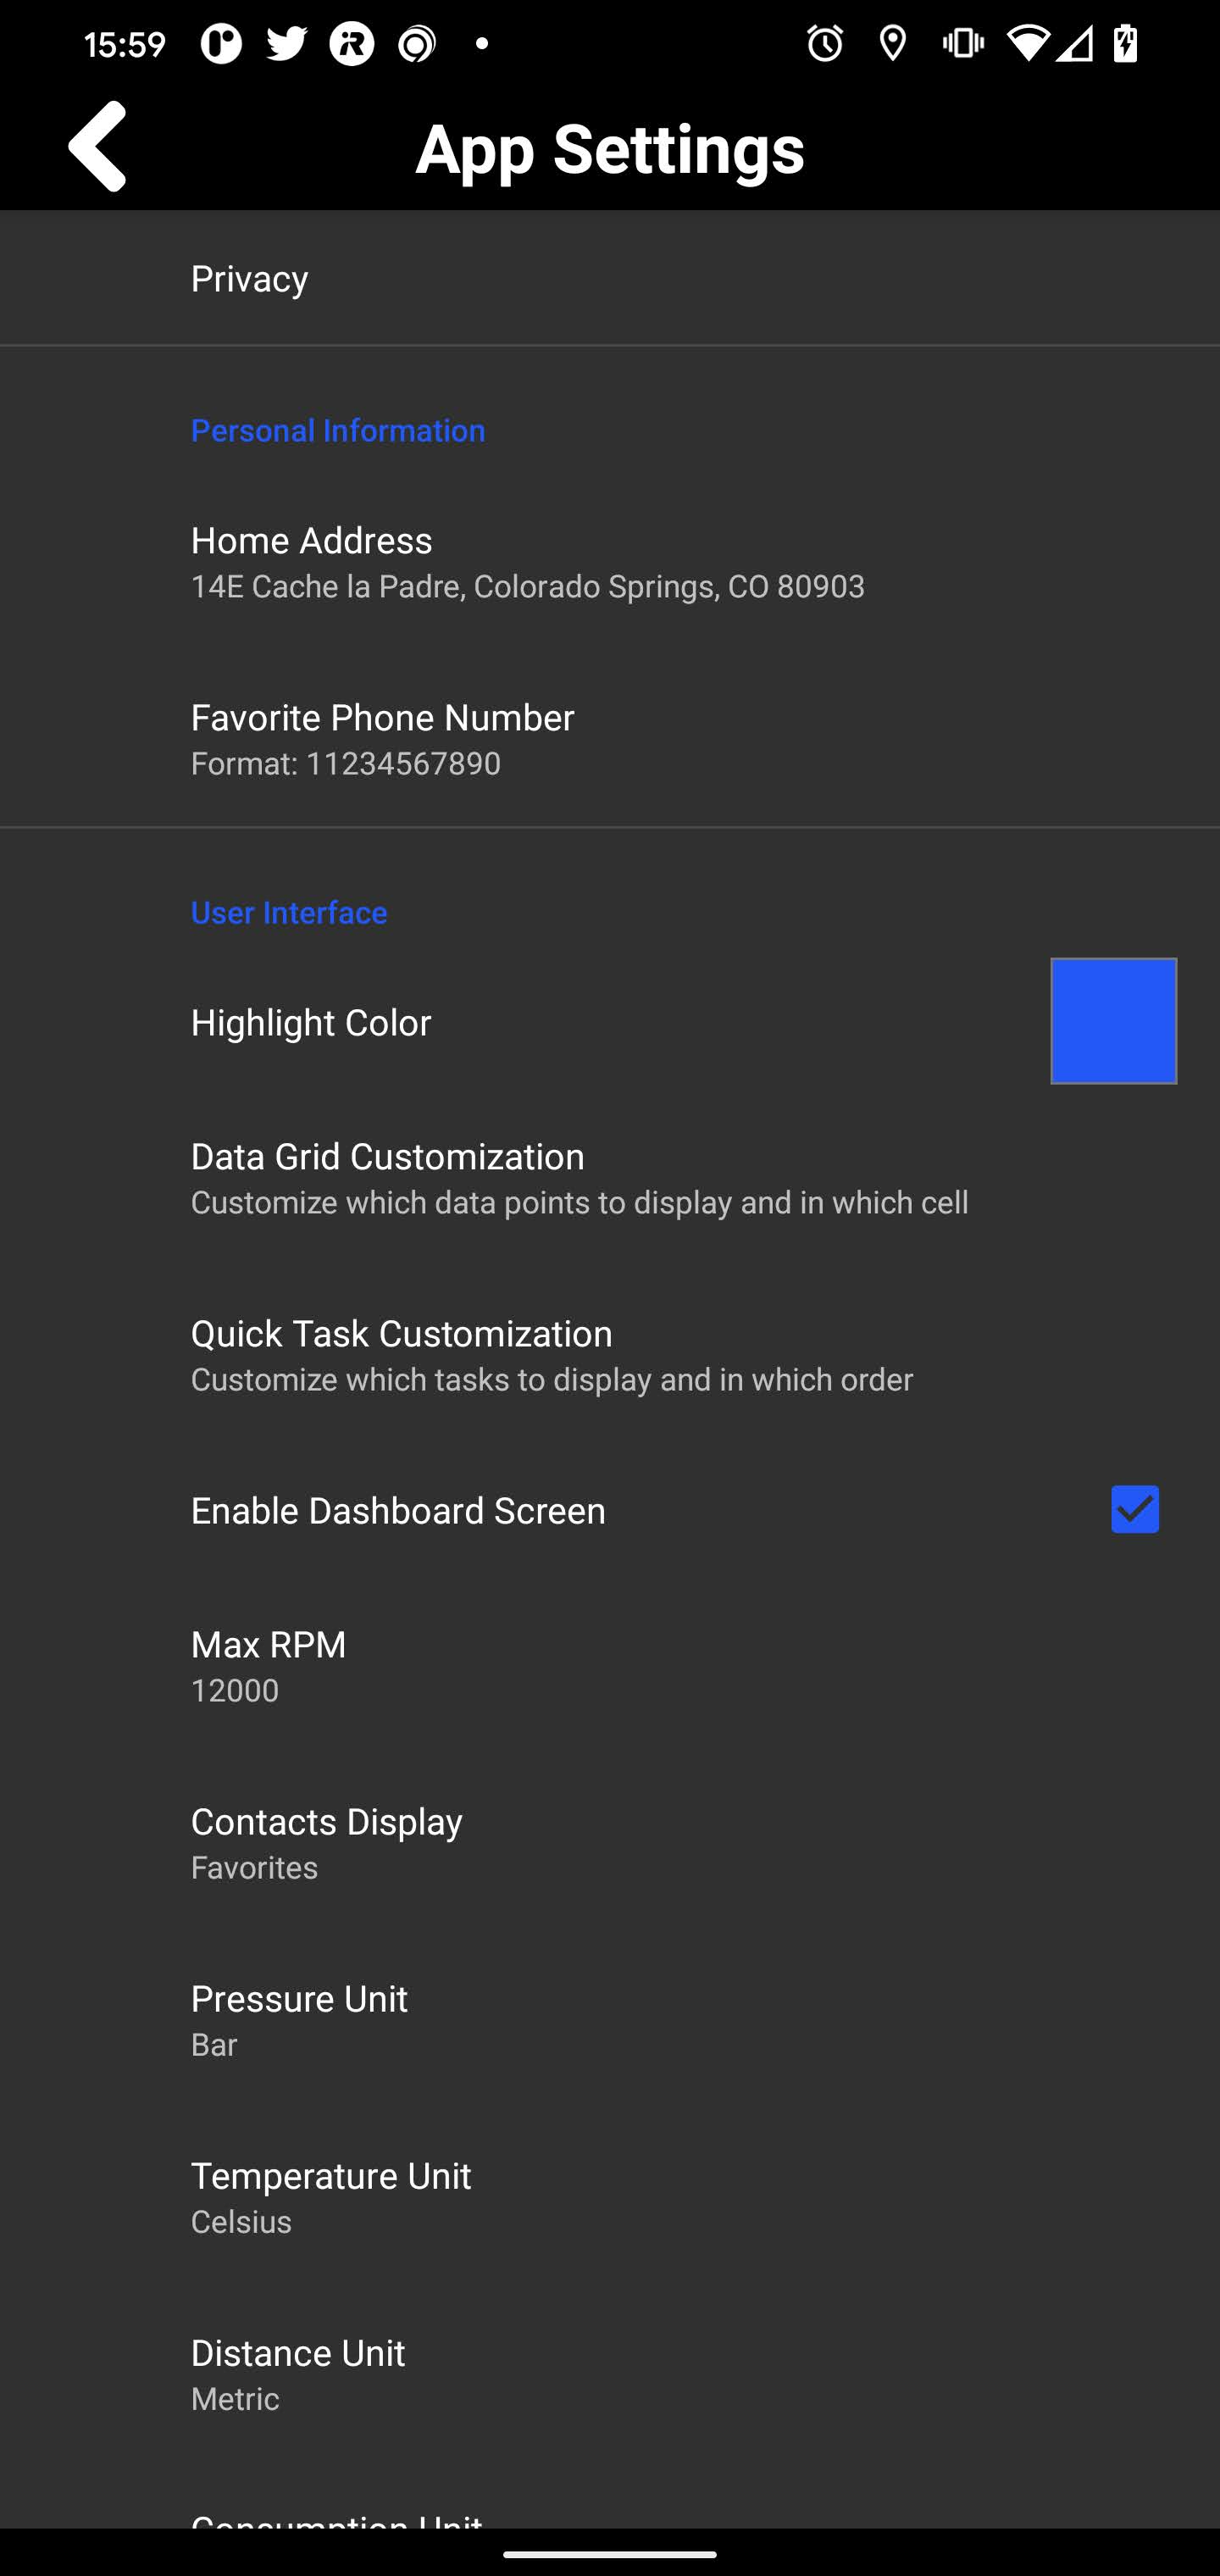
| Privacy | Displays current privacy/premission status. |
Personal Information
| Home Address: | The address set here is used by the Go Home Quick Task. |
| Favorite Phone Number: | The number set here is used by the Call Favorite Number Quick Task. |
User Interface Settings
| Highlight Color | Select your prefered highlight/accent color. |
| Main Screen Customization: | Enable optional main screens. |
| Data Grid Customization: | Brings you to a screen to customize the data grid on the Motorcycle Screen. |
| Quick Task Customization: | Brings you to a screen to customize the tasks on the Quick Task Screen. |
| Max RPM: | Set max RPM on dashboard gauge. |
| Contact Display: | Select which contacts to display. |
| Pressure Unit: | Select your preferred pressure unit for display. |

| Temperature Unit: | Select your preferred temperature unit for display. |
| Distance Unit: | Select your preferred distance unit for display. |
| Consumption Unit: | Select your preferred fuel consumption unit for display. |
| Bearing Unit: | Select your preferred bearing unit for compass display. |
| Time Format: | Select your preferred time format. |
| Orientation Lock: | Select the orientation to lock the UI at. |
| Display Brightness: | Set display brightness to the max when in day mode. |
| Night Mode: | Enable to turn on the white on black mode for easier on the eyes night experience. Auto uses the phone's ambient light sensor. |
| Auto Night Mode Delay: | How many seconds of darkness before enabling Night Mode. |
| Hide the navigation bar when not in use: | Auto Hide hide the navigation bar when not in use. |
| Focus Indication: | Applies Highlight Color to navigation bar when the app has control focus. |
Alert Settings
| Enable Fault Notifications: | Enable to turn on notifications for critical faults. |
| Custom Tire Pressure Threshold: | Override motorbike fault and use a custom pressure threshold. |
| Low Tire Pressure Threshold: | Specify a value relative to your set pressure unit. |
| Fuel Routing: | Prompt to route to nearest fuel stations when low fuel fault is present. |
| Ignition: | Prompt to close app when ignition is shut off. |
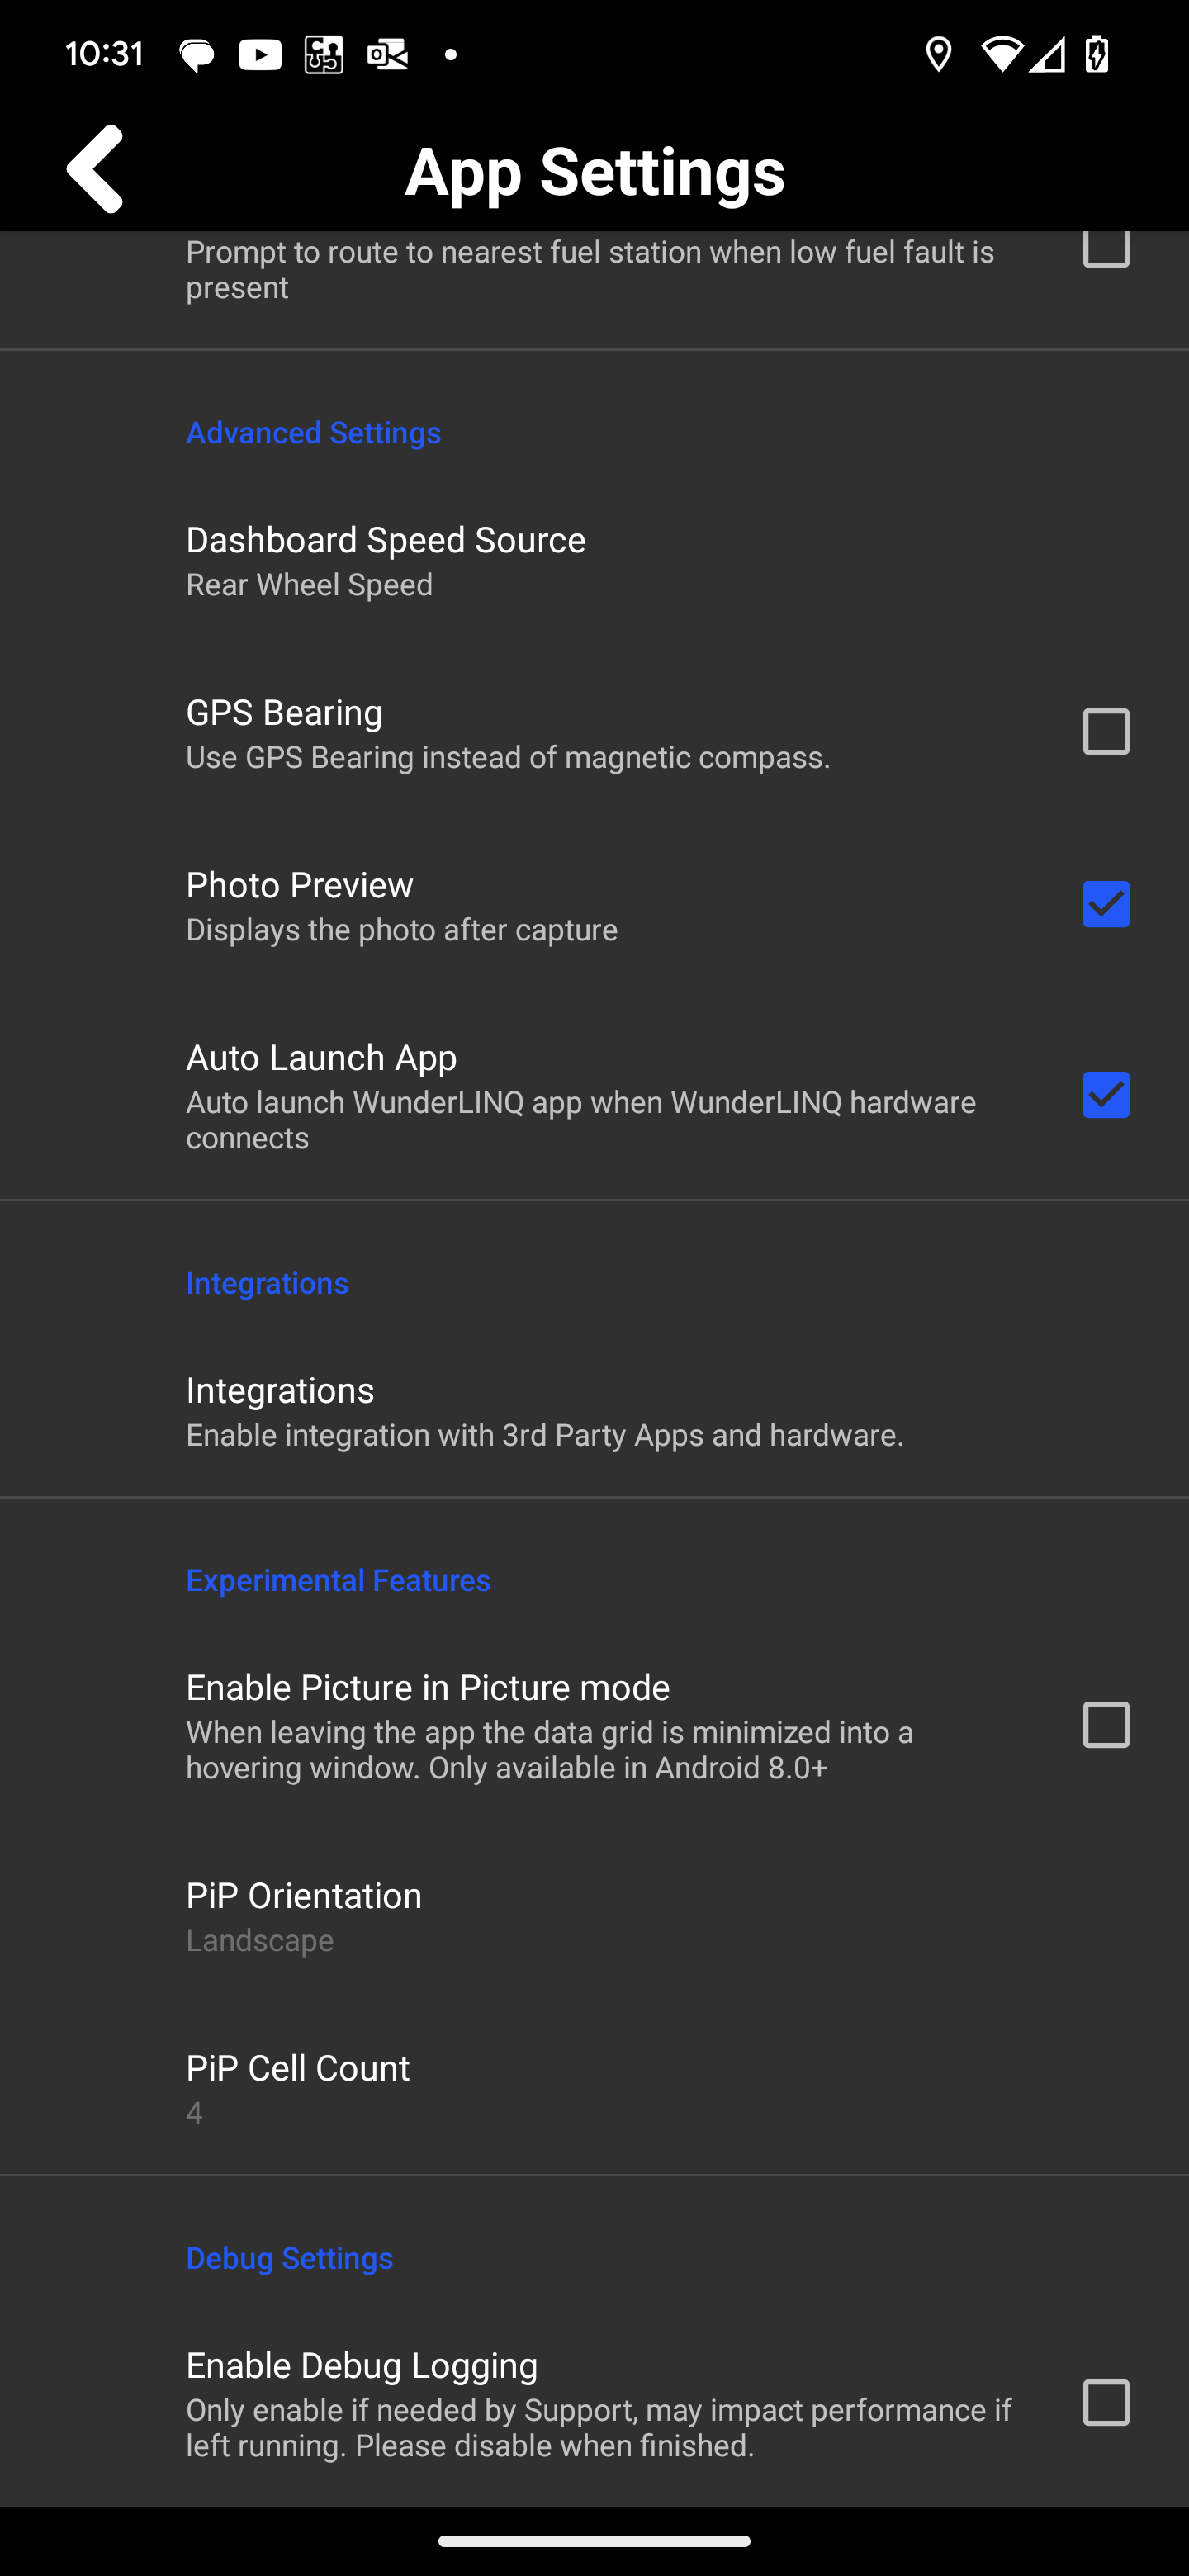
Advanced Settings
| GPS Bearing: | Select to use GPS bearing instead on compass. |
| Photo Preview: | Displays photo after capture. |
| Auto Launch App: | Launches app when WunderLINQ hardware connects. |
| Split Screen App Launch: | Controls how 3rd party apps like Navigation are launched when in Split Screen Mode. Adject opens in the other screen, Overtop opens the app to take place of the WunderLINQ app. |
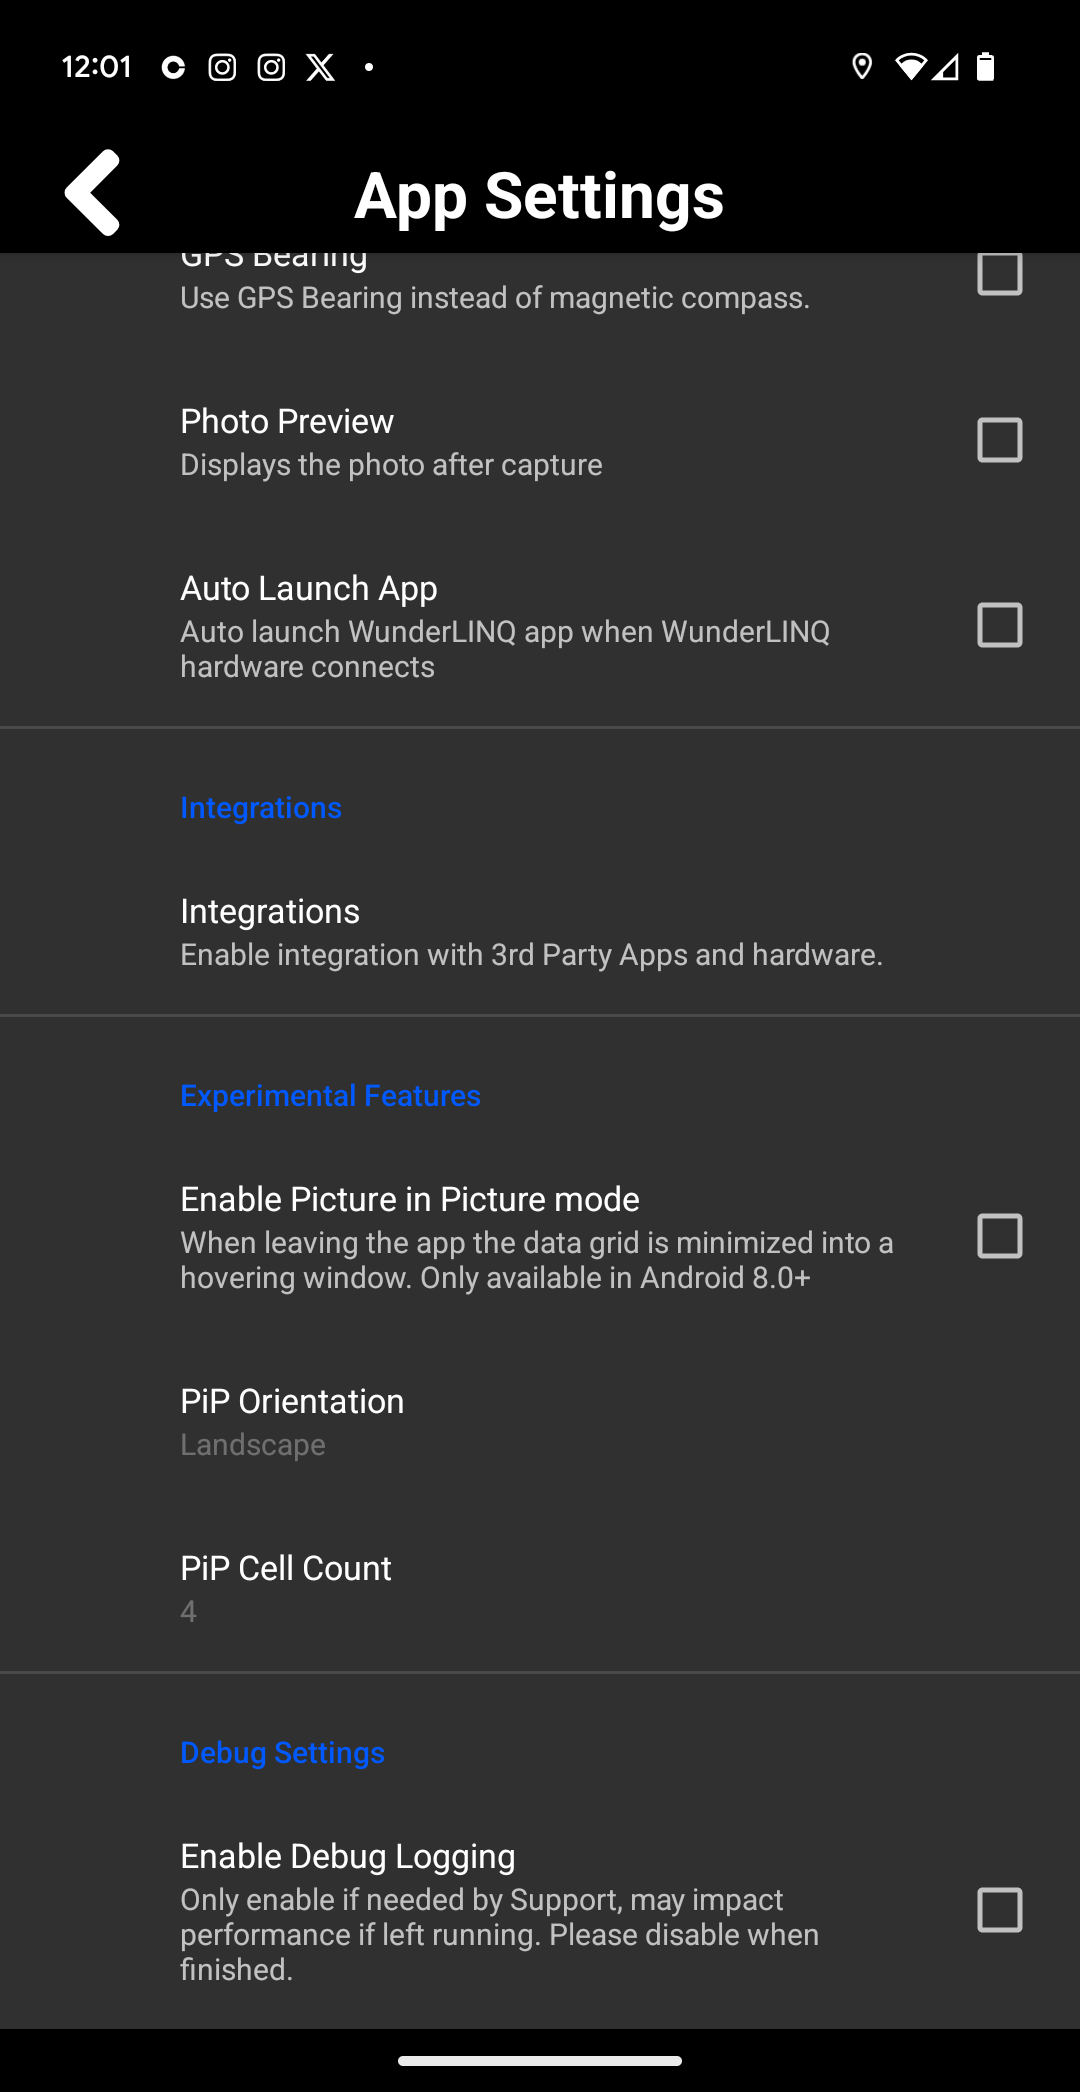
Integration Settings
| Integrations: | Settings for 3rd party software and hardware integrations. |
Experimental Features
| Enable Picture in Picture: | When enabled the Motorcycle Screen is put in a floating window when you leave the app. |
| PiP Orientation: | Select landscape or portrait layout for the PiP window. |
| Auto Launch App: | Only enable if requested, and should be shut off when you are done. May cause performance issues if left on. |
Debug Settings
| Enable Debug Logging: | Only enable if requested, and should be shut off when you are done. May cause performance issues if left on. |
Privacy
Displays current privacy/premission status.
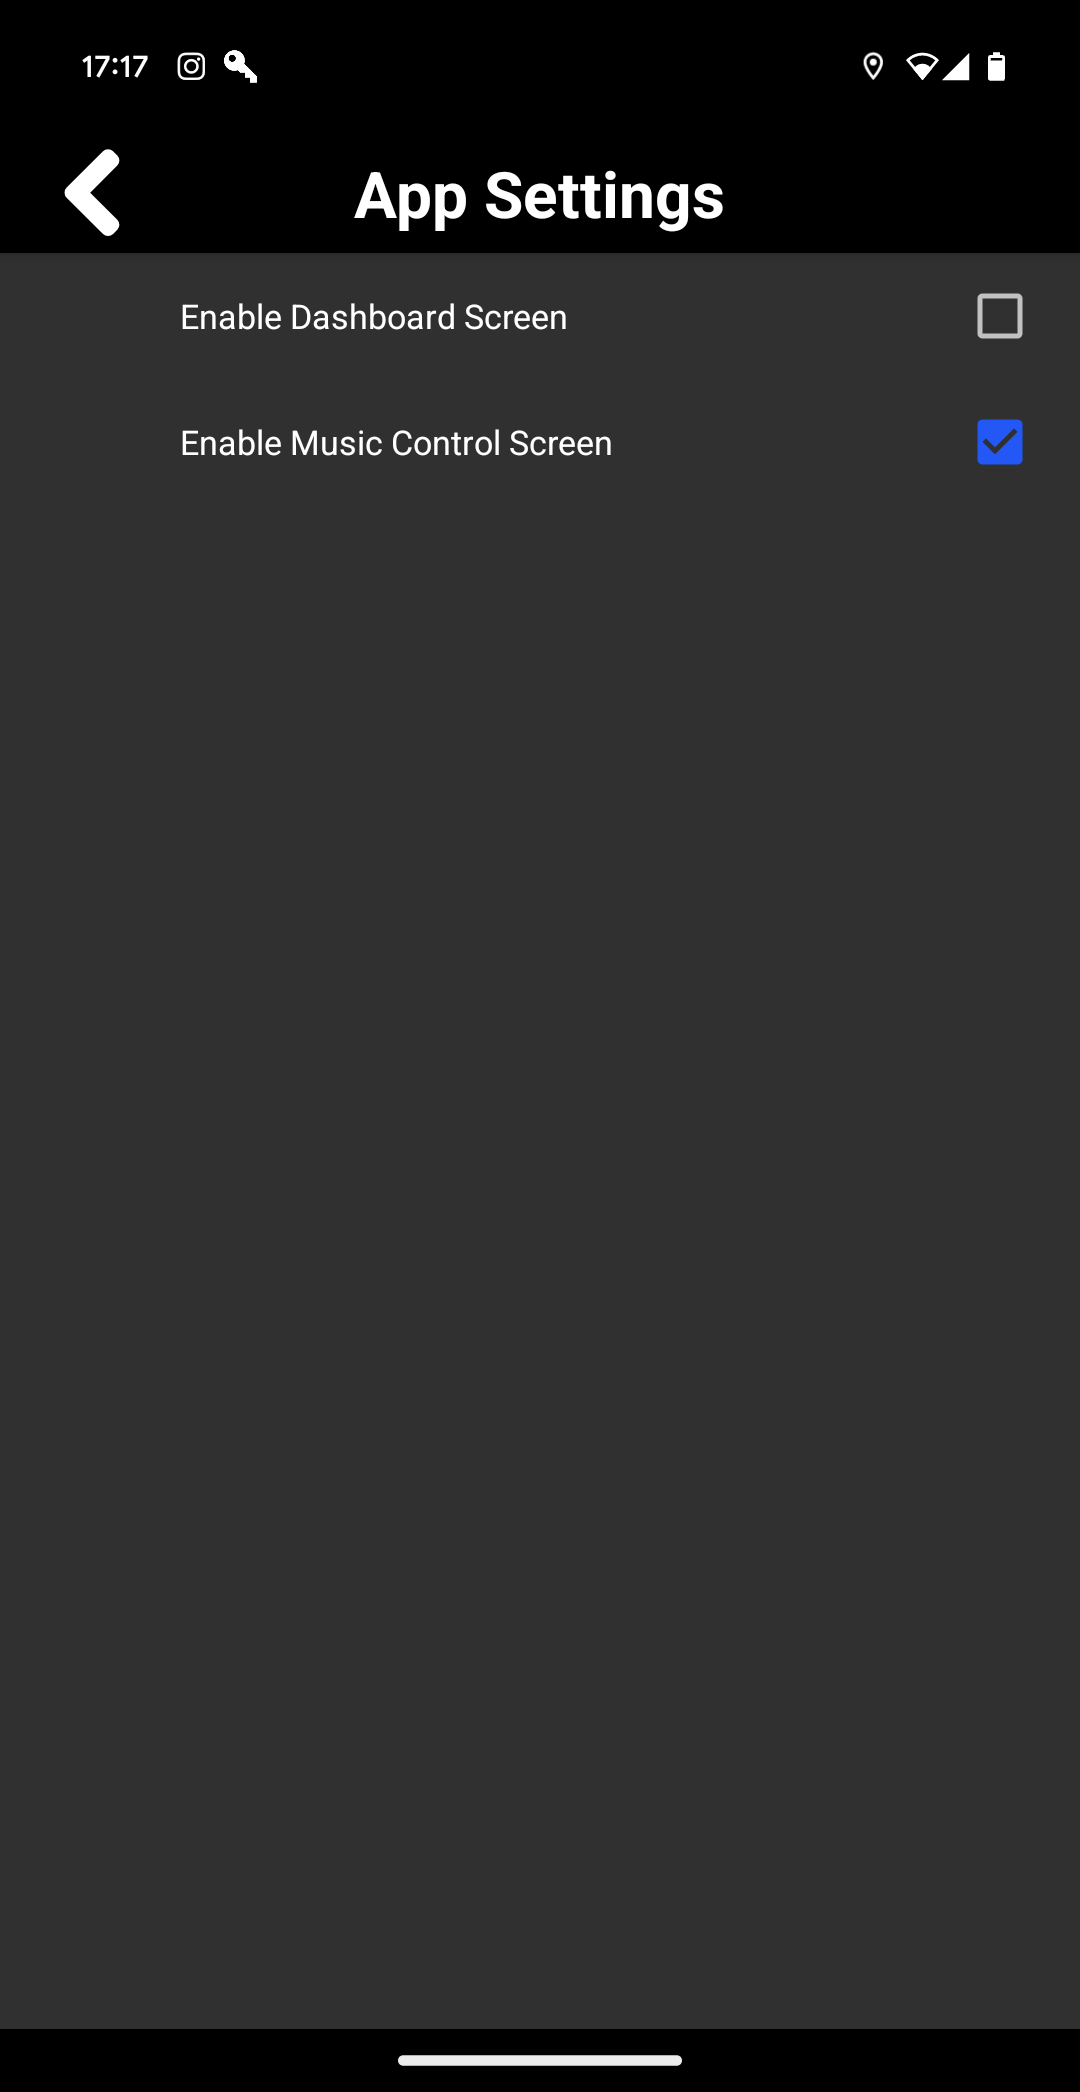
Main Screen Customization
| Enable Dashboard Screen | Enables dashboard like screen. |
| Enable Music Control Screen | Enables music playback control screen. |
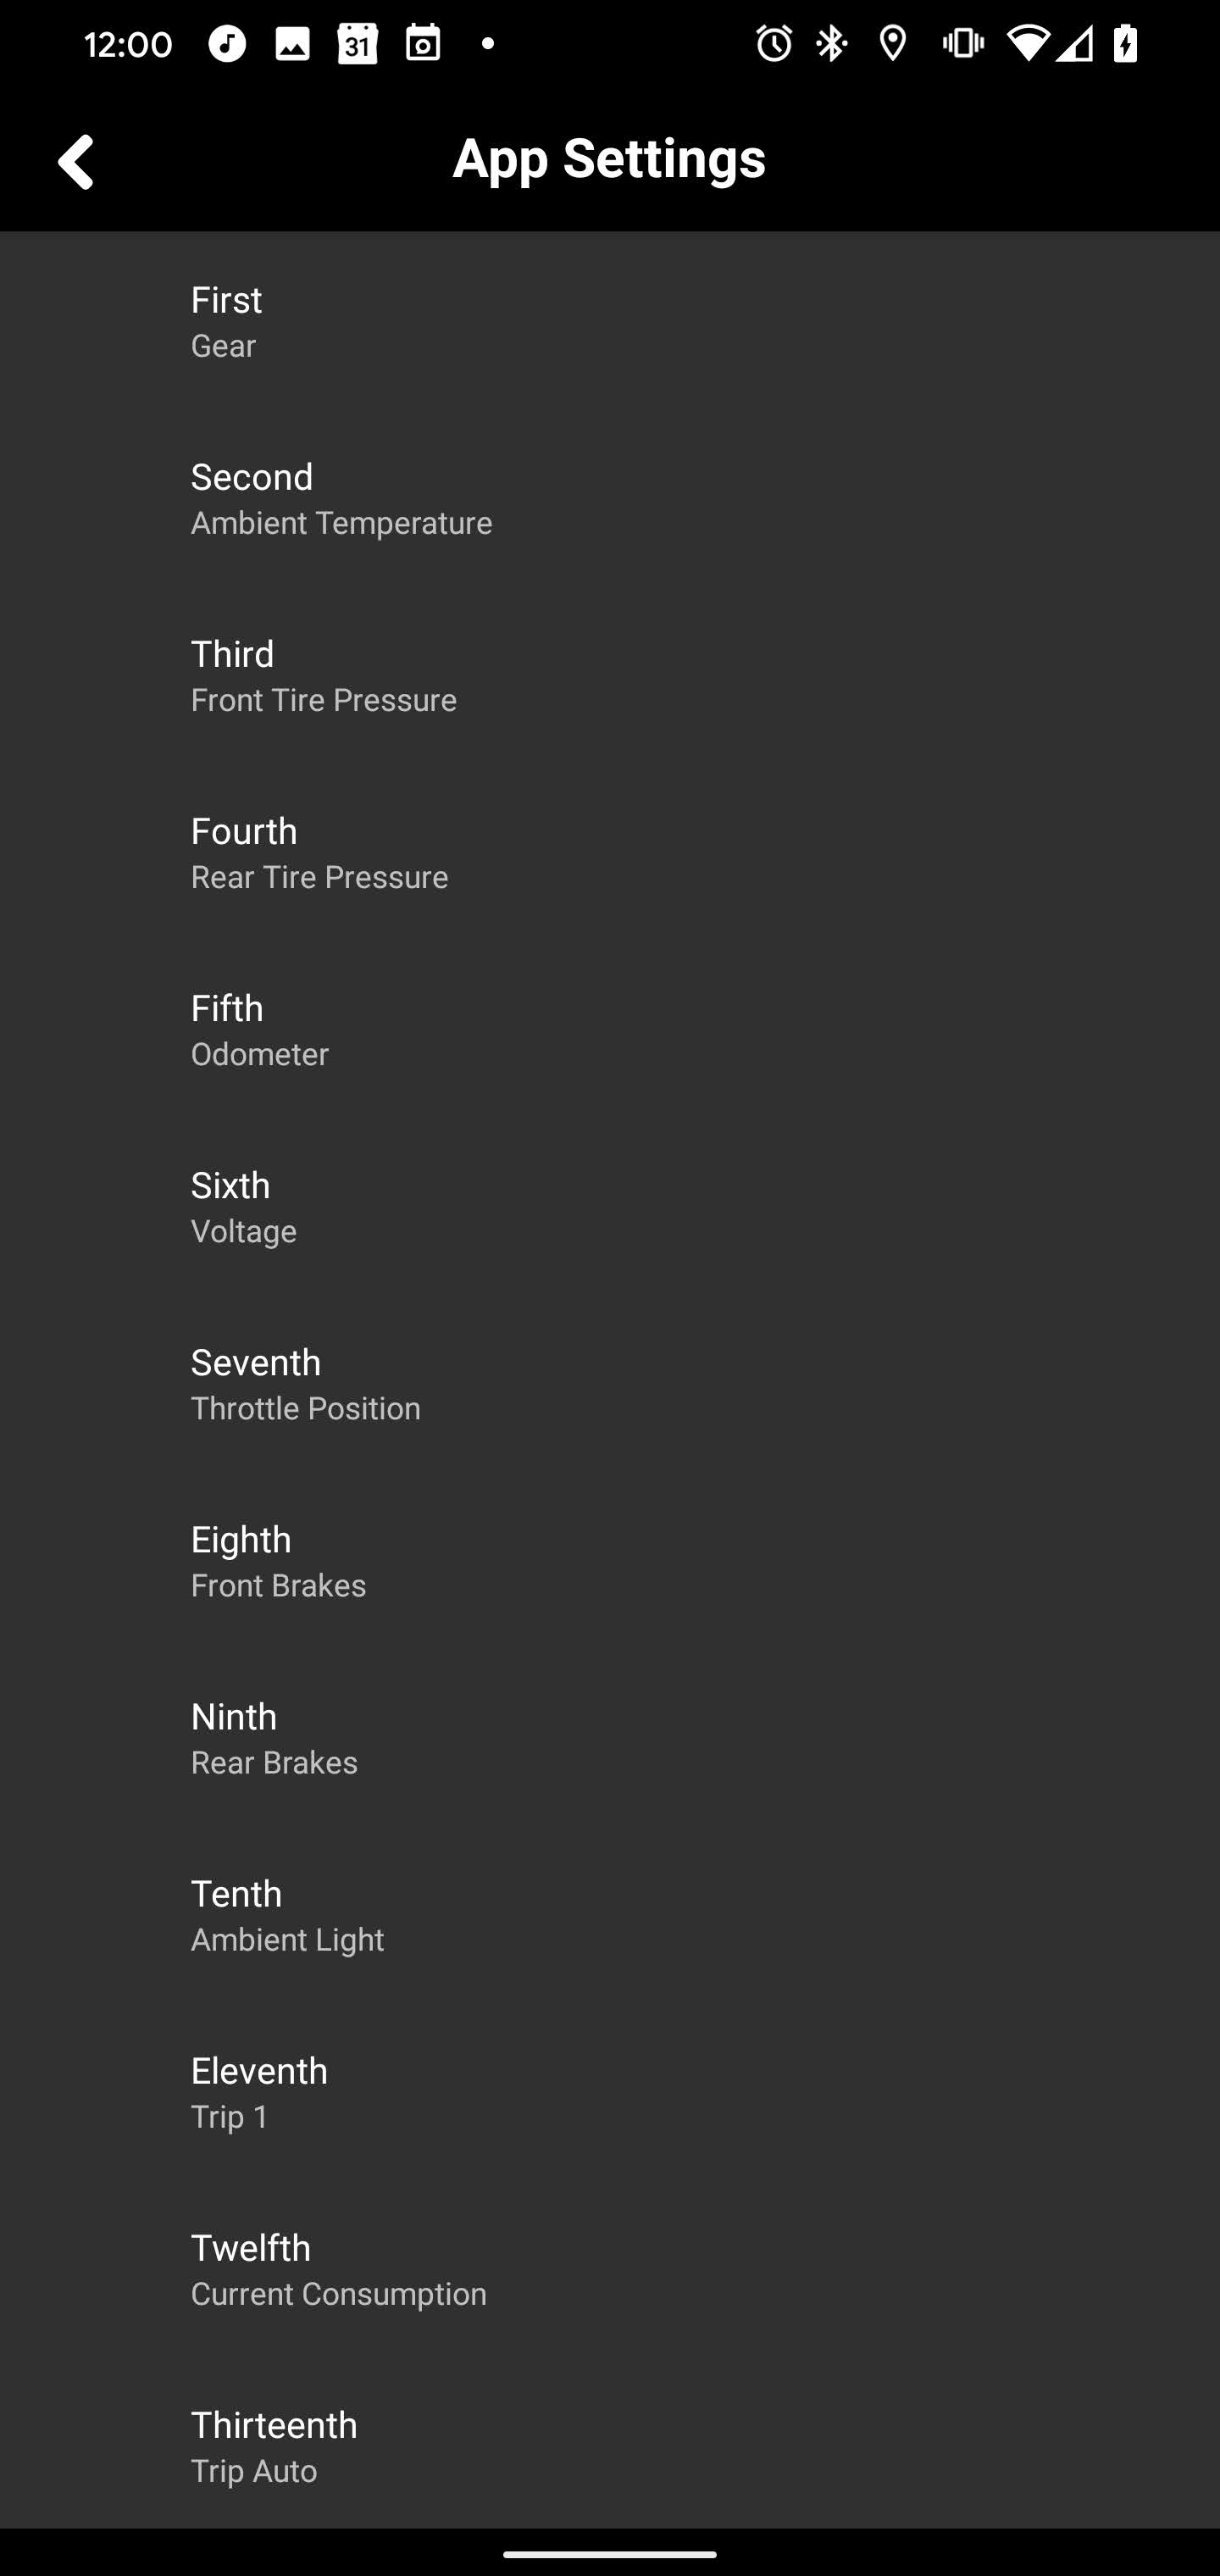
Data Grid Customization
Controls display and location of datapoints on the Motorcycle Screen. Currently supported data points are below.
| Date/Time |
| Sunrise/Sunset |
| Location (Latitude, Longitude) |
| Altitude |
| GPS Speed |
| VIN |
| Ambient Light |
| Next Service Date* |
| Miles to next service* |
| Gear* |
| Engine Temperature* |
| Ambient Temperature* |
| Front Tire Pressure* |
| Rear Tire Pressure* |
| Odometer* |
| Motorcycle Battery Voltage* |
| Throttle Position* |
| Front Brake Count* |
| Rear Brake Count* |
| Shift Count* |
| Tripmeter One* |
| Tripmeter Two* |
| Tripmeter Auto* |
| Speed* |
| Rear Wheel Speed* |
| Average Speed* |
| Current Fuel Consumption* |
| Fuel Economy One* |
| Fuel Economy Two* |
| Fuel Range* |
| g-force** |
| Bearing** |
| Barometric Pressure** |
| RPM* |
| Lean Angle** |
| Lean Angle Mobile** |
| Mobile Device Battery** |
| Cellular Signal** |
| Elevation Change** |
*Check your WunderLINQ compatability matrix if your motorcycle provides this. **Requires the necessary sensor in your smart phone.
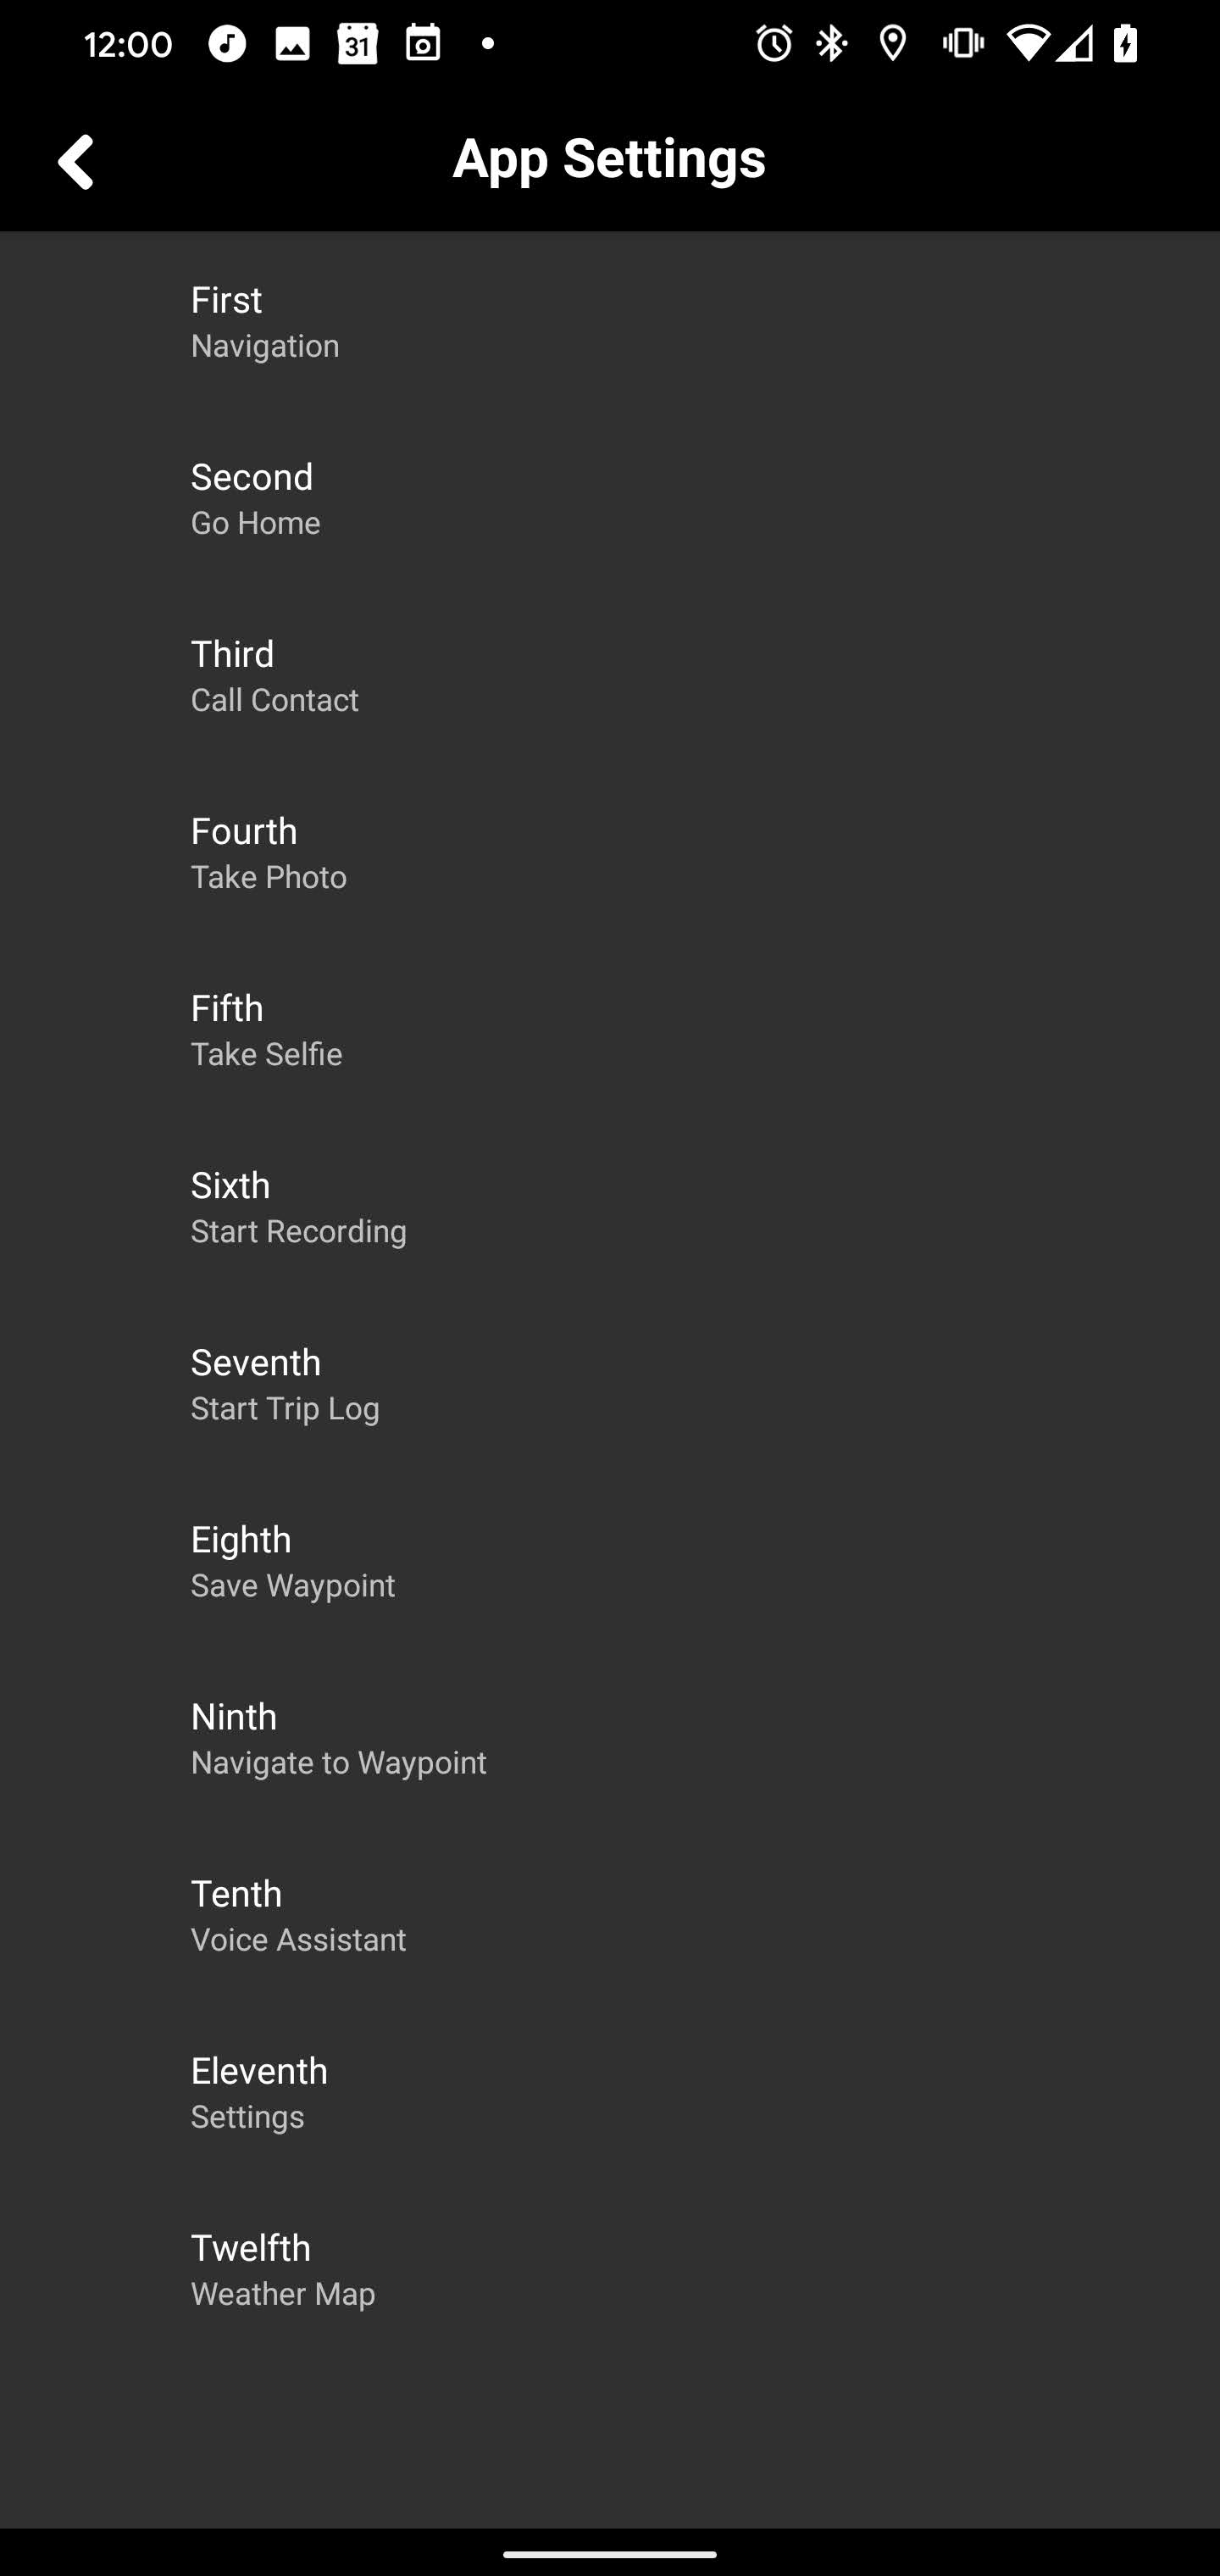
Quick Task Customization
Controls display and order of tasks on the Quick Task Screen. Current task options include the following.
| Navigation: | Launches a supported 3rd party navigation app into driving mode. |
| Go Home: | Launches a supported 3rd party navigation app and routes you to the destination you’ve defined in the WundeLINQ App Settings. |
| Call Favorite Number: | Launches your phone app and dials the phone number you’ve defined in the WundeLINQ App Settings. |
| Call Contact: | Provides a list of your address book phone numbers that you can in turn call. |
| Take Photo: | Take a picture with your rear camera. |
| Take Selfie: | Take a picture with your front camera. |
| Start Selfie/Stop Recording: | Controls video recording through your devices front camera. |
| Start/Stop Recording: | Controls video recording through your devices rear camera. |
| Start/Stop Trip Log: | Controls trip logging. Trip logging includes location, phone sensor and performance data if available. |
| Save Waypoint: | Save your current location as a waypoint to be viewed later. |
| Navigate to Waypoint: | Launches a supported 3rd party navigation app and routes you to the saved waypoint. |
| Voice Assistant: | This will launch your devices Virtual Assistant so that you can provide voice commands. |
| Settings: | Launch the App Settings. |
| Home Screen: | Go to Android Home Screen. |
| GoPro Control: | Launches the WunderLINQ GoPro Remote App. |
| Weather Map: | Display a zoomable weather map with precipitation overlay. |
| App Launcher: | Display a scrollable list of all installed apps, allowing their launch. |
| Roadbook: | Launches a supported 3rd party roadbook app. |
| Volume: | Controls device master volume. |
| Insta360 Control: | Launches the WunderLINQ Insta360 Remote App. |
| Fuel: | Searches or routes you to the nearest fuel station using your preferred navigation app. |
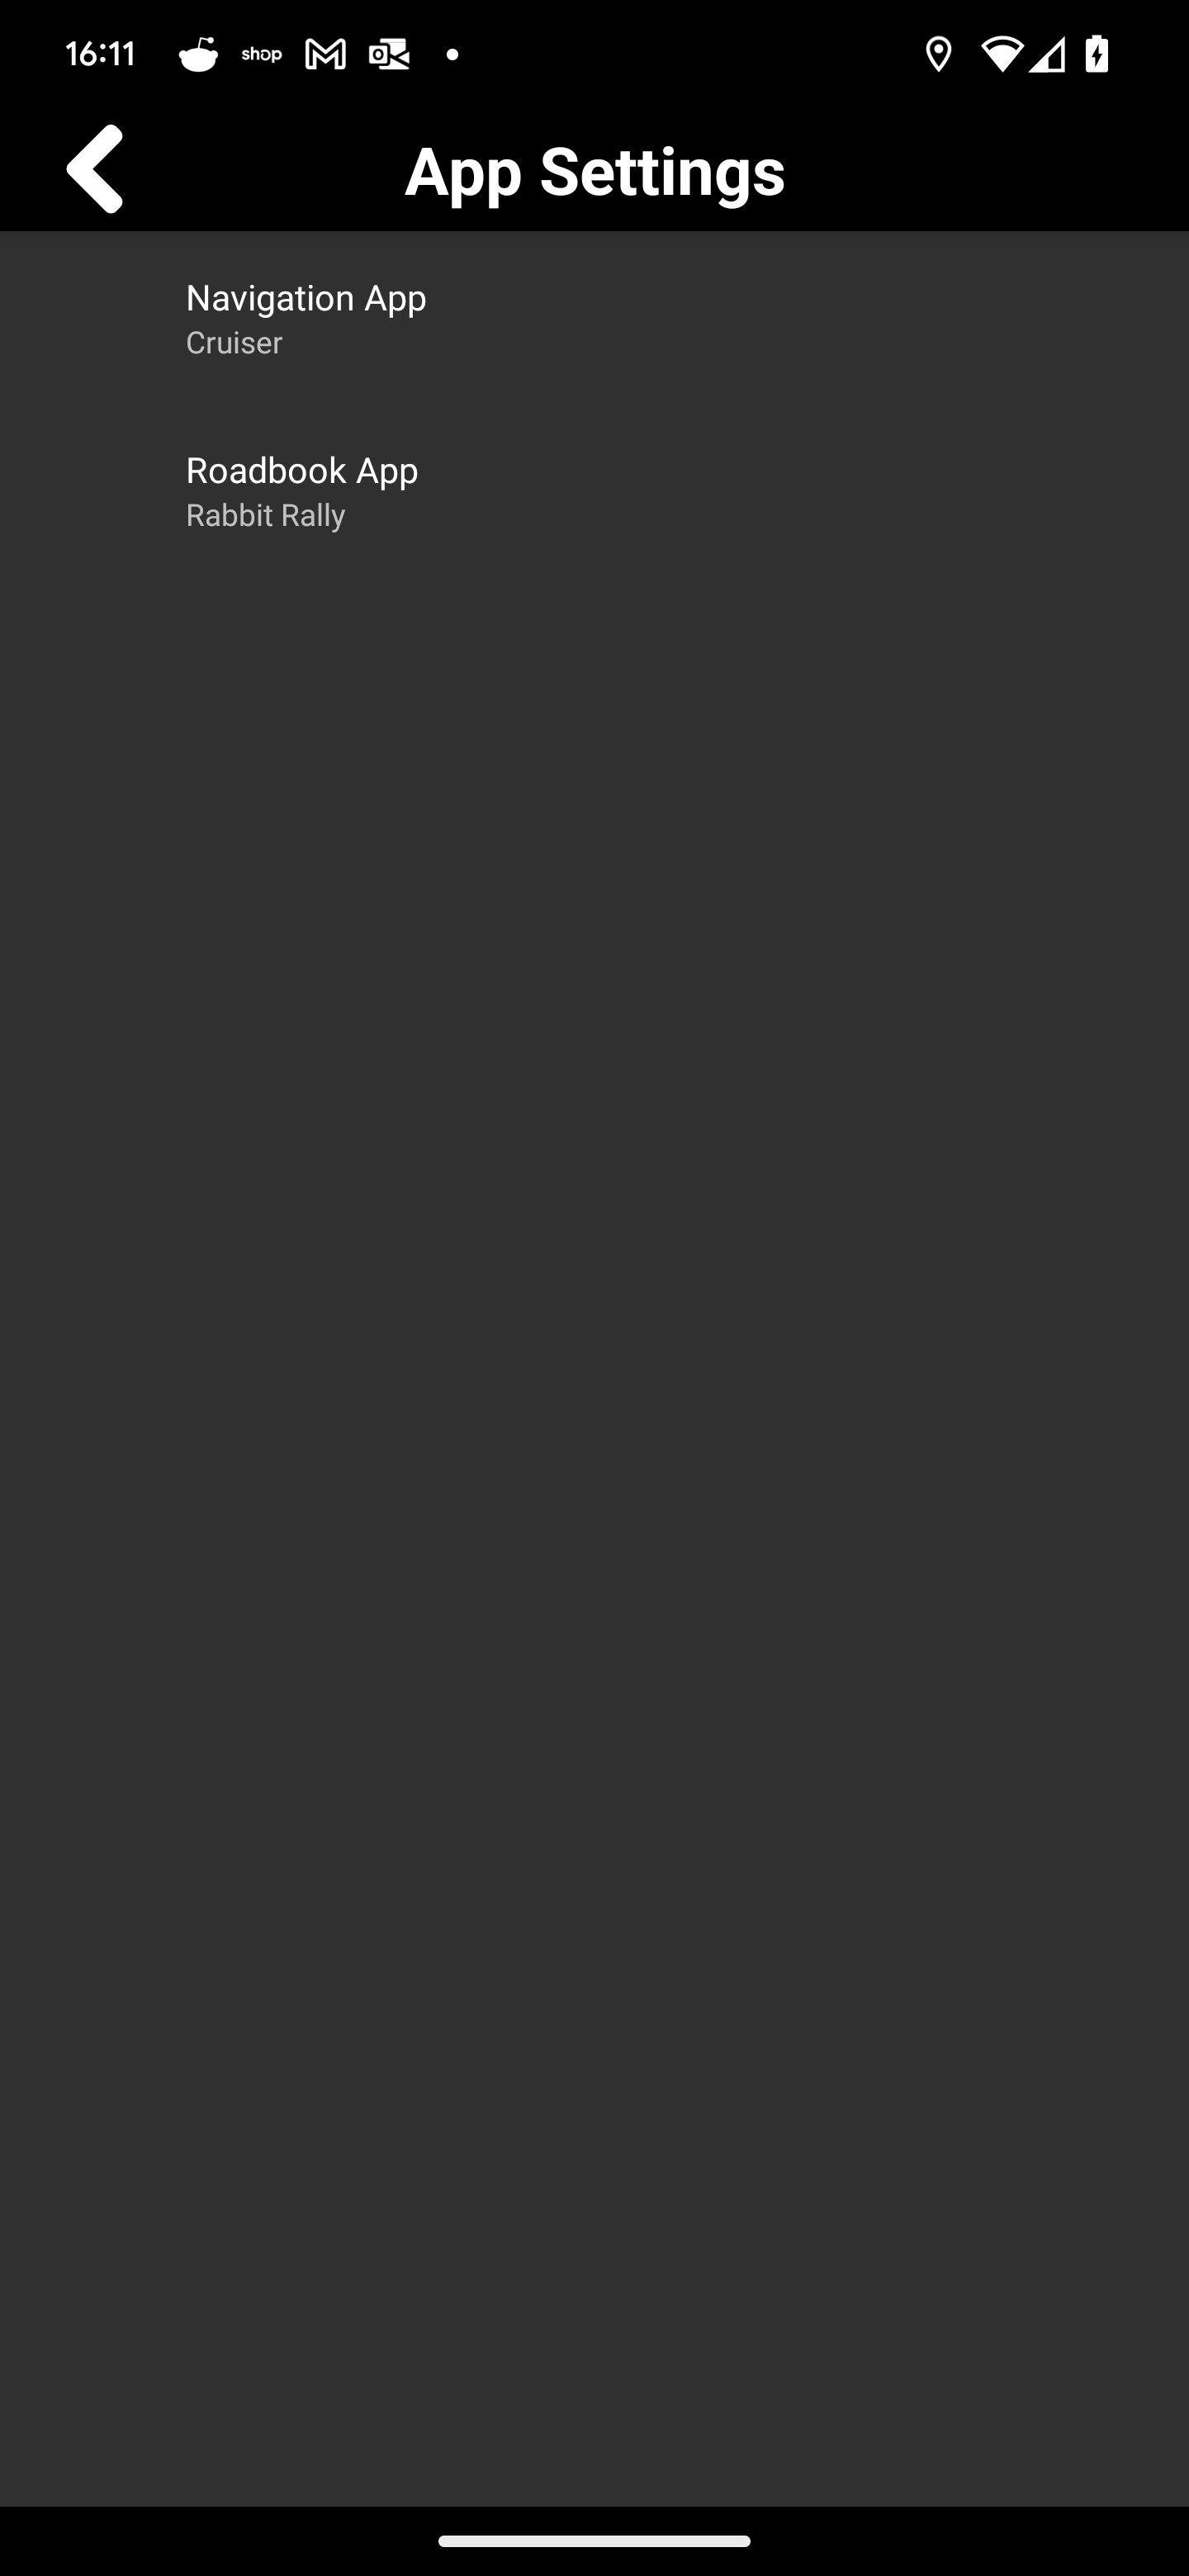
Integrations
| Navigation App: | Select preferred Navigation App. |
| Roadbook App: | Select preferred Roadbook App. |
HW Settings Screen
The HW Settings screen provides access to all of the WunderLINQ Hardware settings. Currently, these settings control how the WunderLINQ input and USB port performs.
* Only available while connected to the WunderLINQ hardware.
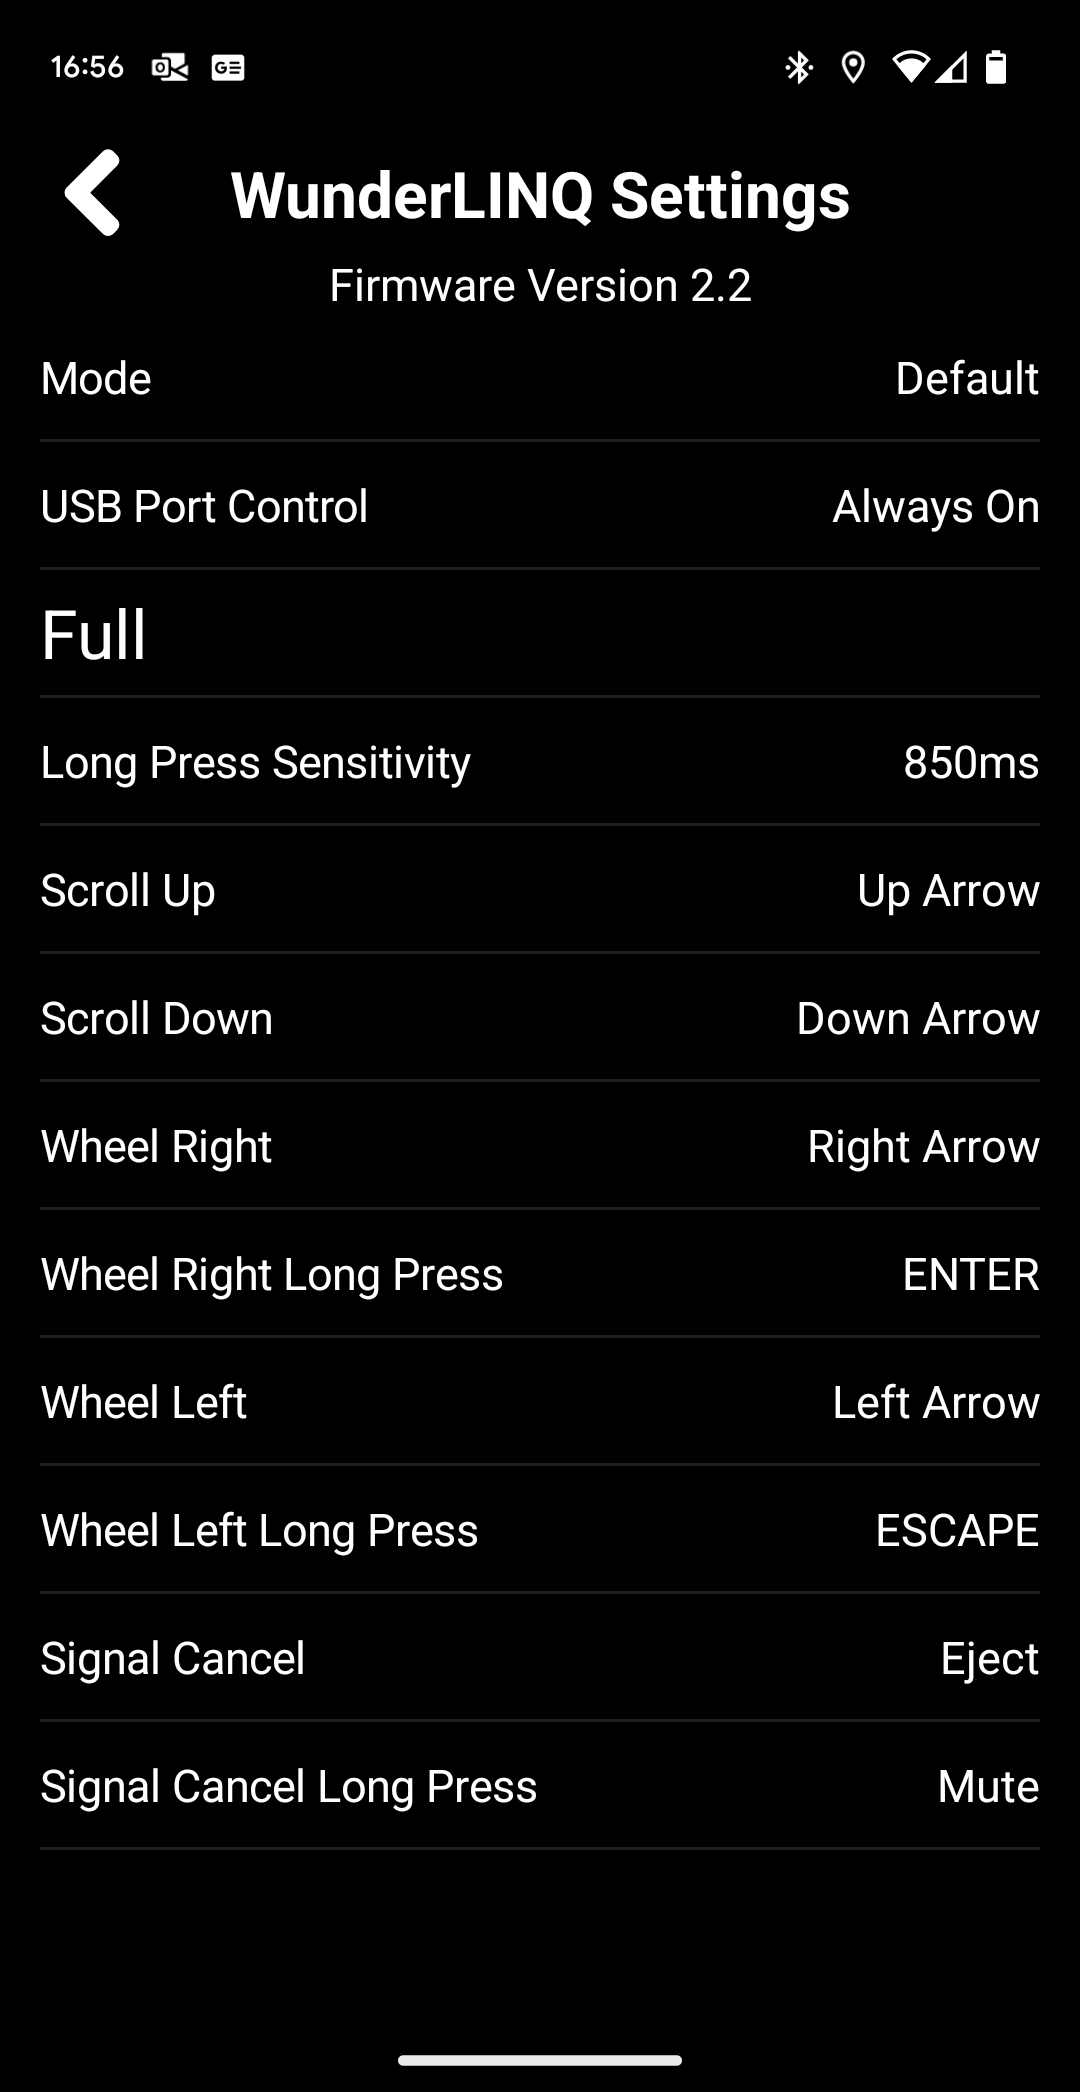
To customize your WunderLINQ first set your desired mode by selecting the Mode option.
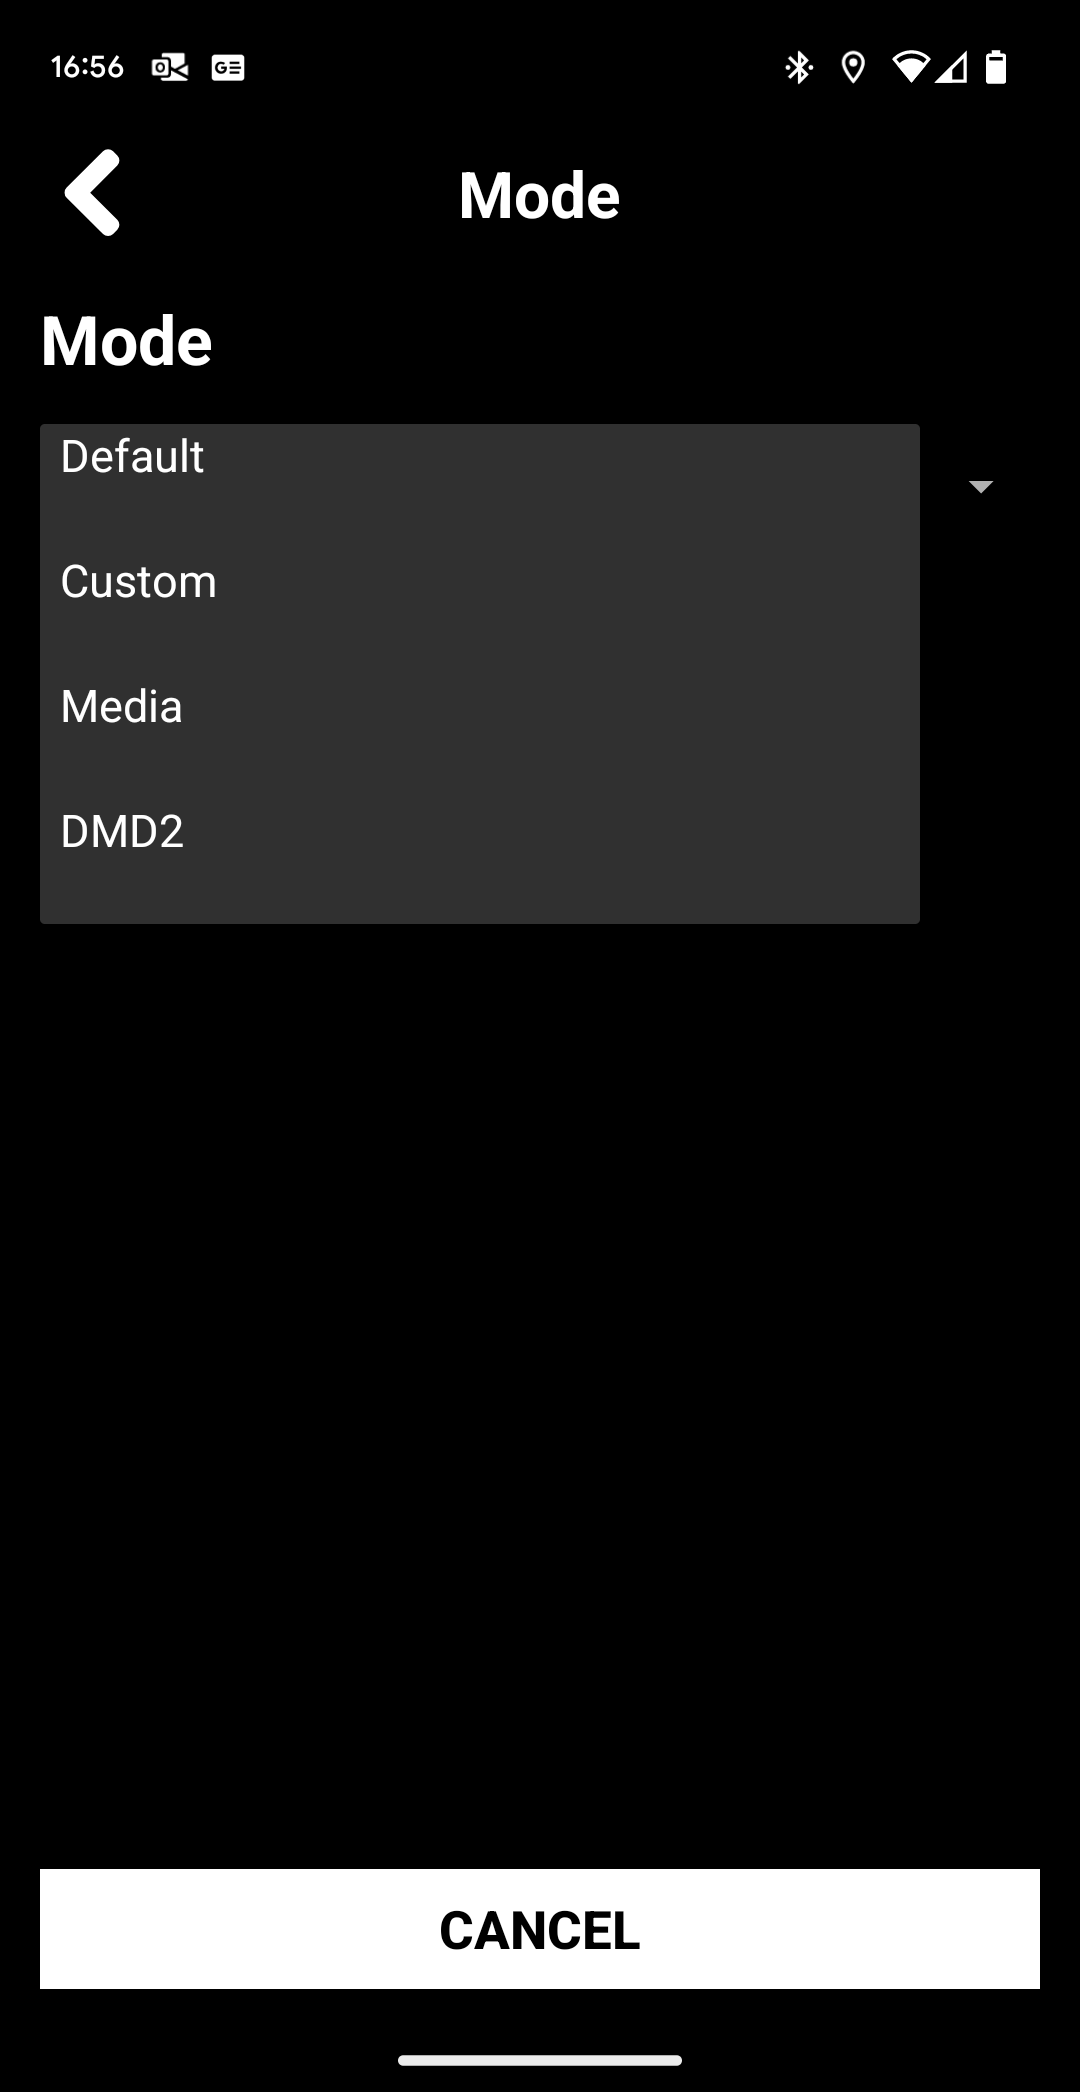
The Mode configuration screen is used to set the input mode of the WunderLINQ. See below for mode details.
| Default | WunderLINQ Default input mode. |
| Custom | WunderLINQ Customizable input mode allows customization of all input. |
| Media | Media Control input mode. All controls are mapped to global Android or iOS media controls. This mode only provides media control and will prevent normal operation. |
| Direct | Direct input mode is specially design for use with Drive Mode Dashboard 2 software for Android. This is not useful for iOS users and will prevent normal operation outside of DMD2. |
![]() The Reset button, will reset all the customized settings back to factory defaults.
The Reset button, will reset all the customized settings back to factory defaults.
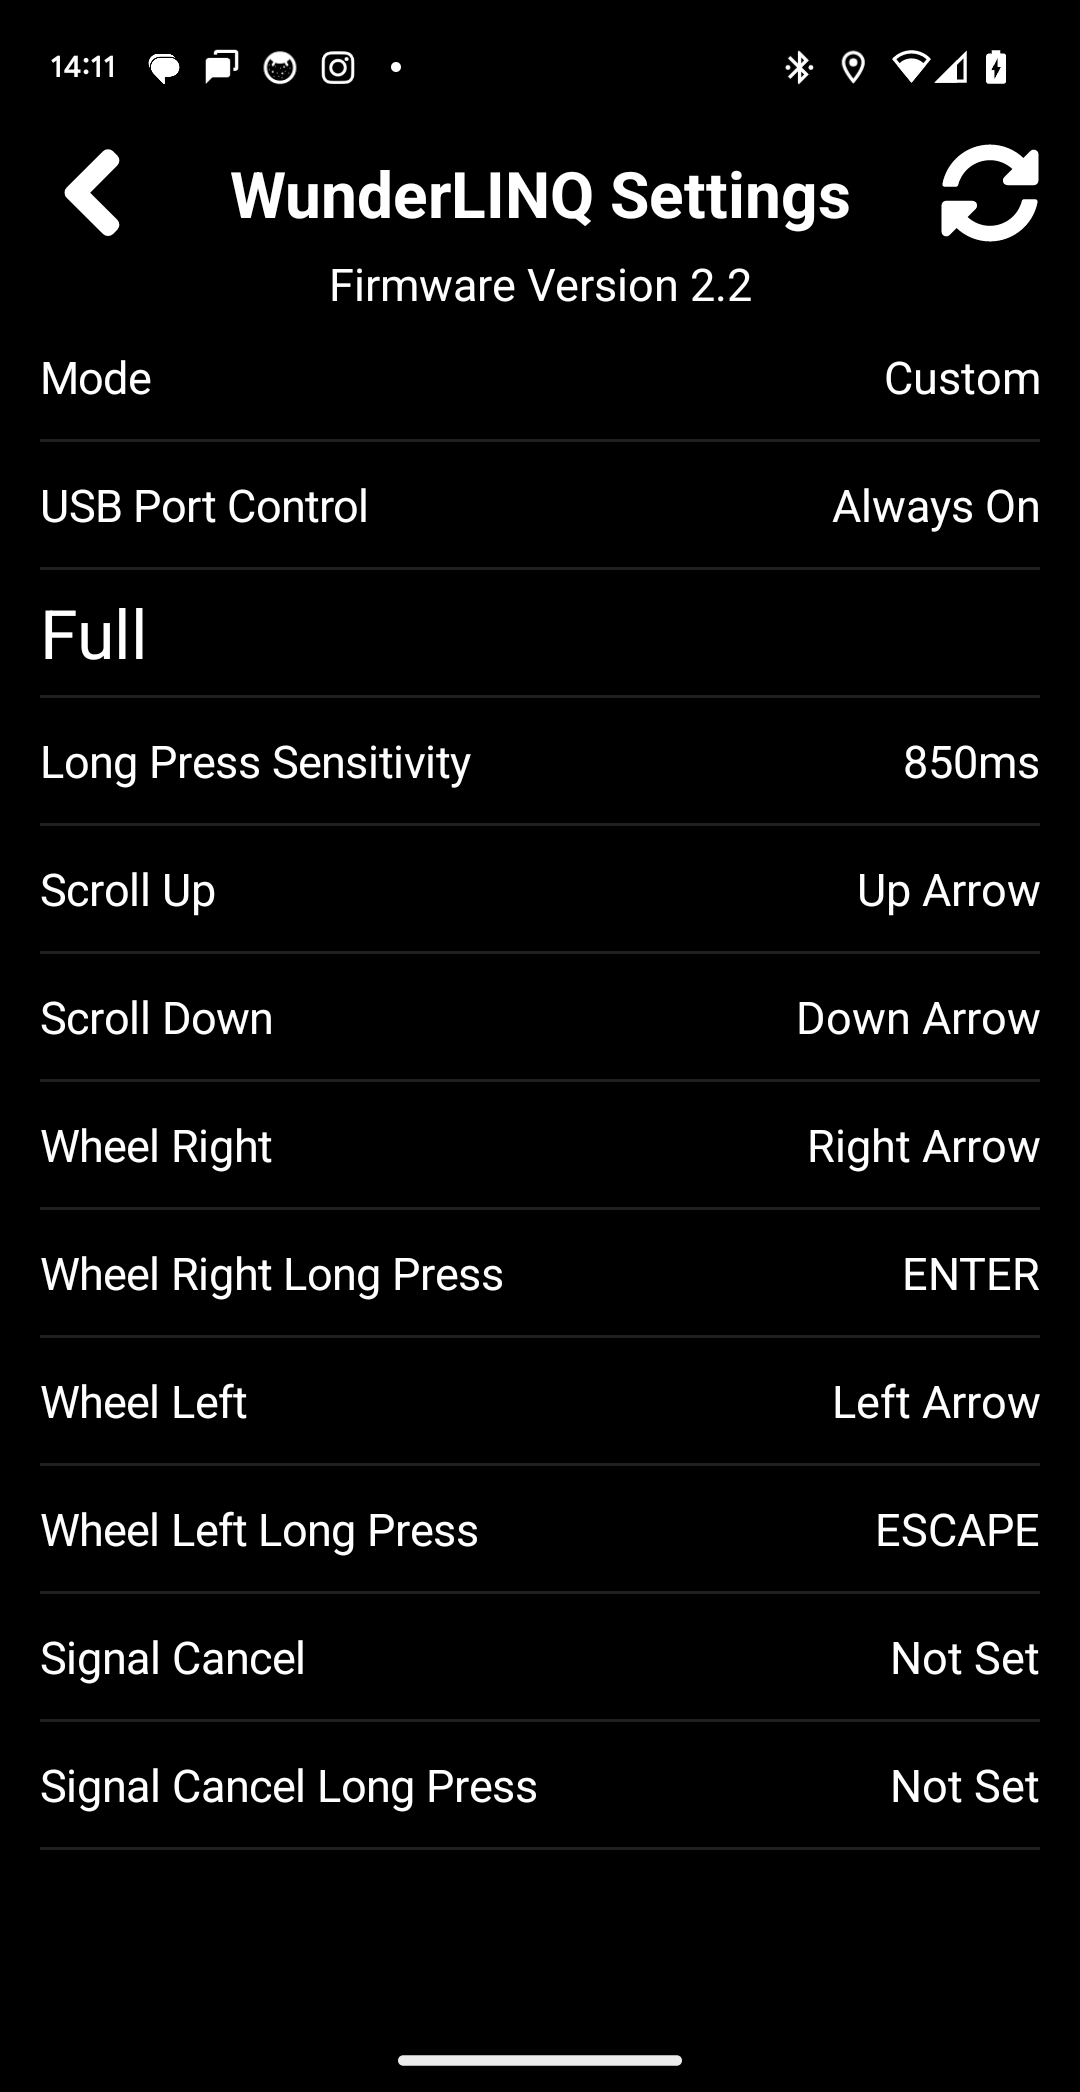
In Custom mode you can select the individual settings to customize.

The USB Port Control screen is used to adjust the status of the USB Power Port. Only available when mode is set to Custom.
Only available on the WunderLINQ Navigator.
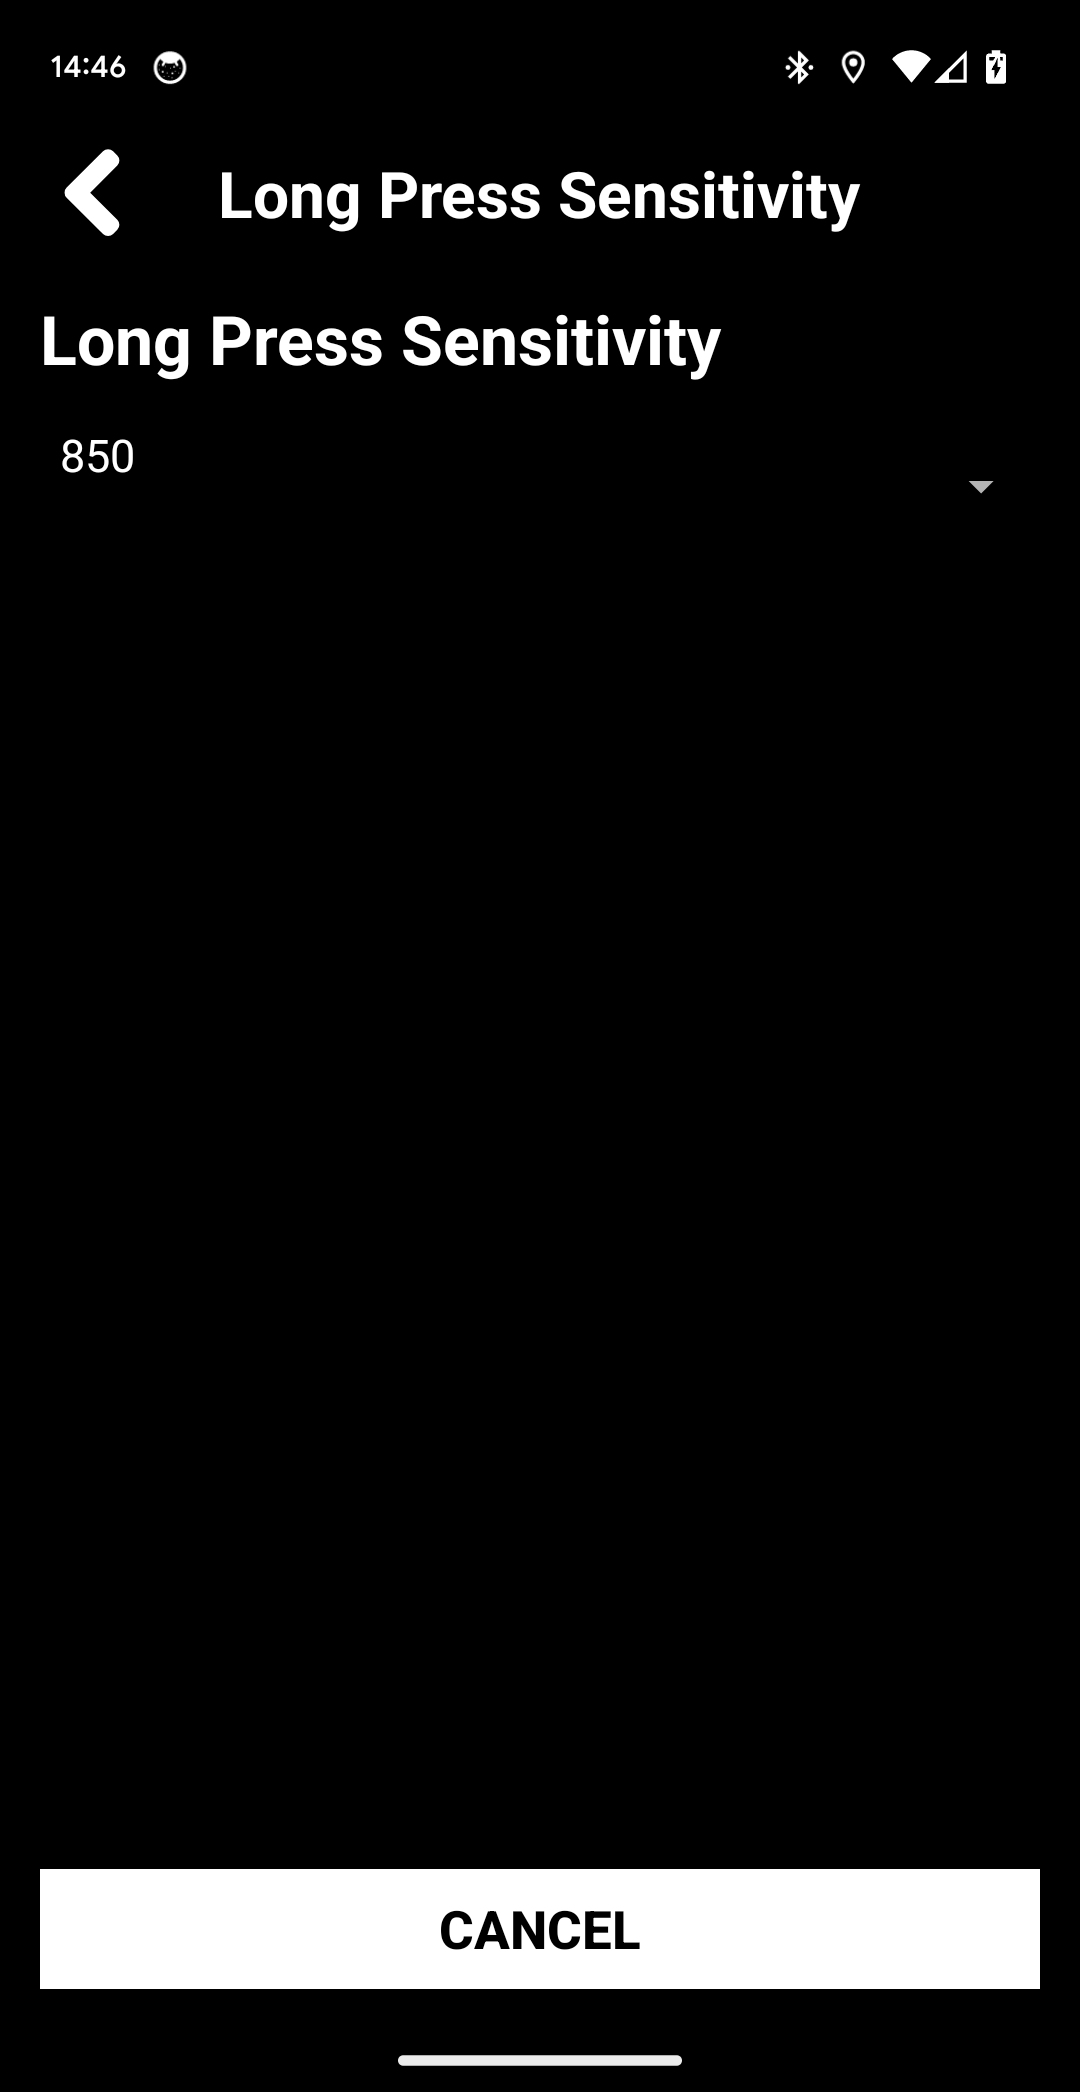
The sensitivity screens are used to adjust the long-press or double-press(RT/K1600) sensitivity. Only available when mode is set to Custom.
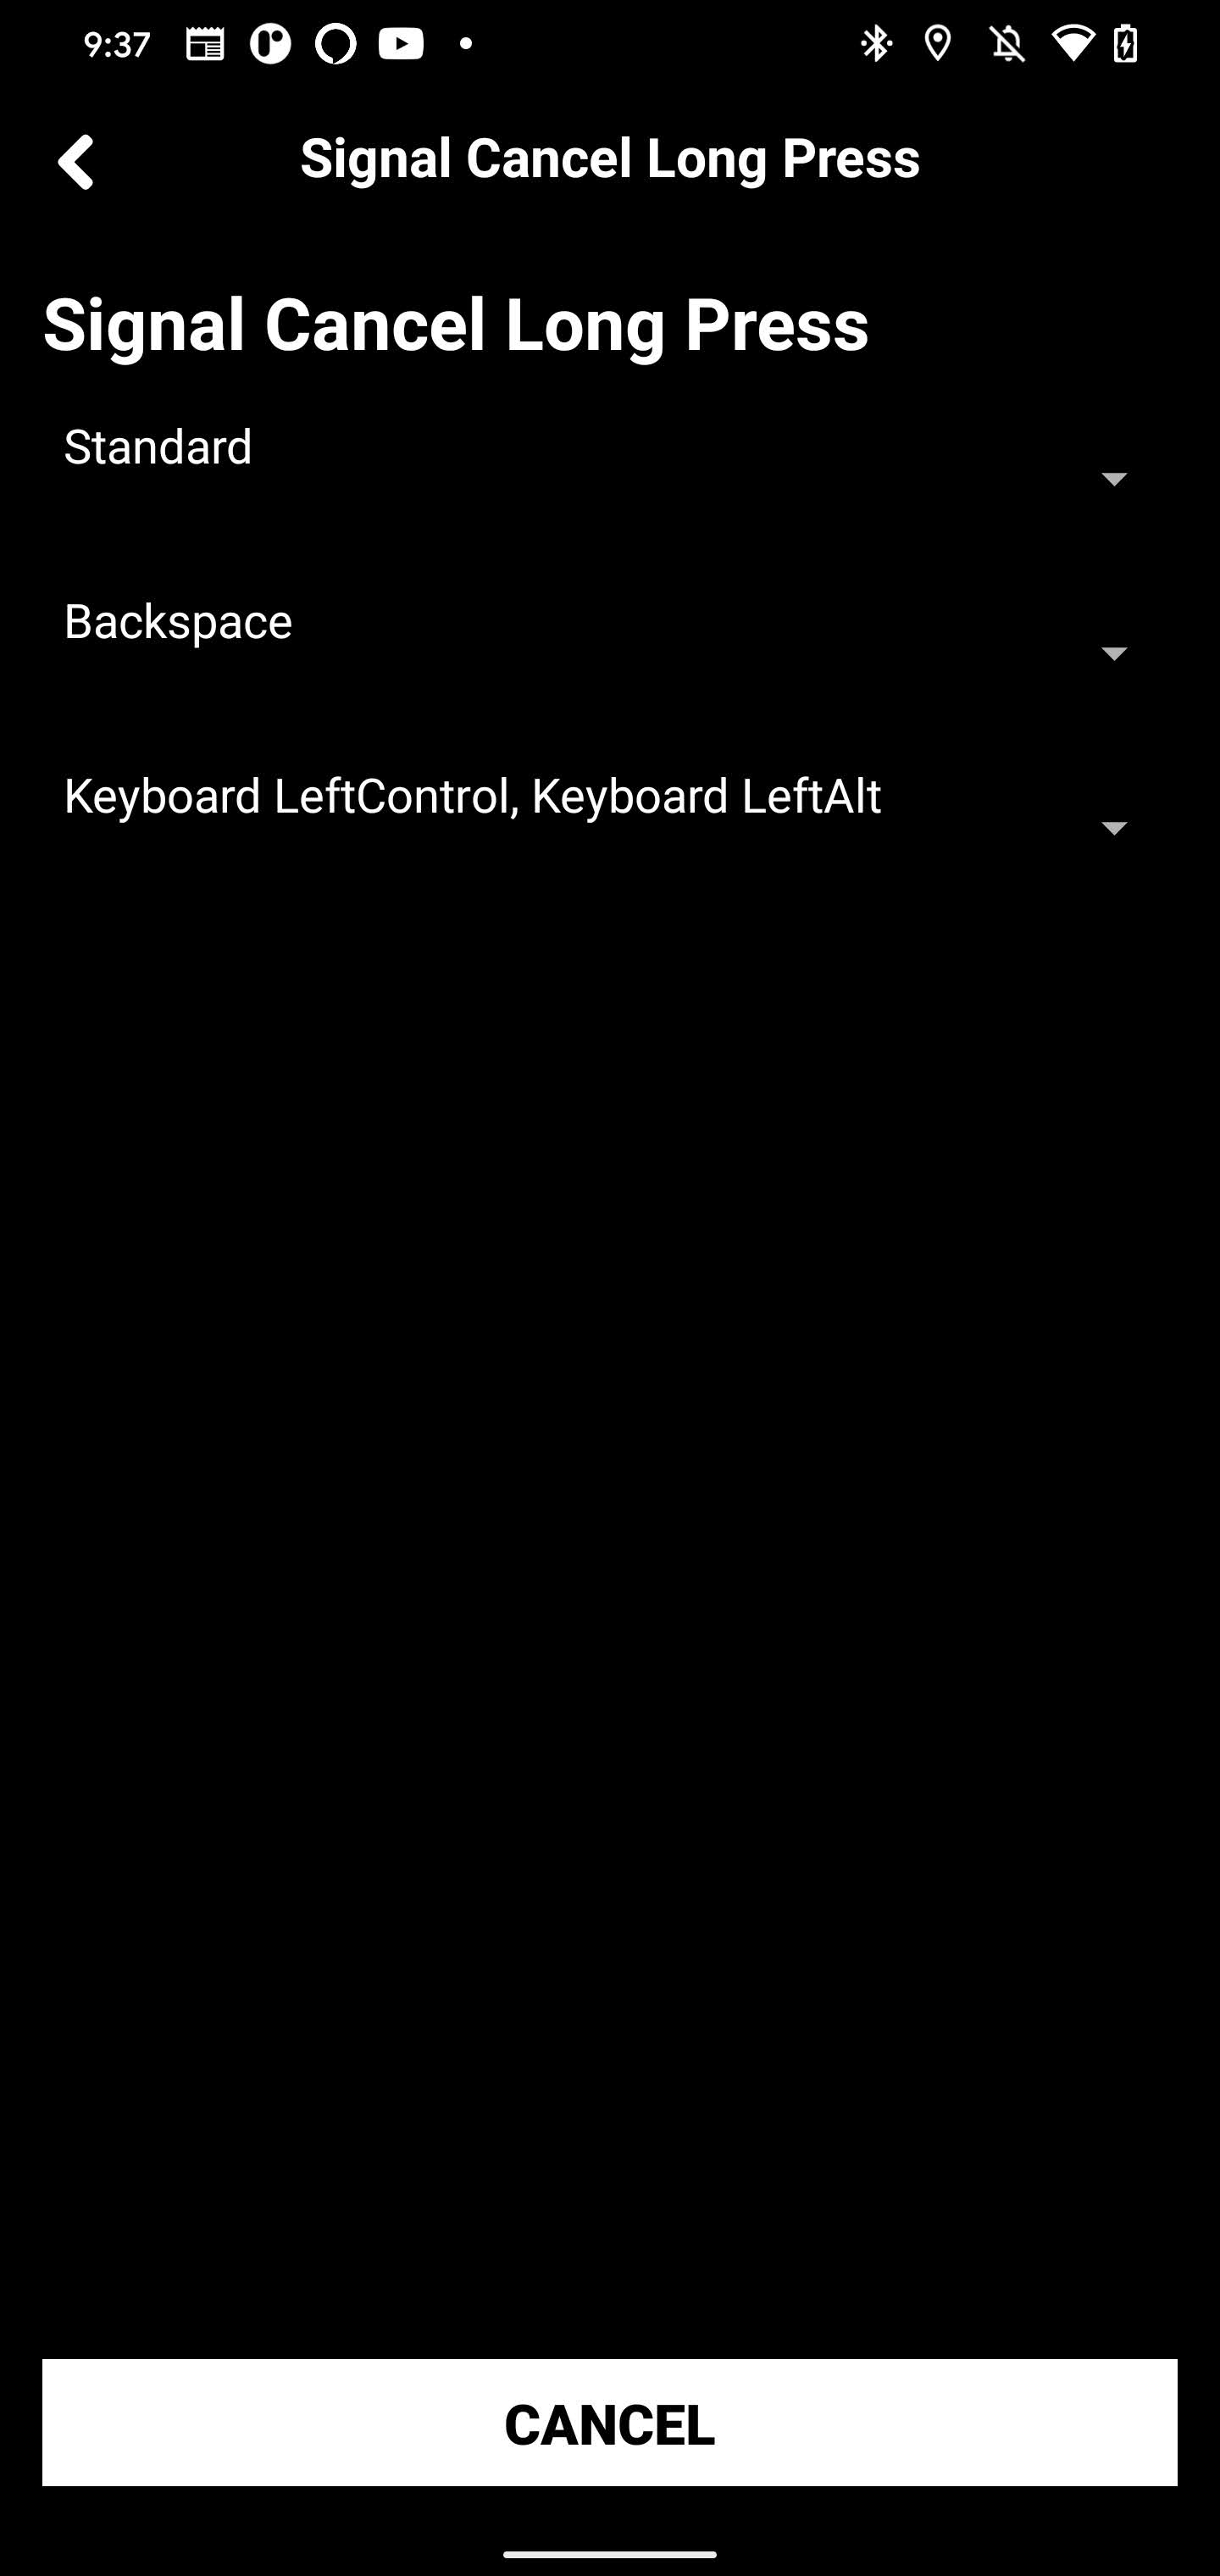
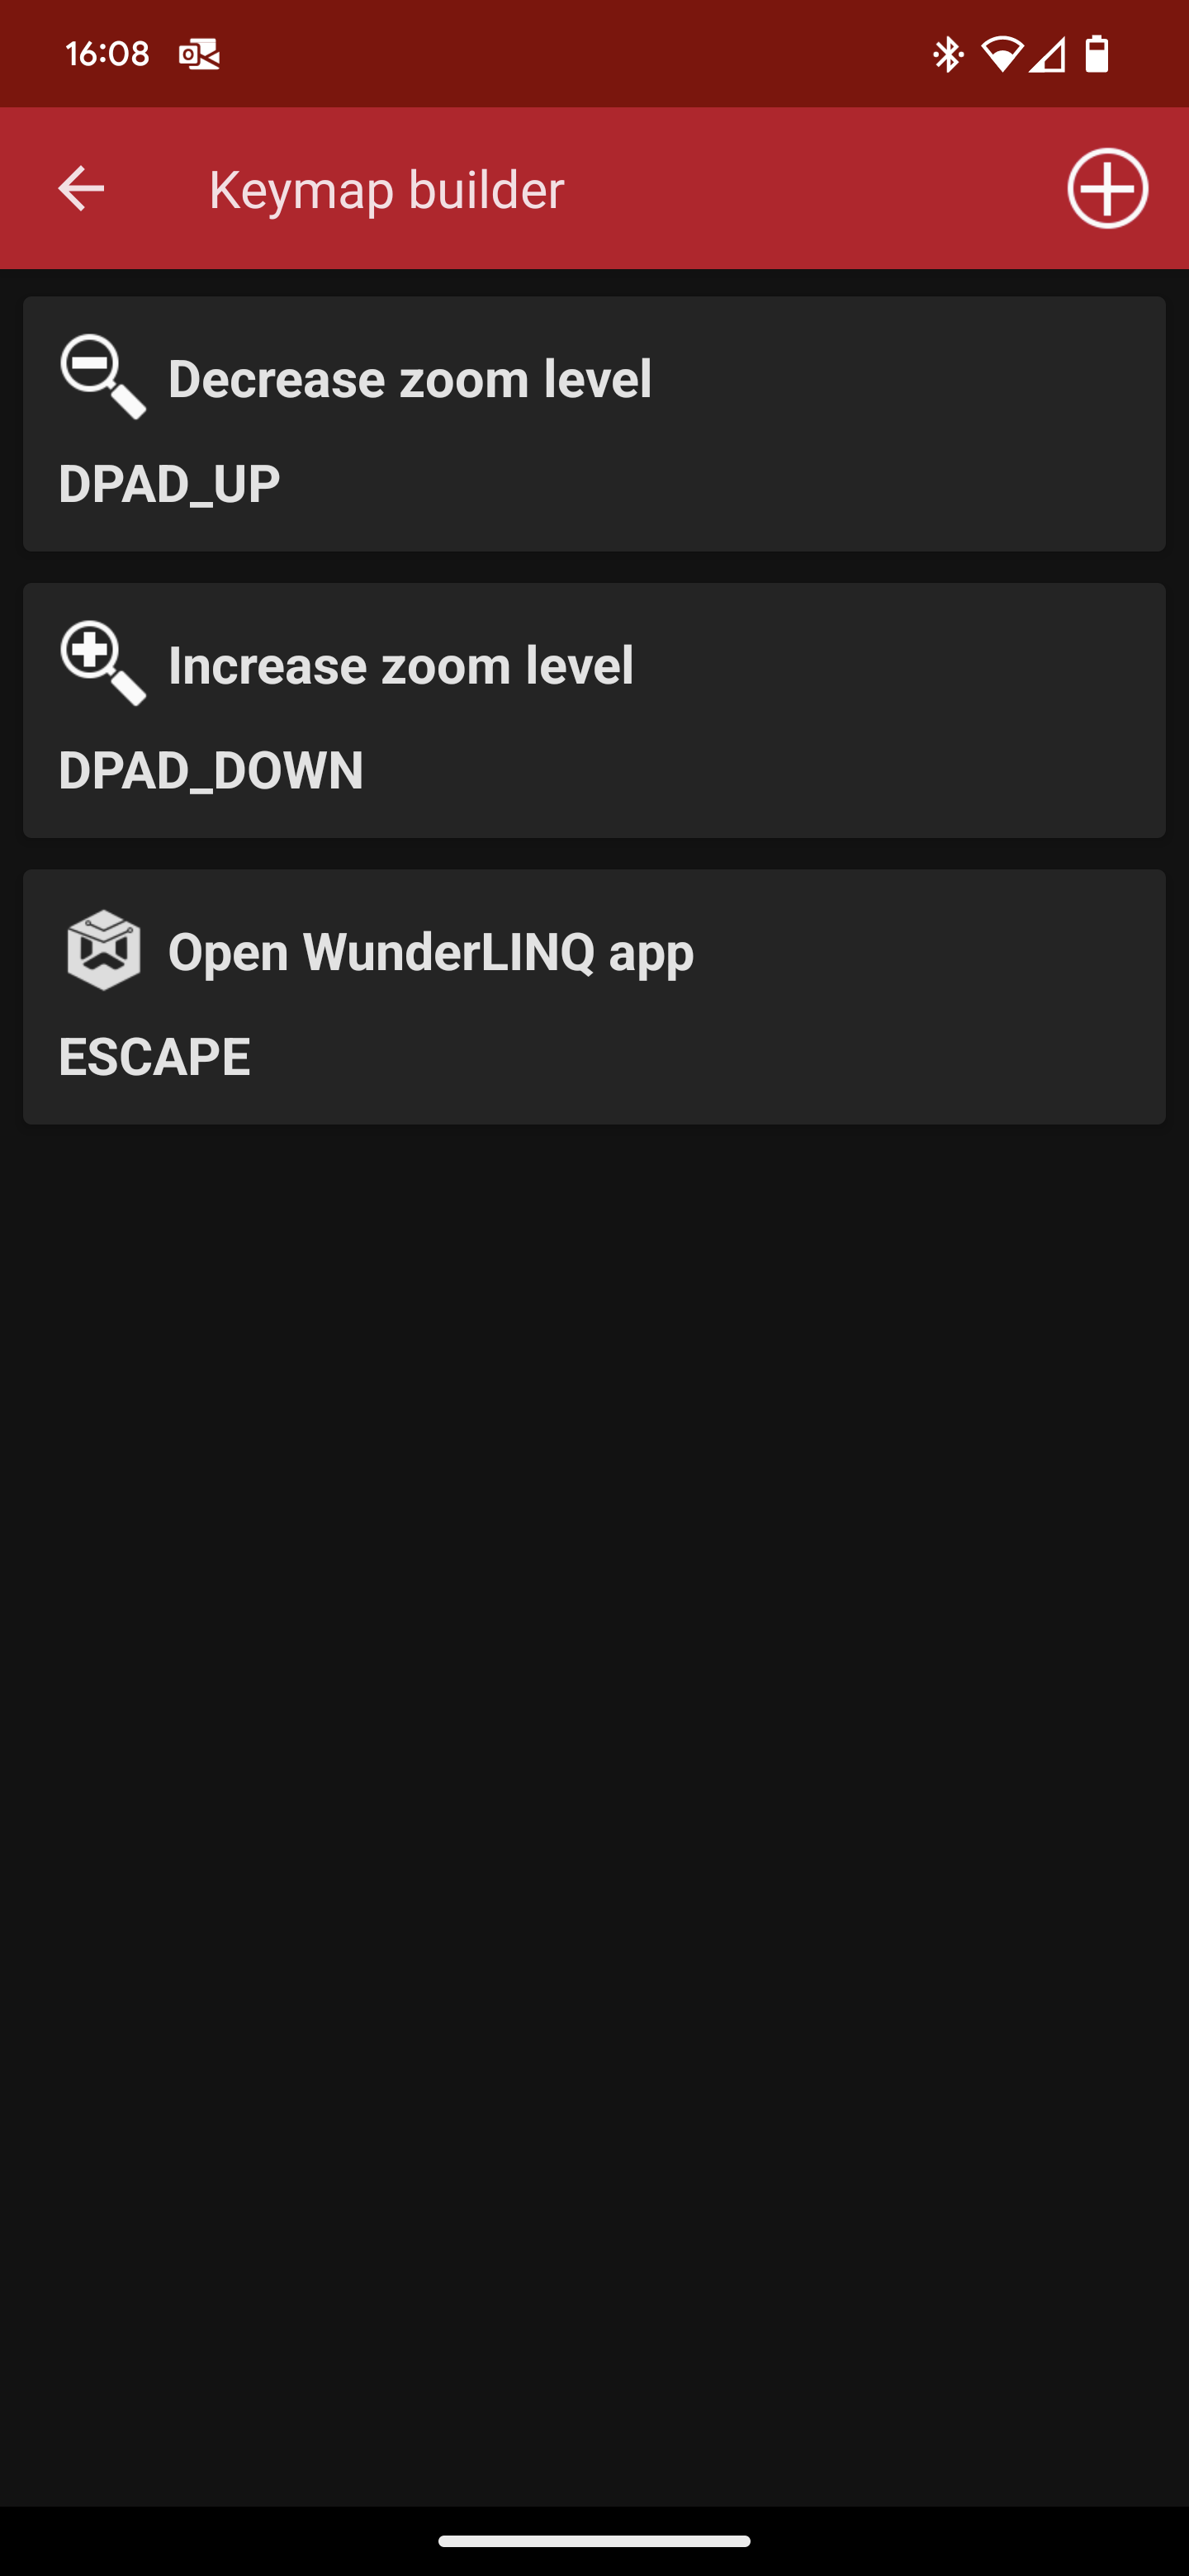
The Key mapping screen is launched by selecting the action you would like to edit once in Custom mode. This feature is meant for advanced users that have an understanding of the usage of the mappings in Android and iOS.
After saving your settings please remove your WunderLINQ from the cradle then reinsert to perform a full reset. Please remember that changing key mapping may impact your ability to navigate the WunderLINQ app with the wheel.
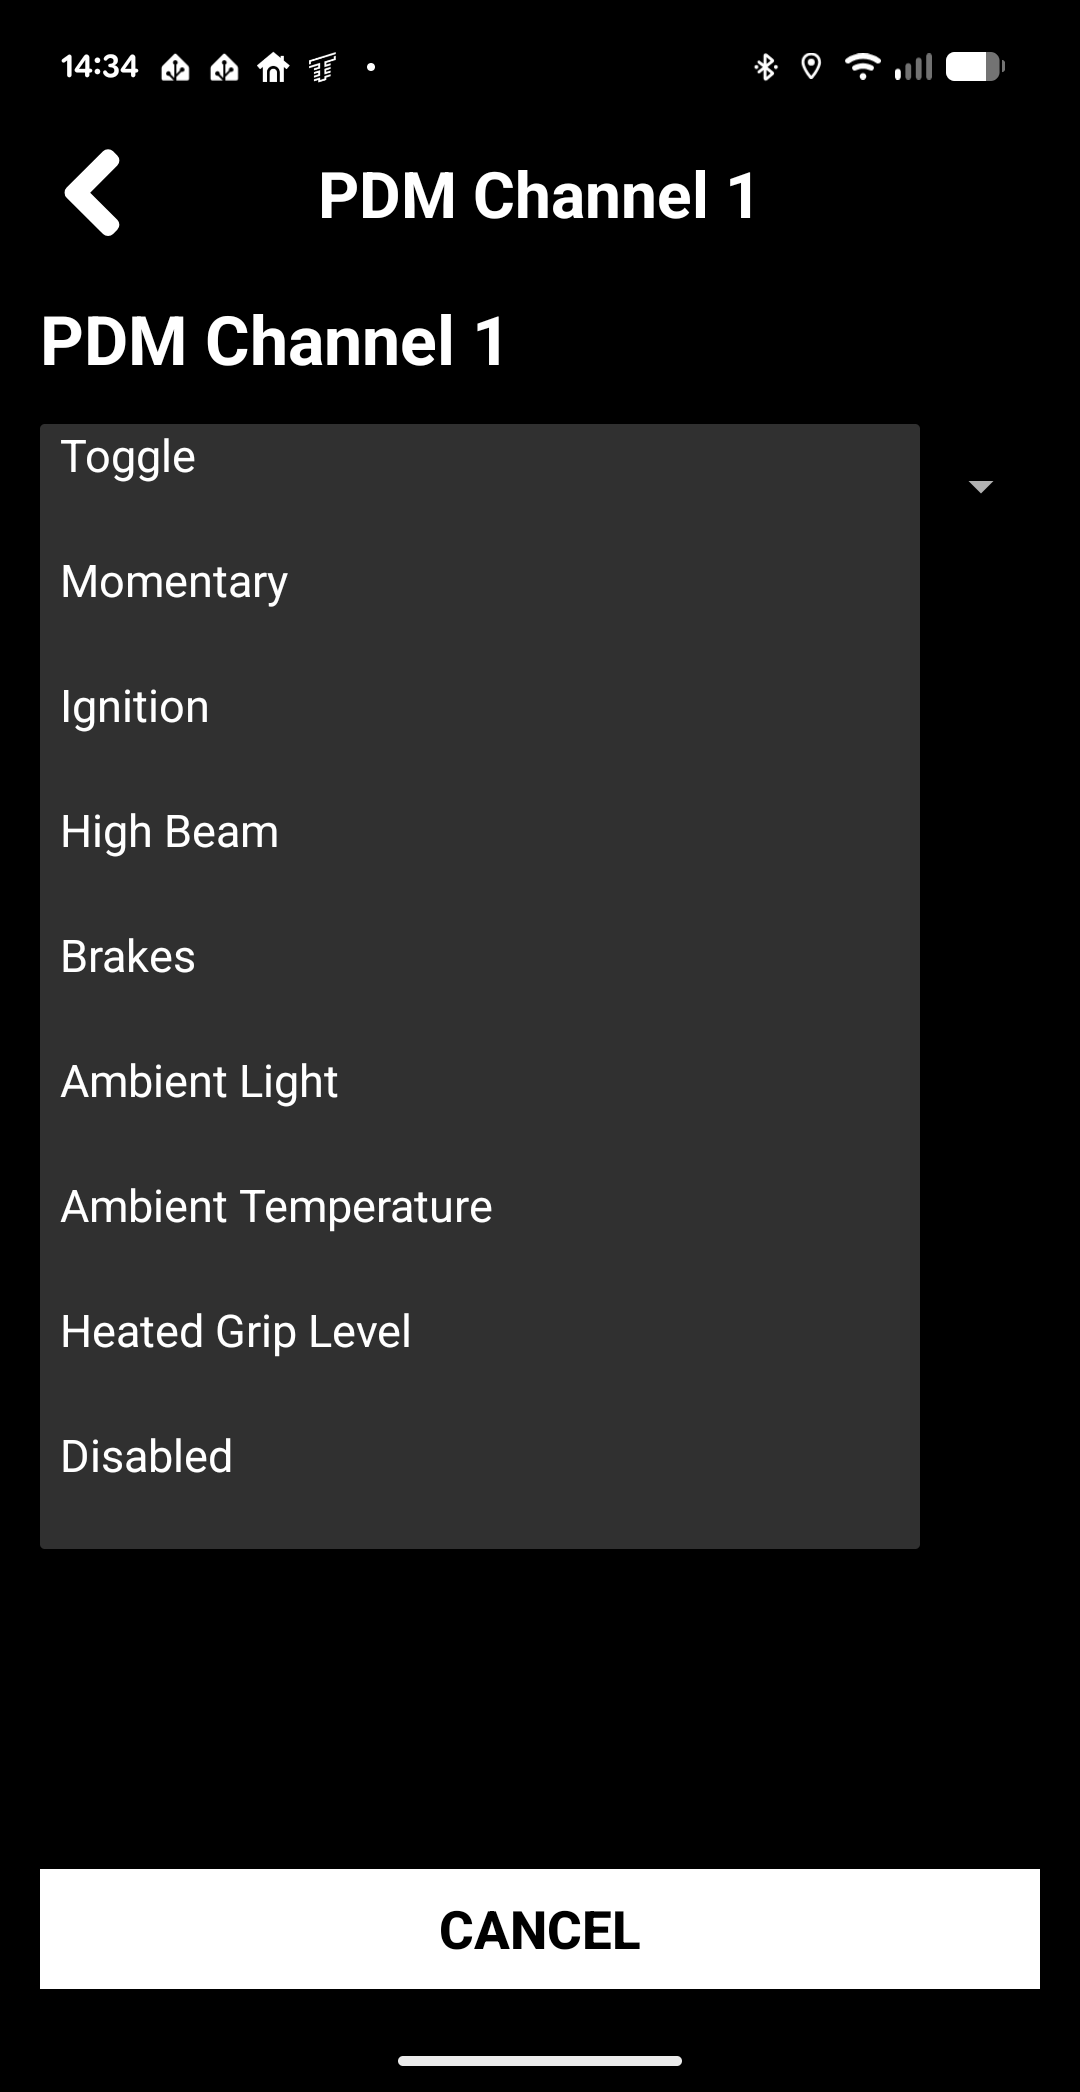
The PowerLINQ channel configuration screen allows you to set the trigger for the selected channel.
Only available on compatible WunderLINQs with installed optional PowerLINQ.
Data Grid Widget
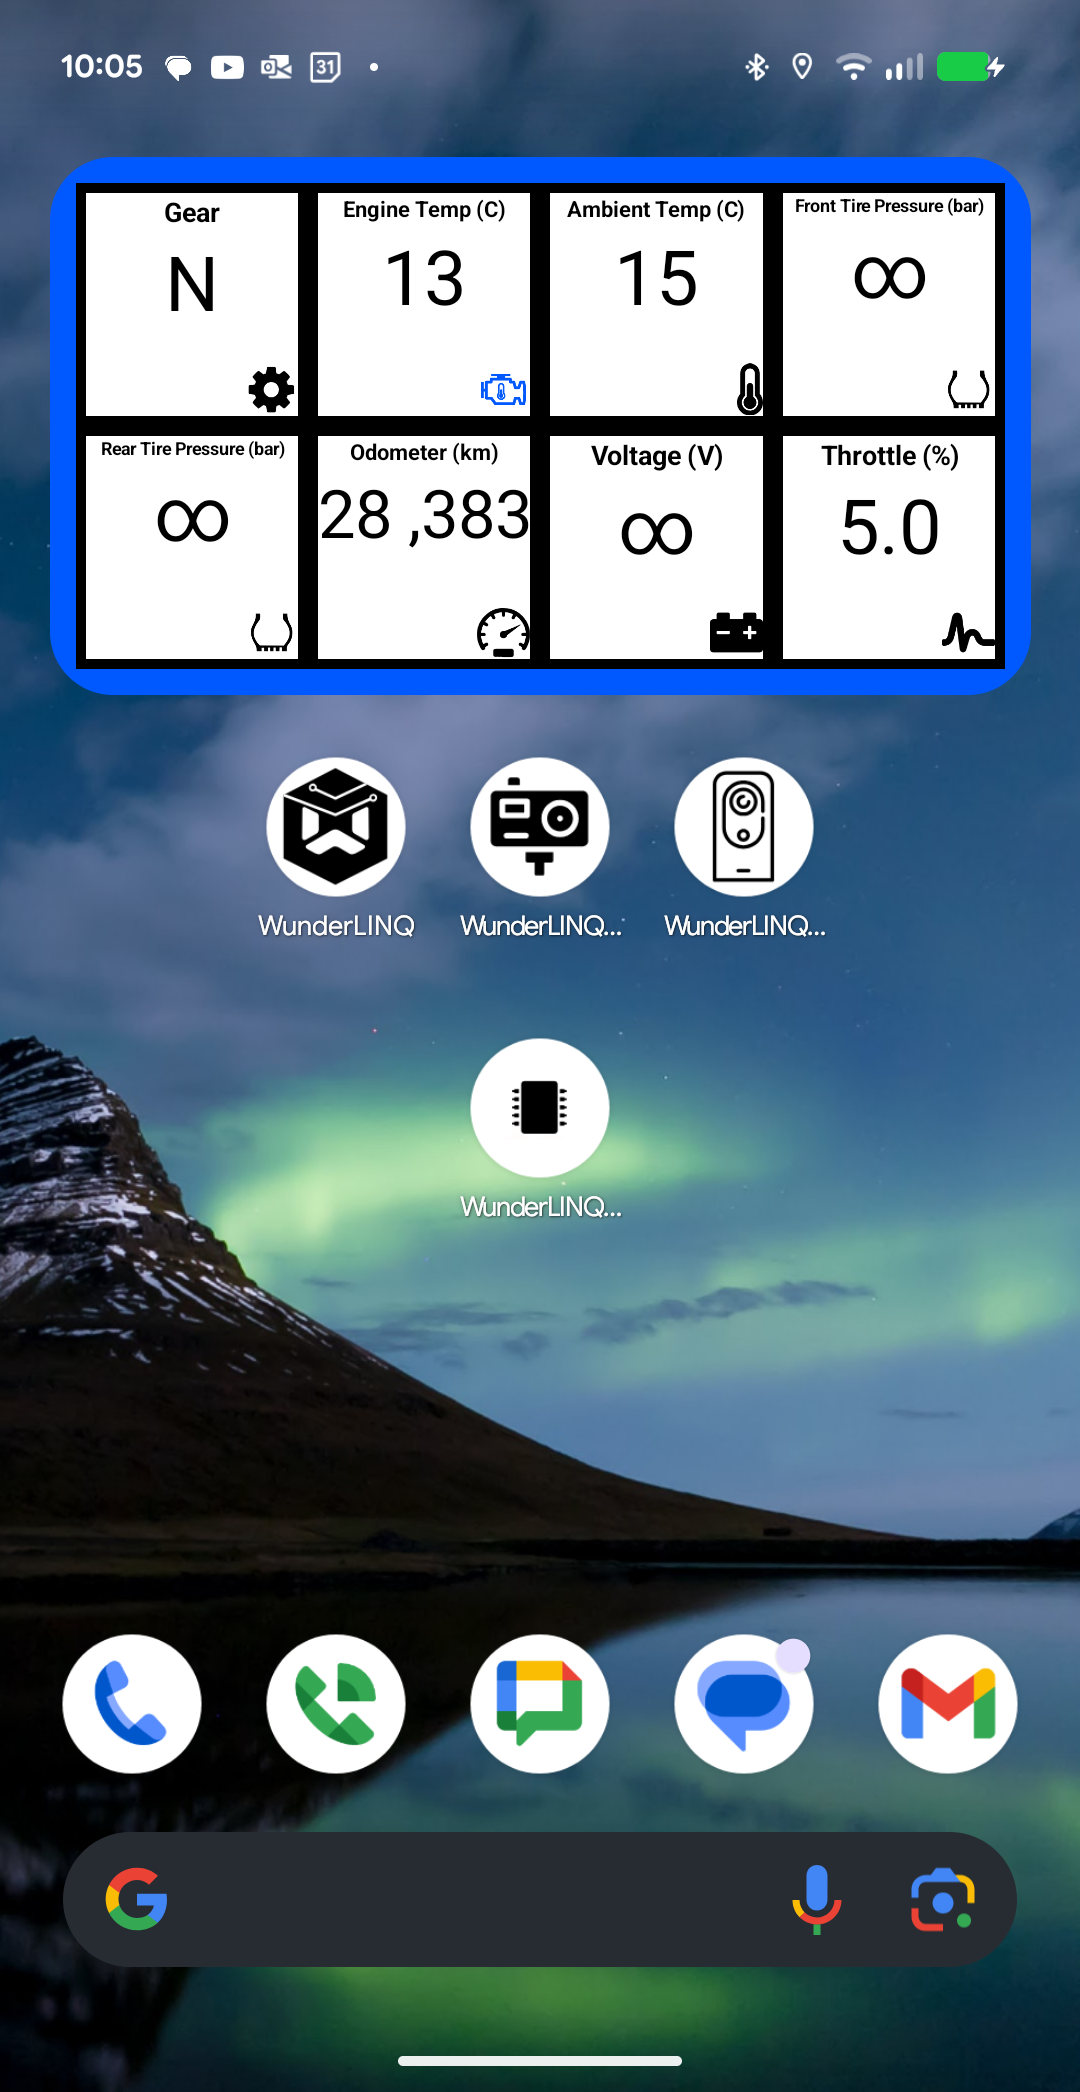
The Data Grid home screen widget, displays your first eight configured data cells and displays a focus hightlight if enabled.
Integrations and Tweaks
Android Trusted Device
Android allows for the setting of a trusted device to prevent device lock when that device is nearby. By trusting the WunderLINQ device this will prevent accidental device locking in certain senarios.
Android Auto WunderLINQ App
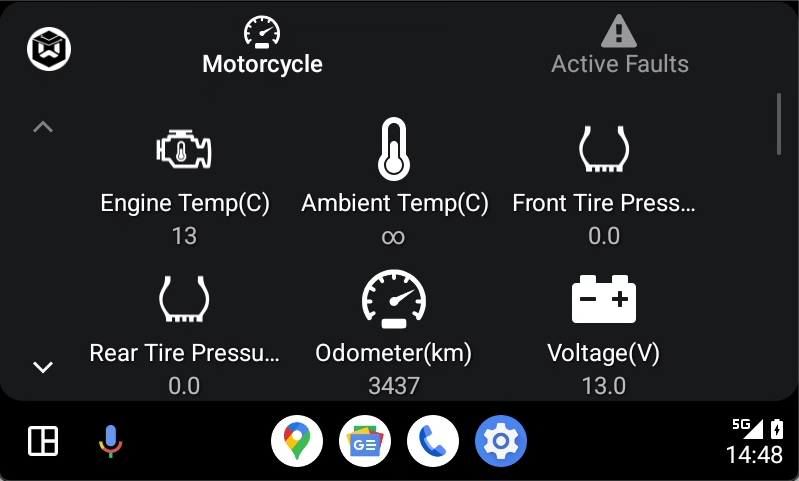
The WunderLINQ Android Auto app displays the Data Grid. These cells respect your Data Grid settings.
This screen will display any active faults.
Bmaps Navigation App
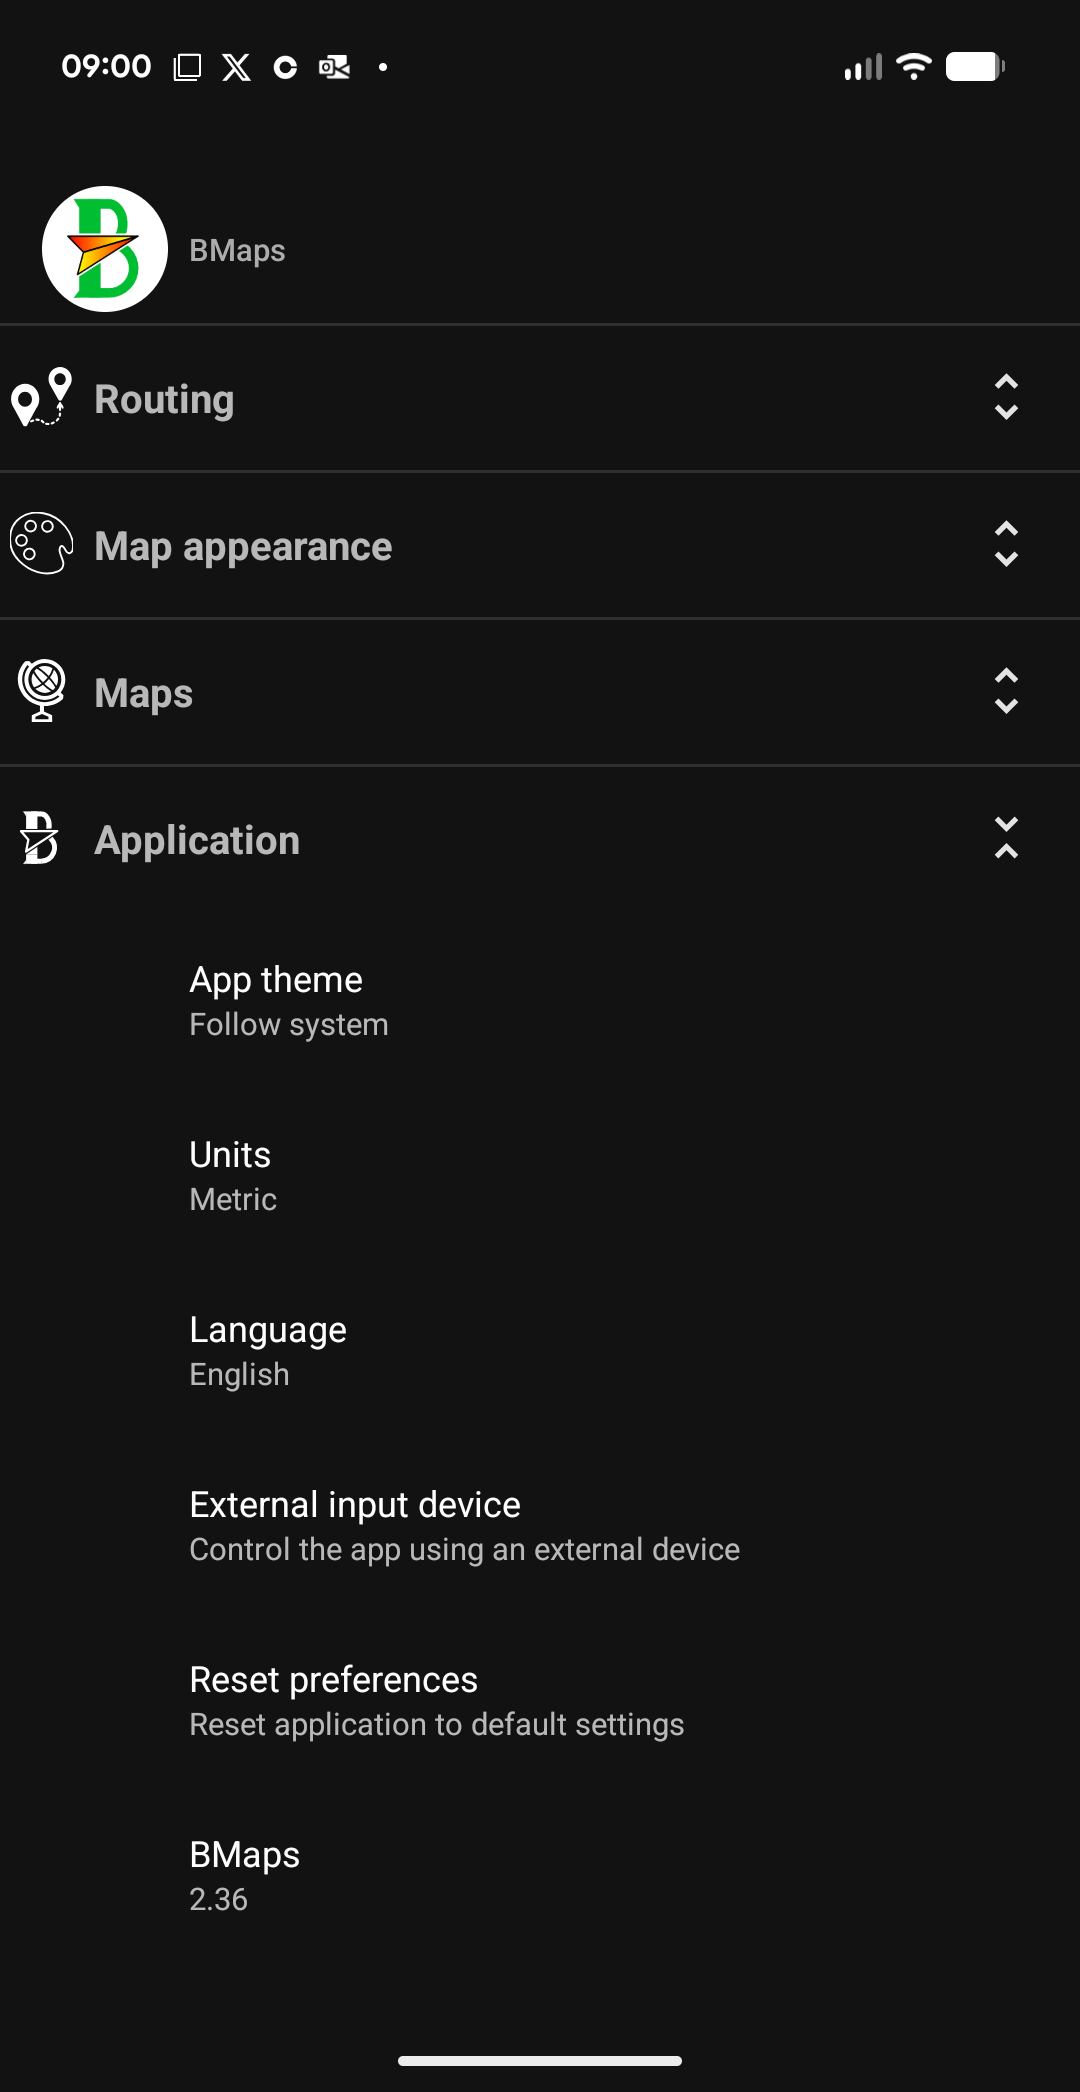
Includes WunderLINQ support for Map Zooming and returning to the WunderLINQ App.
Open Settings and select Application
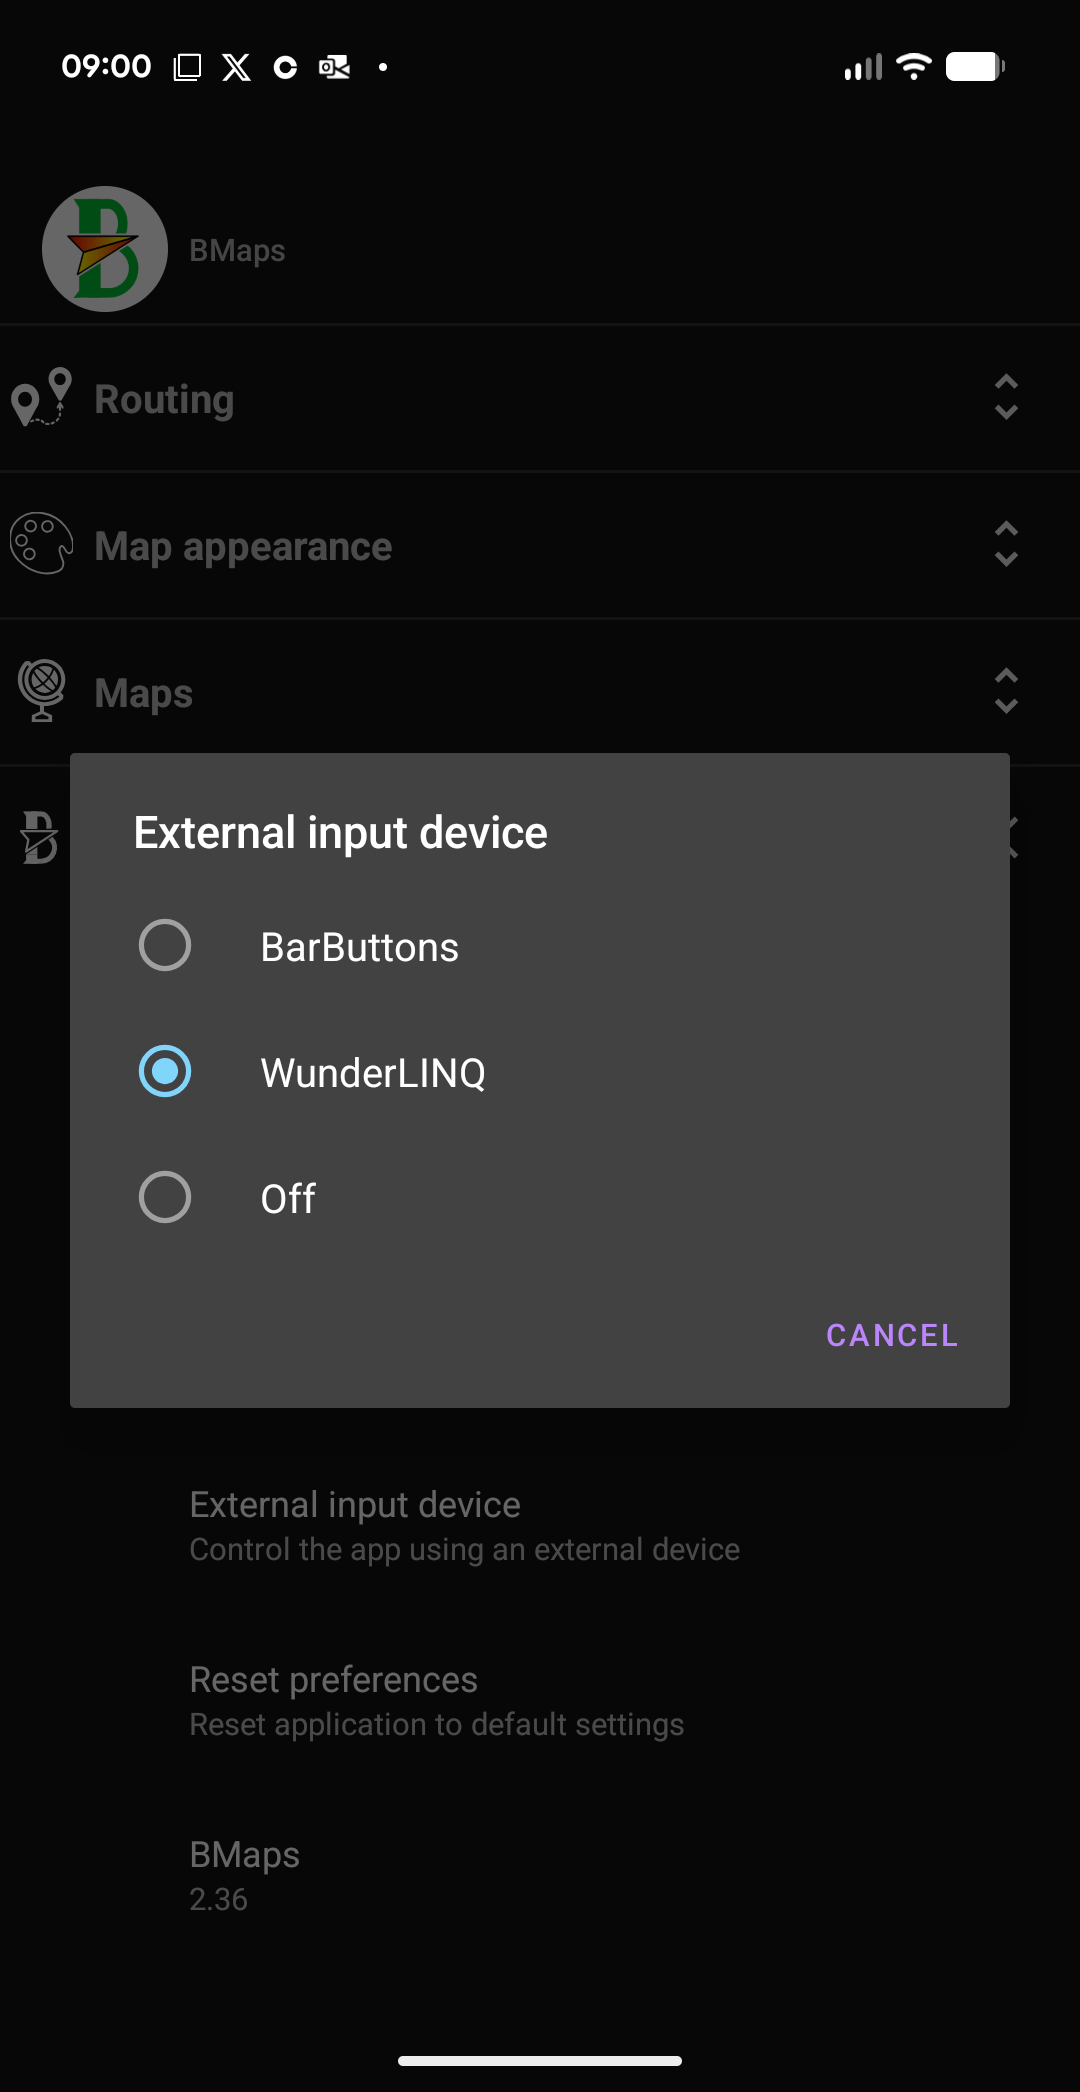
Select External input device and select WunderLINQ
Cartograph Maps Navigation App
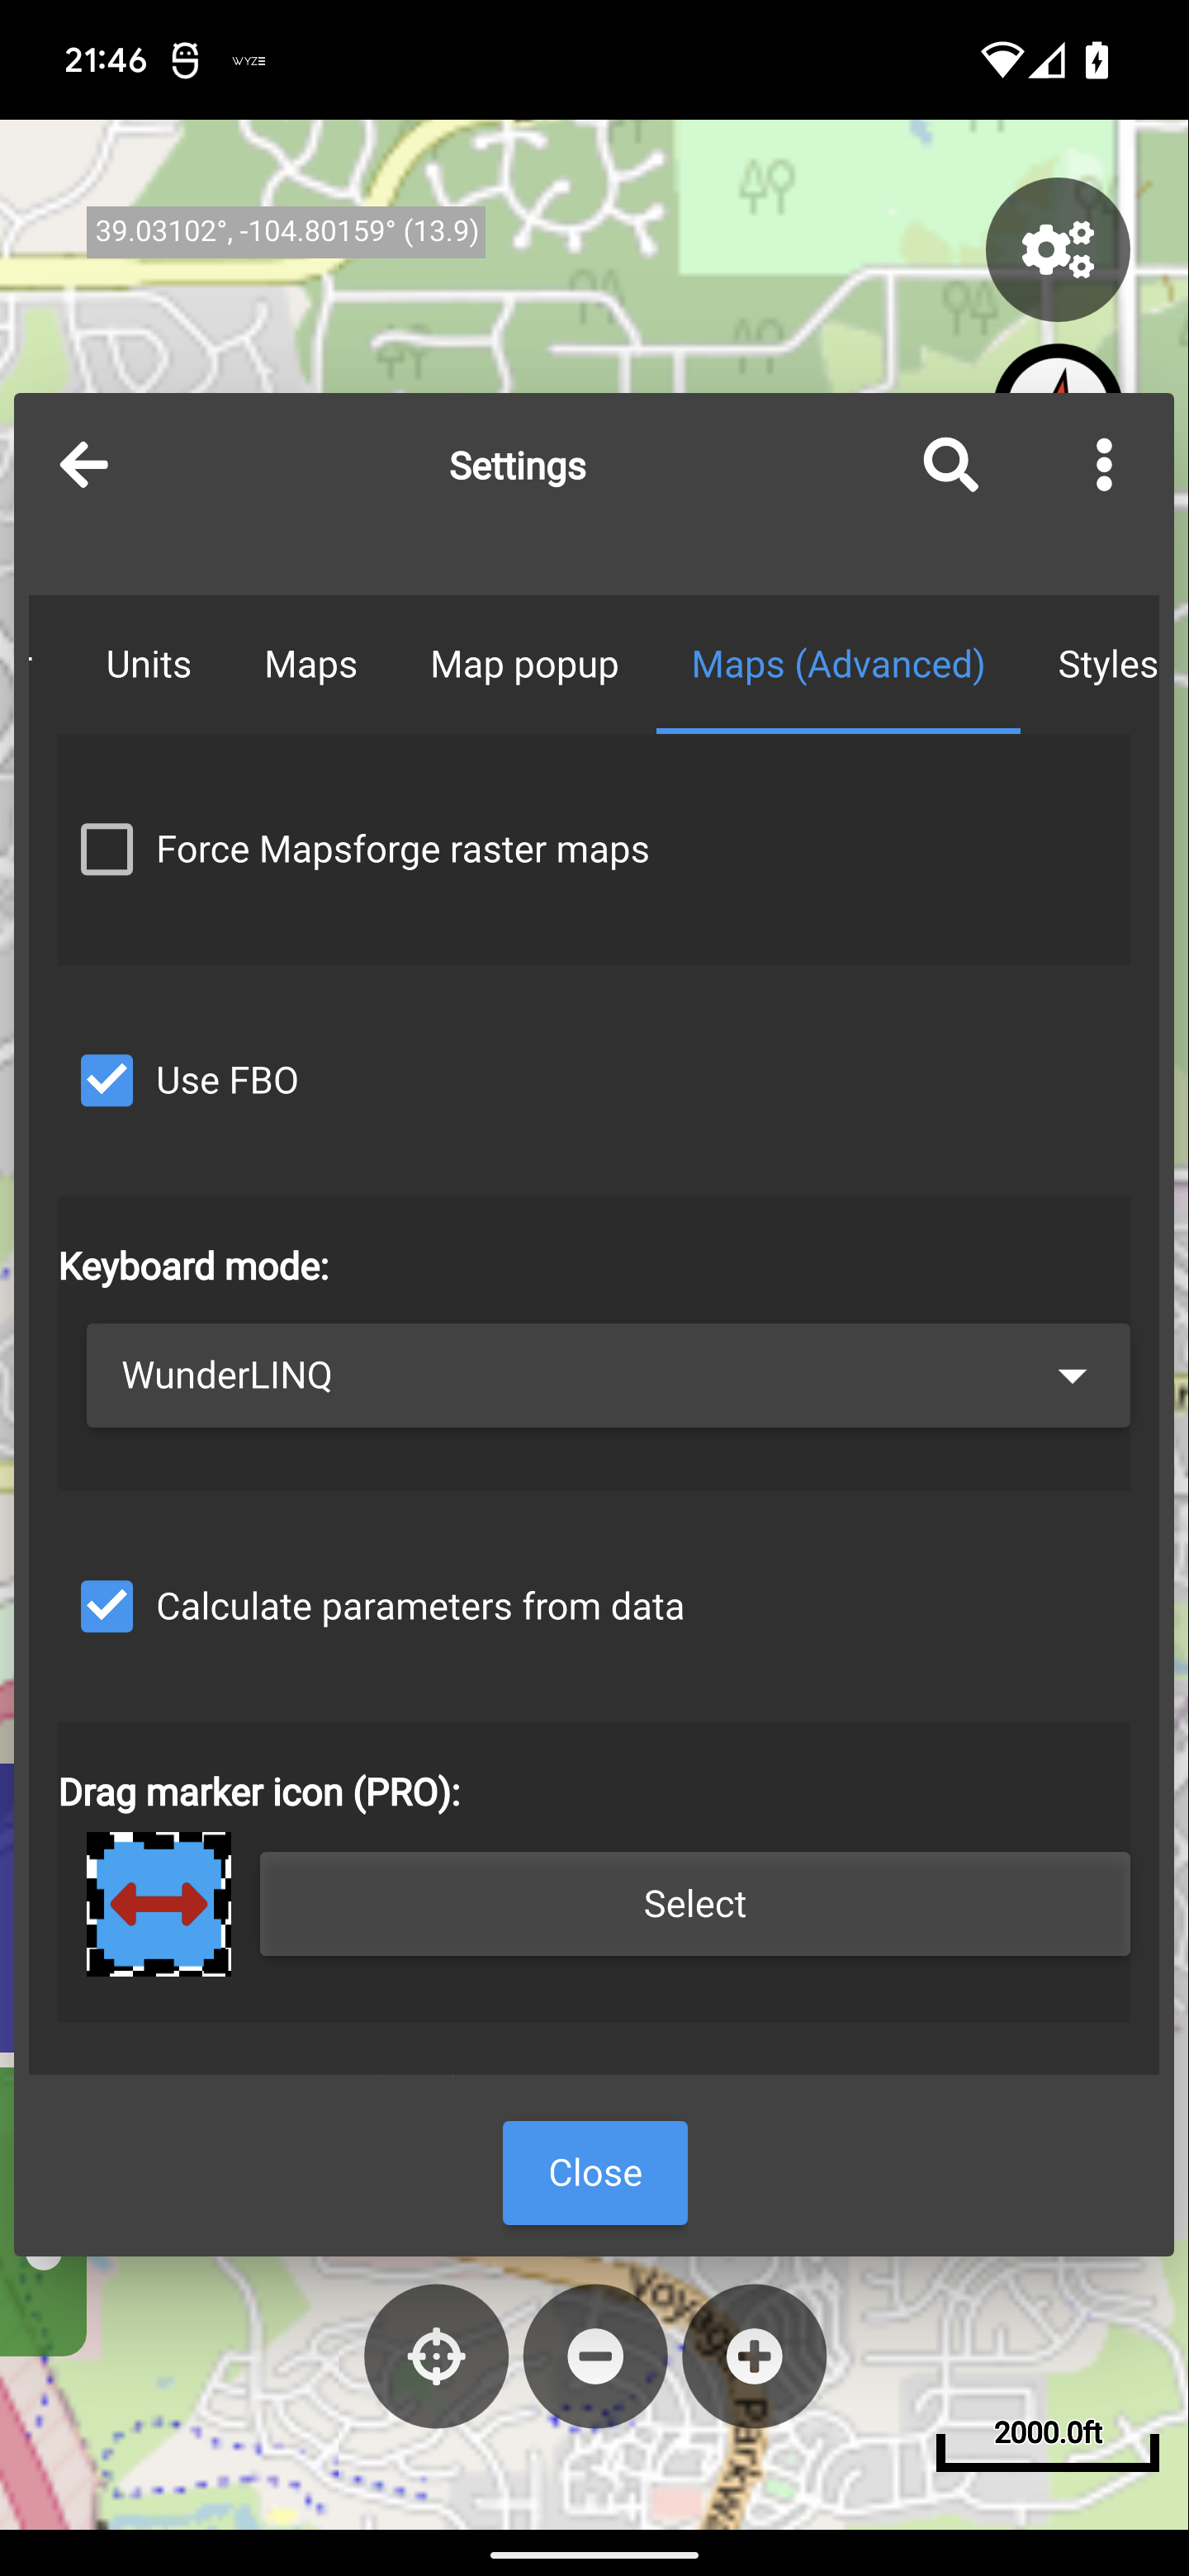
Includes WunderLINQ support for Map Zooming and returning to the WunderLINQ App.
Set Keyboard mode to WunderLINQ under Maps(Advanced) Settings.
Cruiser Navigation App
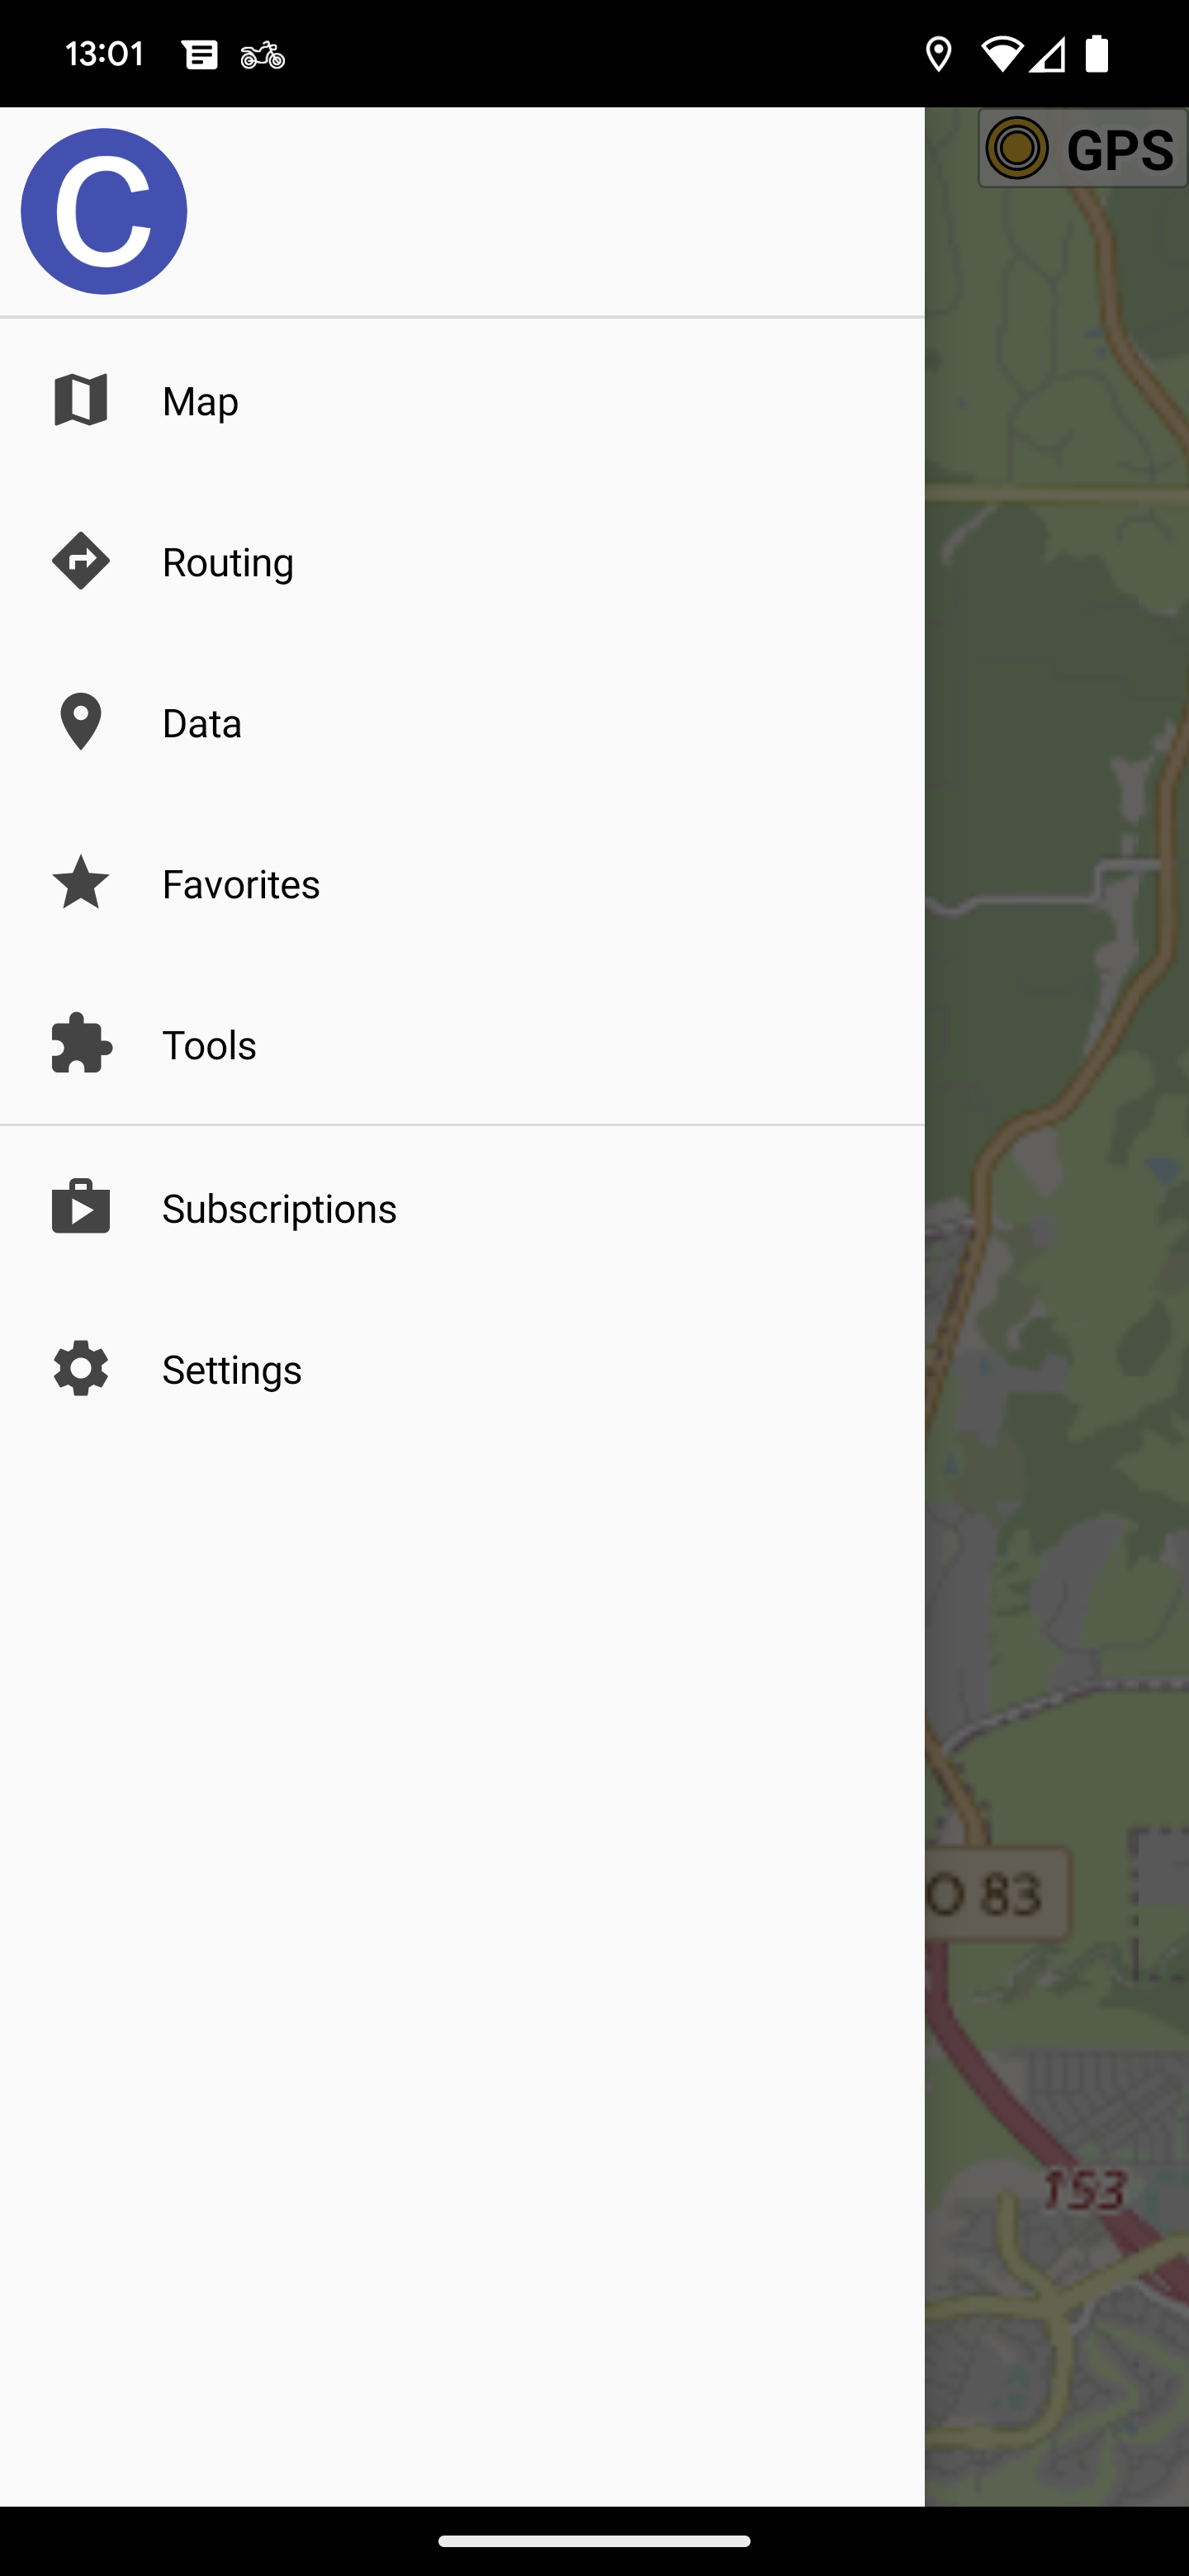
Includes WunderLINQ support for Map Zooming and returning to the WunderLINQ App.
Open Settings and select Application
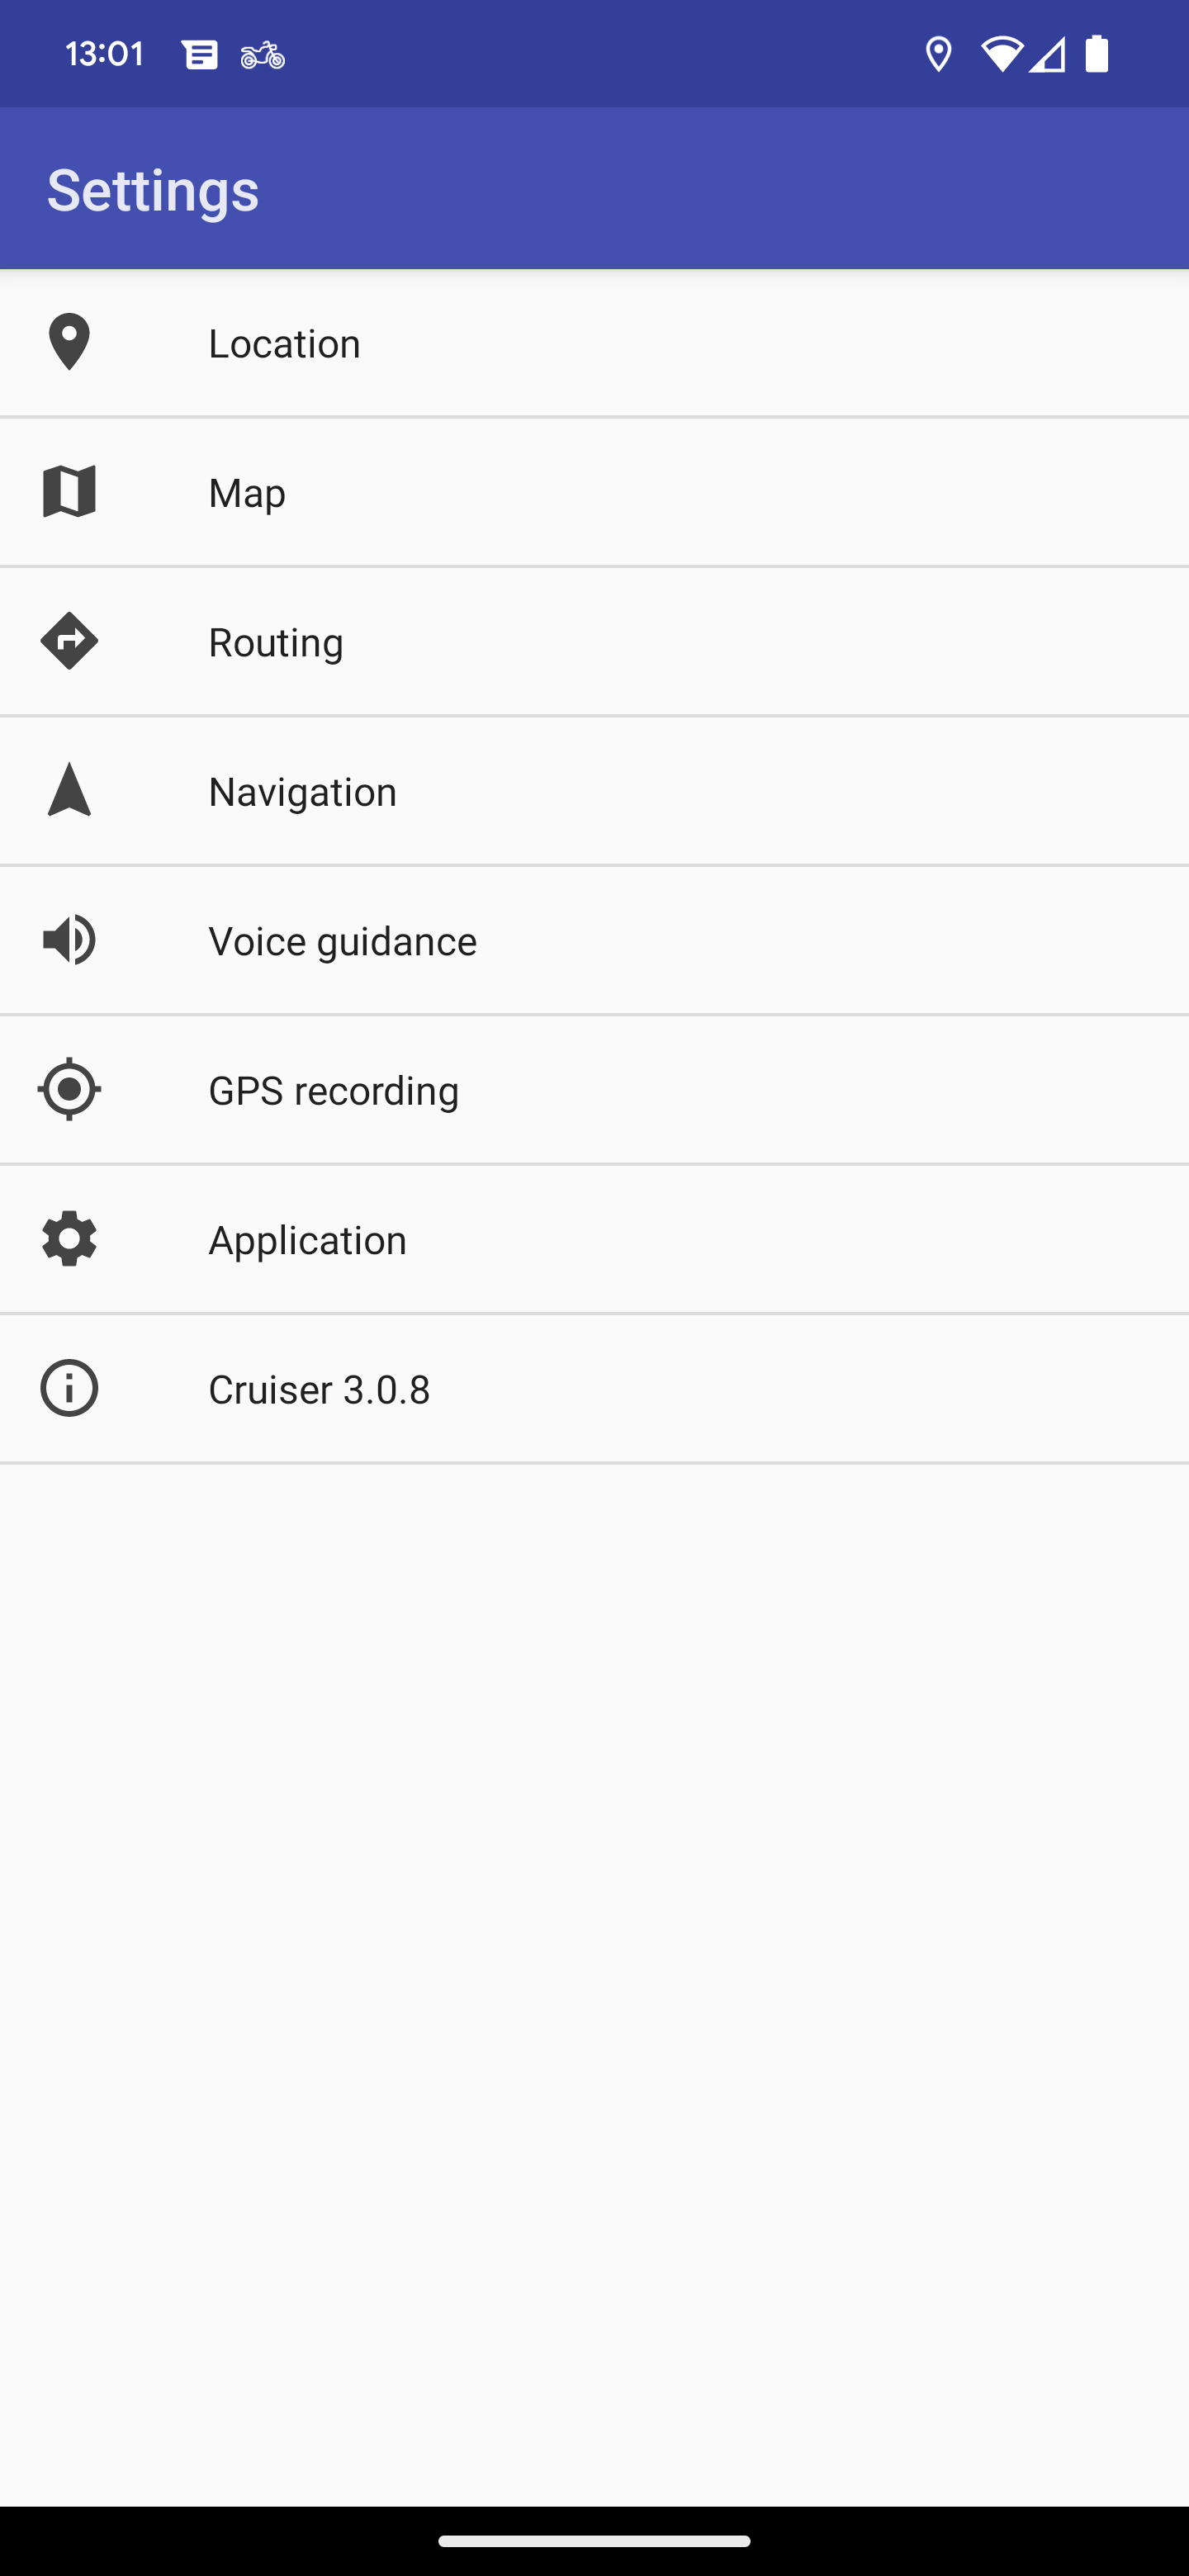
Select External input device
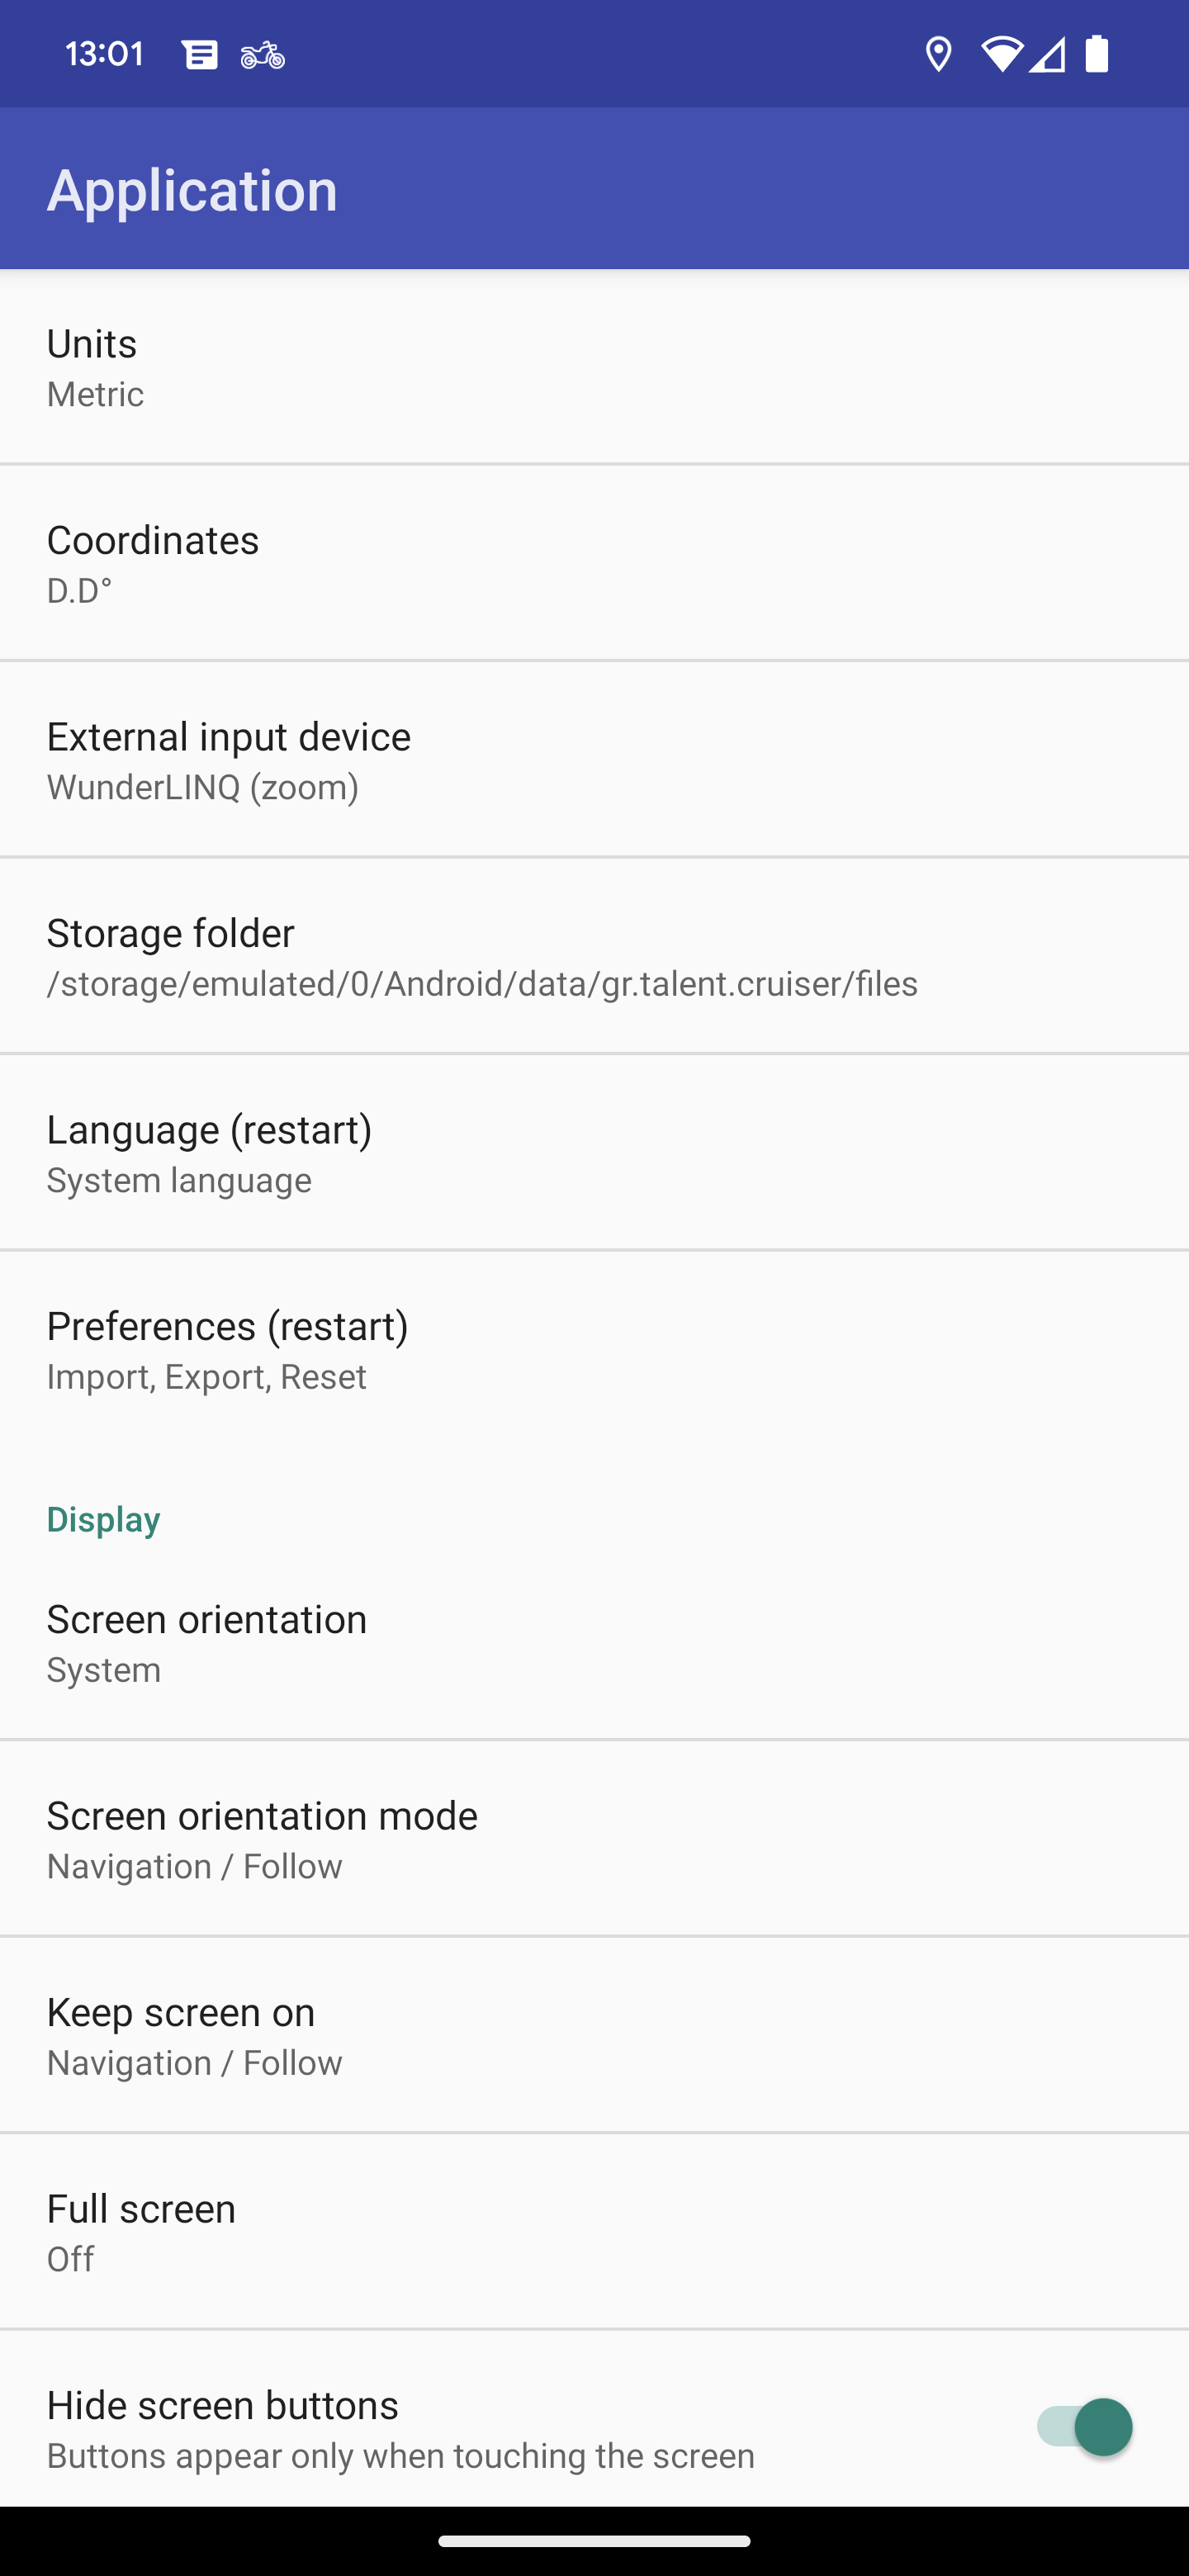
Select WunderLINQ (zoom) or WunderLINQ (move)

For fuel station routing enable them under Settings->Navigation-Display->Nearby
Drive Mode Dashboard 2 App
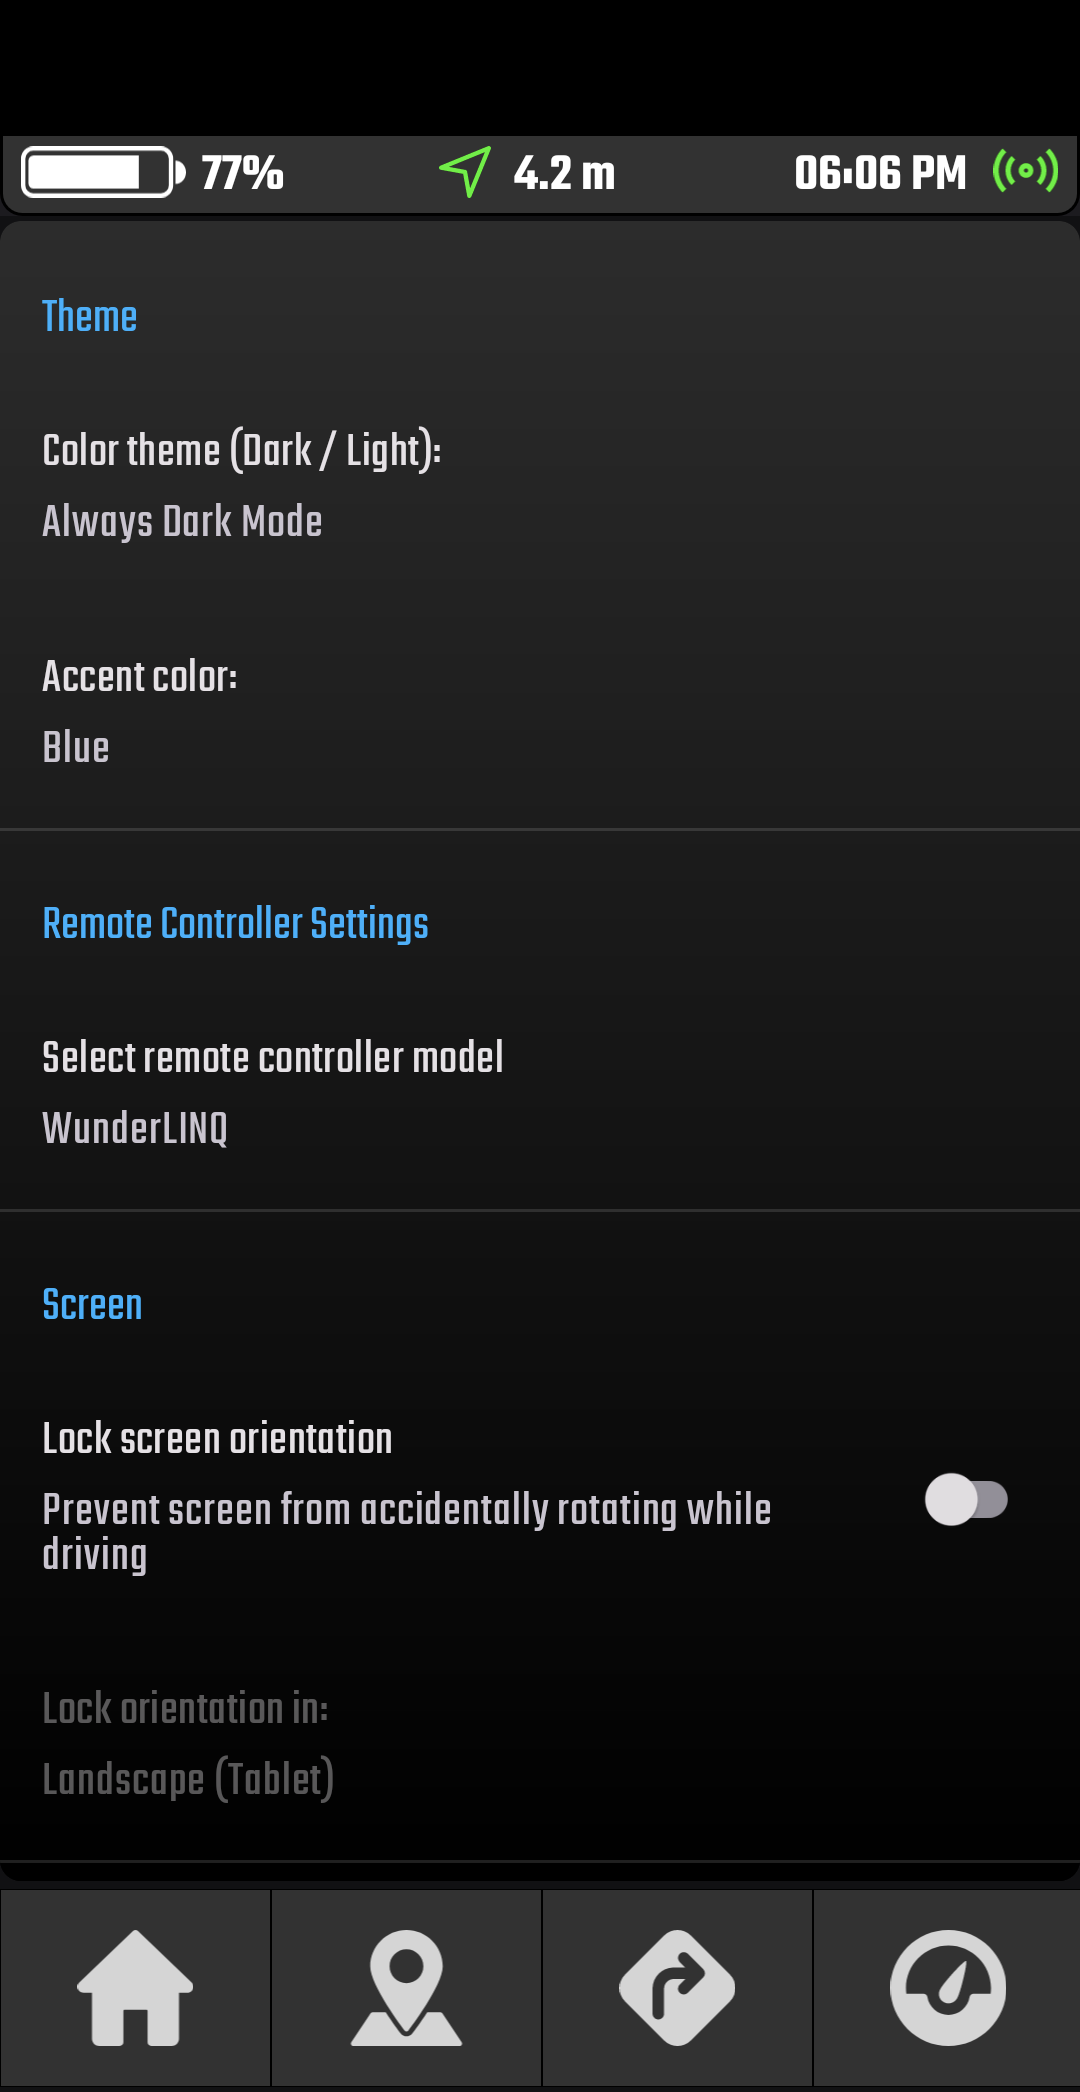
Provides a complete Dashboard that the WunderLINQ can control.
Open Settings and set WunderLINQ as the remote control.
Headunit Revived Android Auto Emulation App
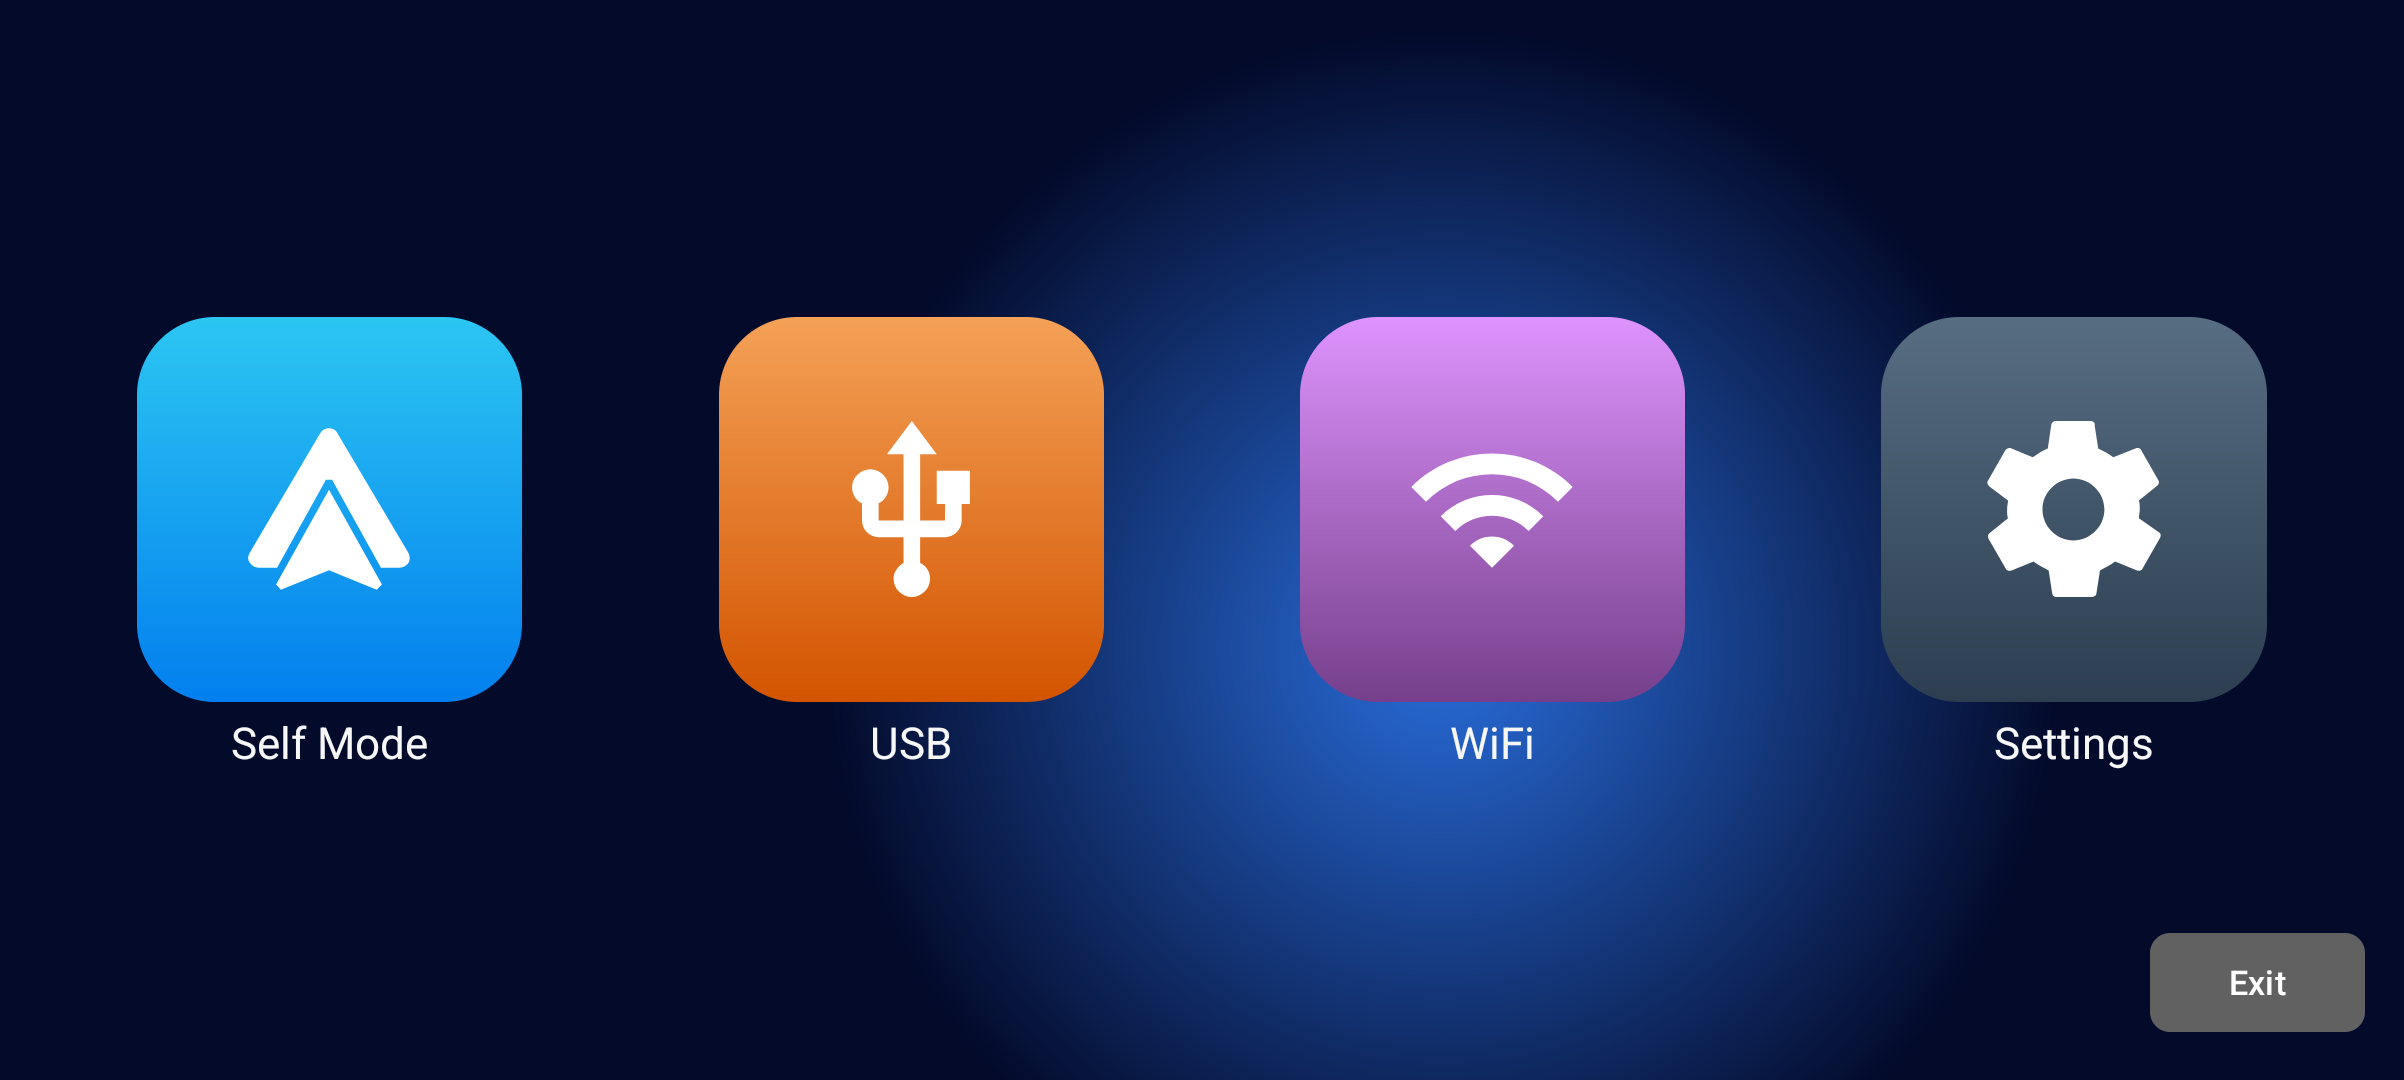
Includes WunderLINQ support for controling the UI.
Select Settings.
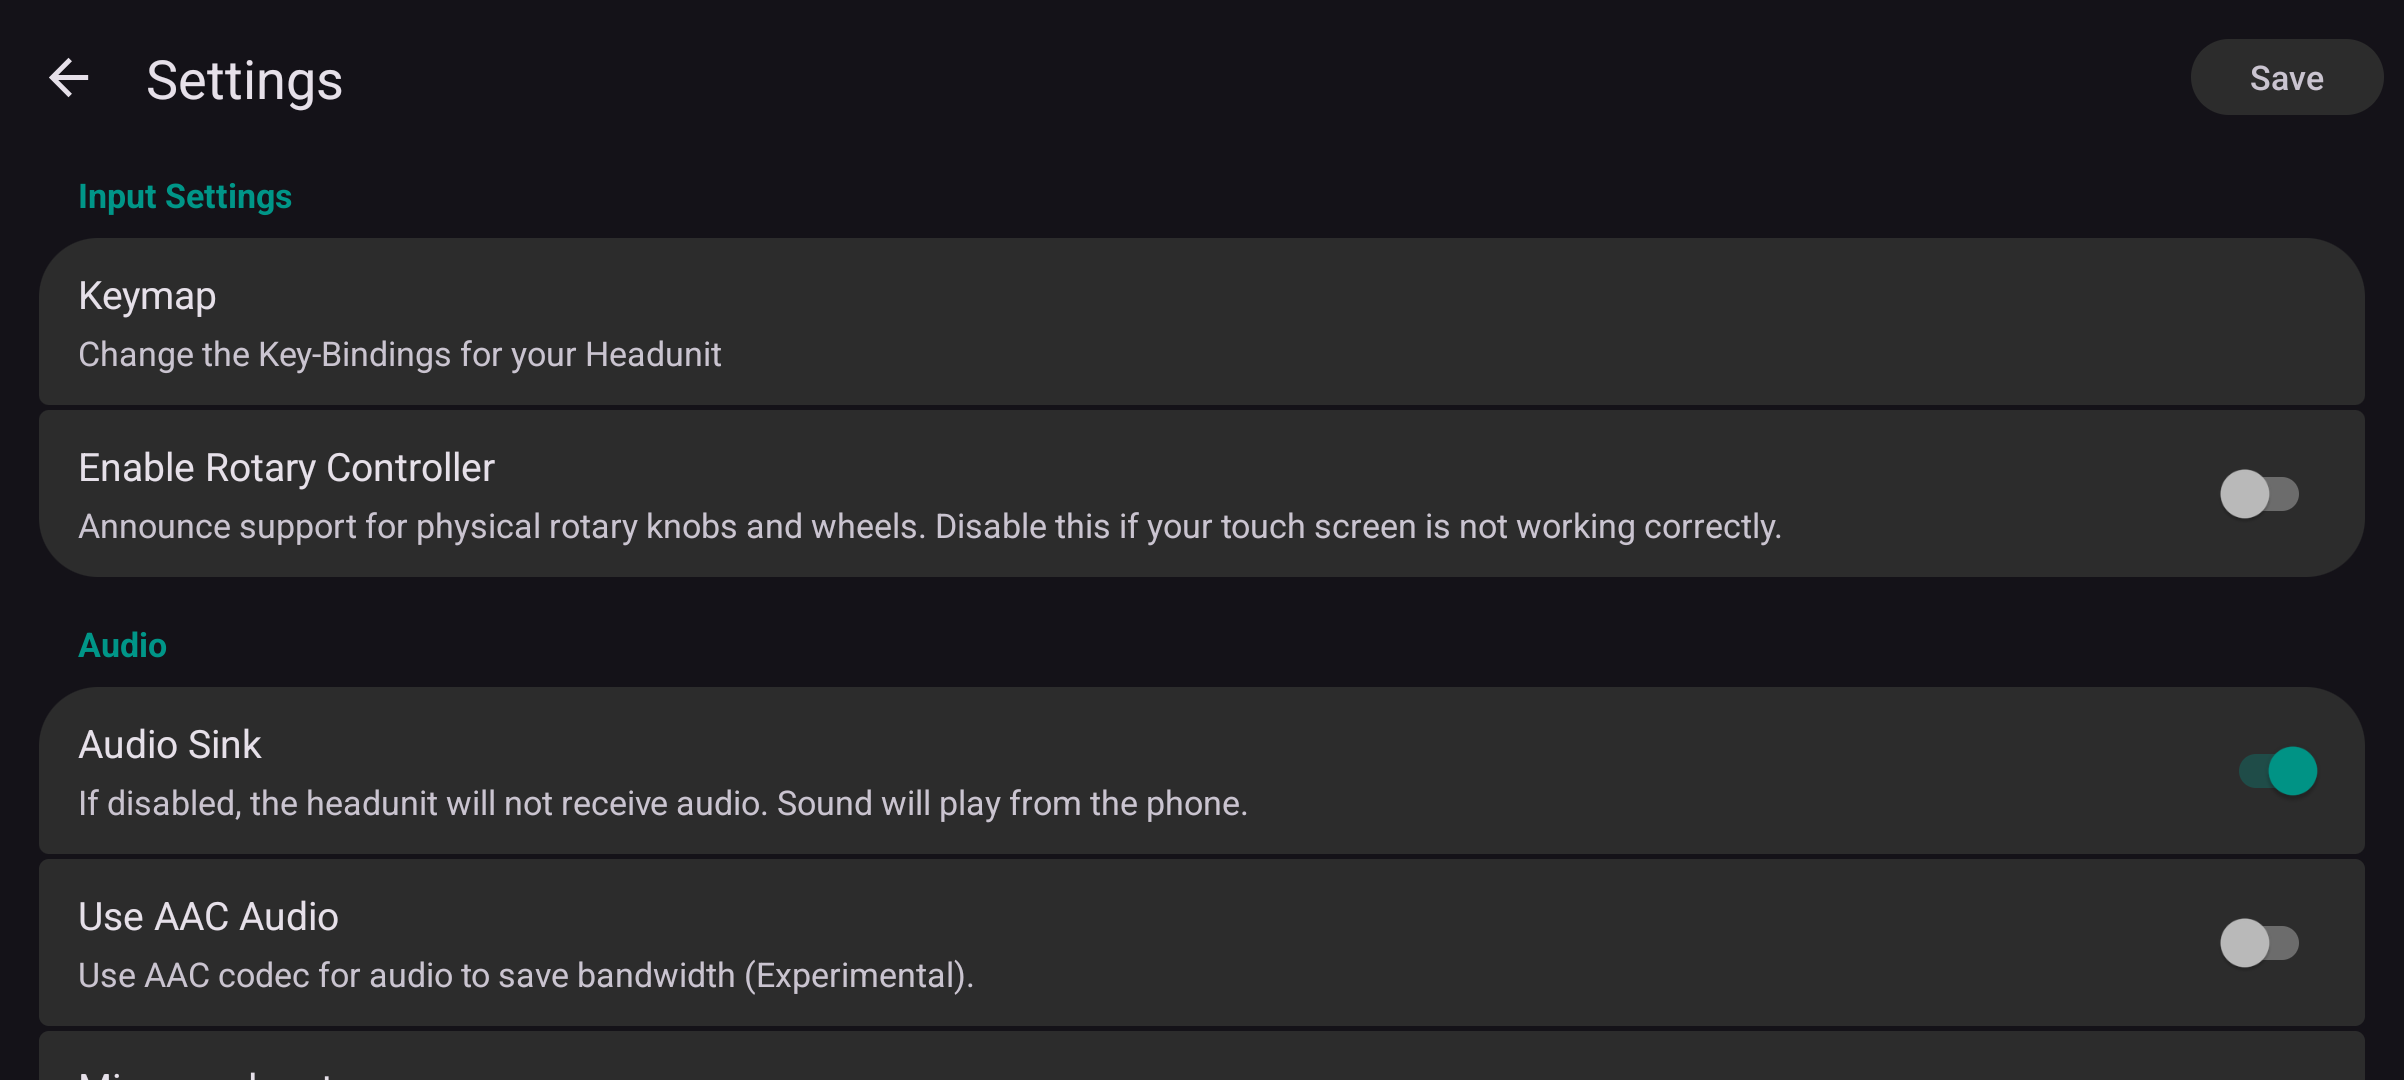
Select Keymap.
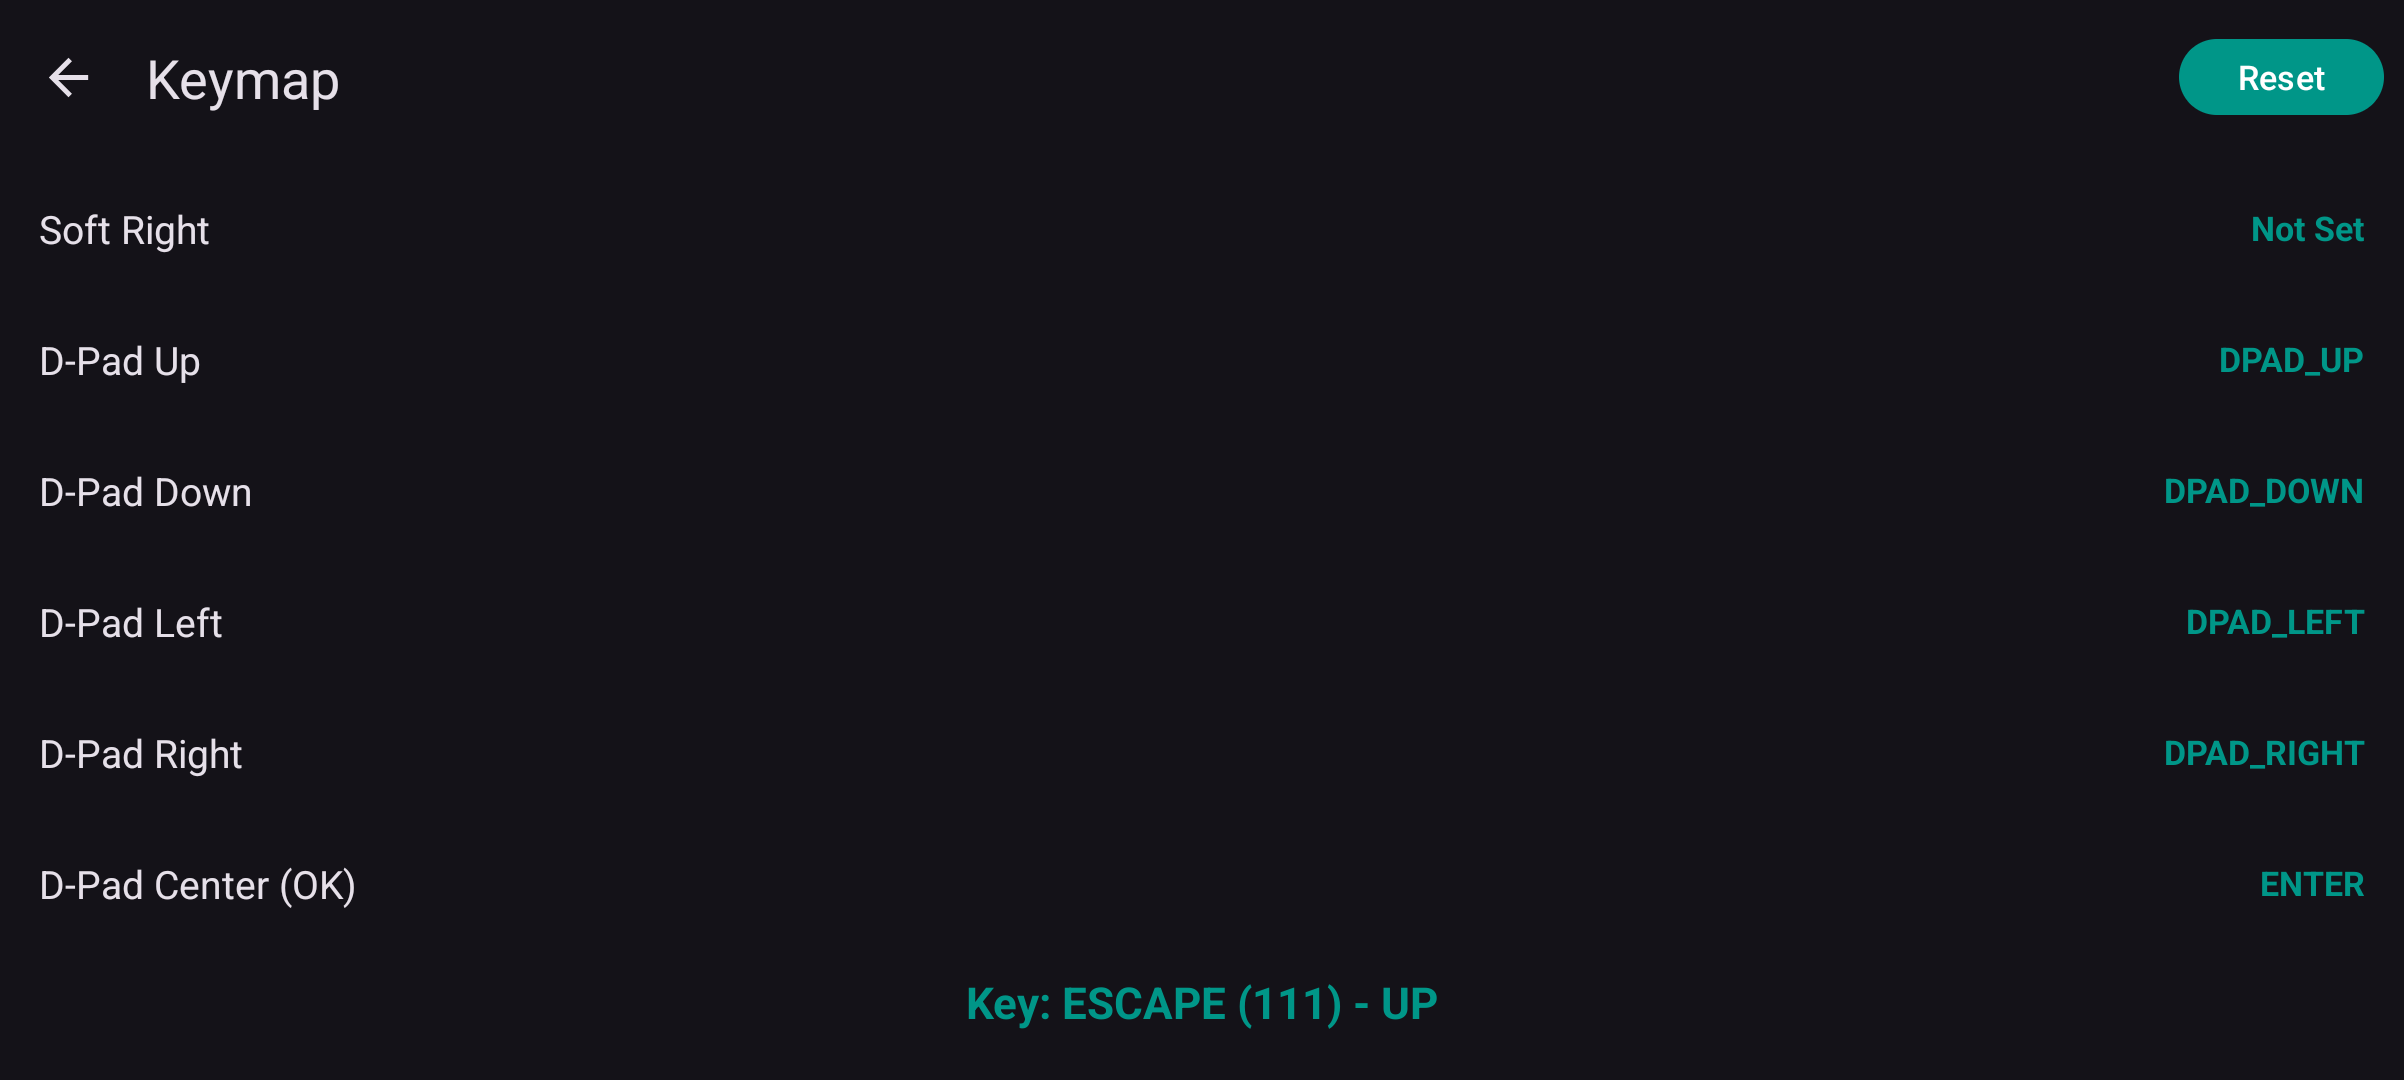
Map your WunderLINQ controls.
Kurviger Navigation App
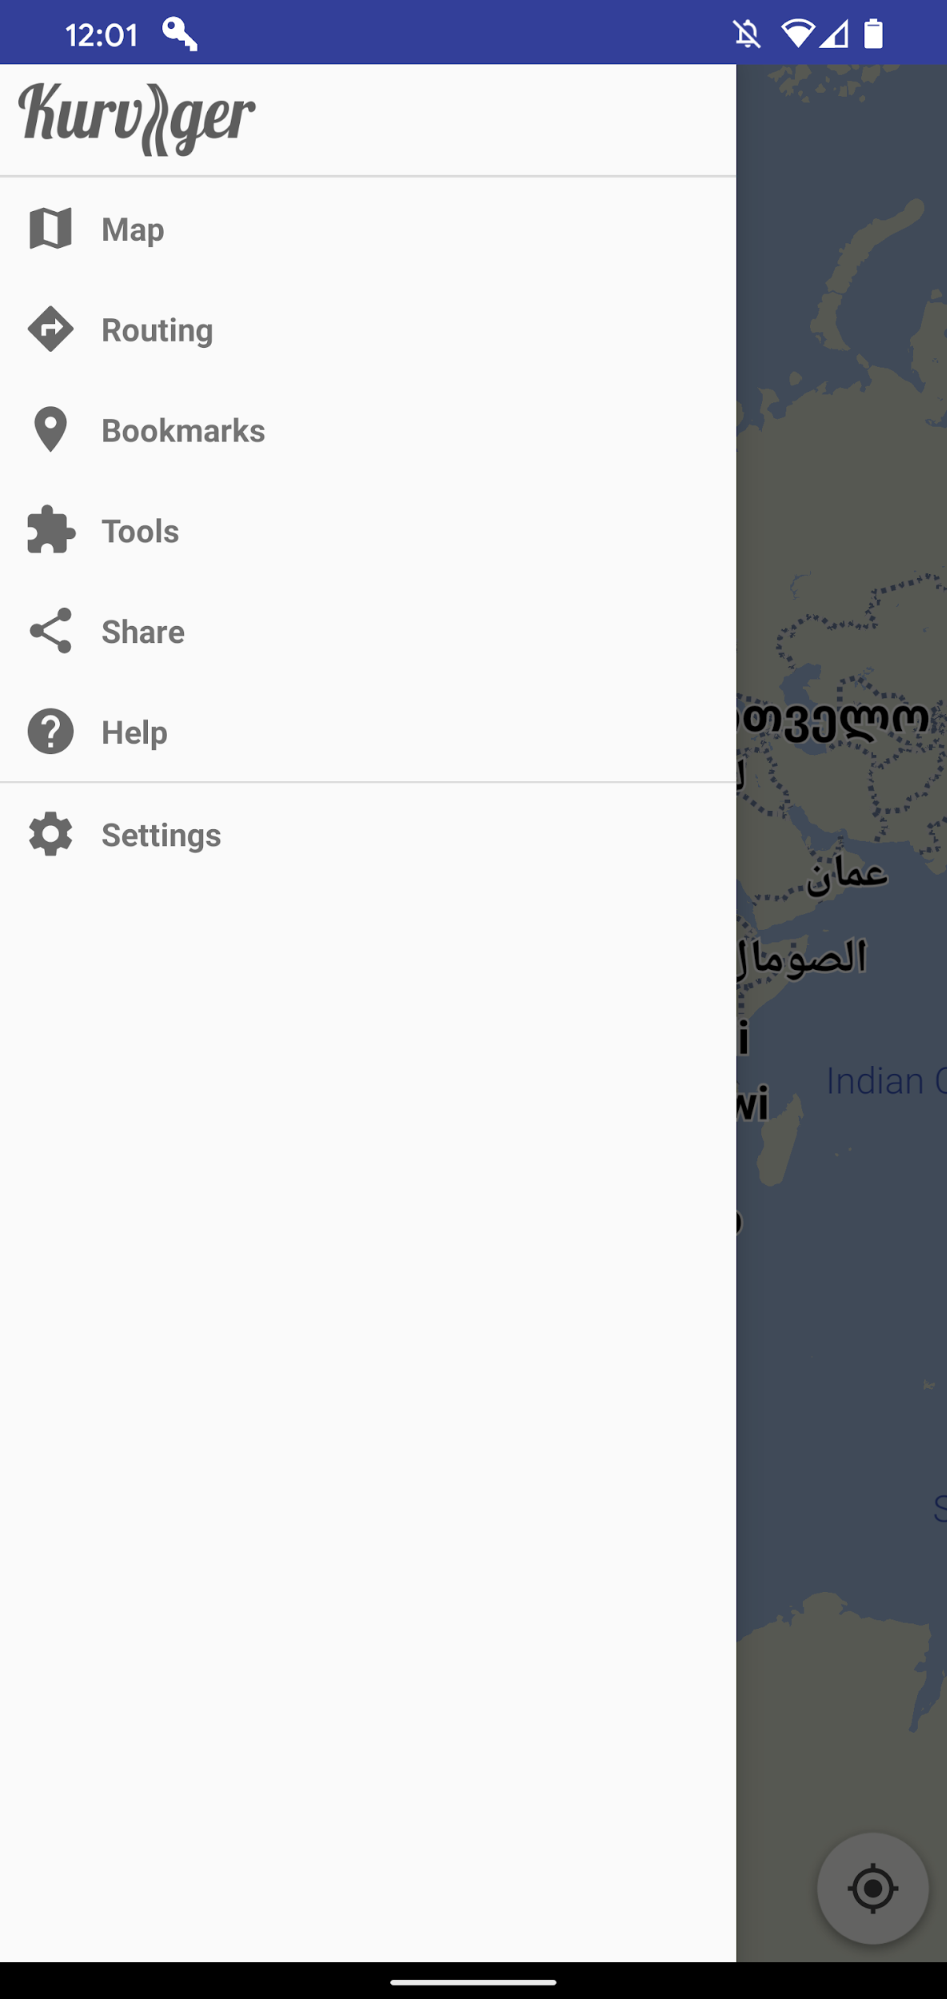
Includes WunderLINQ support for map panning and zooming and returning to the WunderLINQ App. For map zooming, you will need to customize your key mapping under the WunderLINQ app's HW Settings to use '+' and '-' keys for zooming.
Locus Maps Pro Navigation App
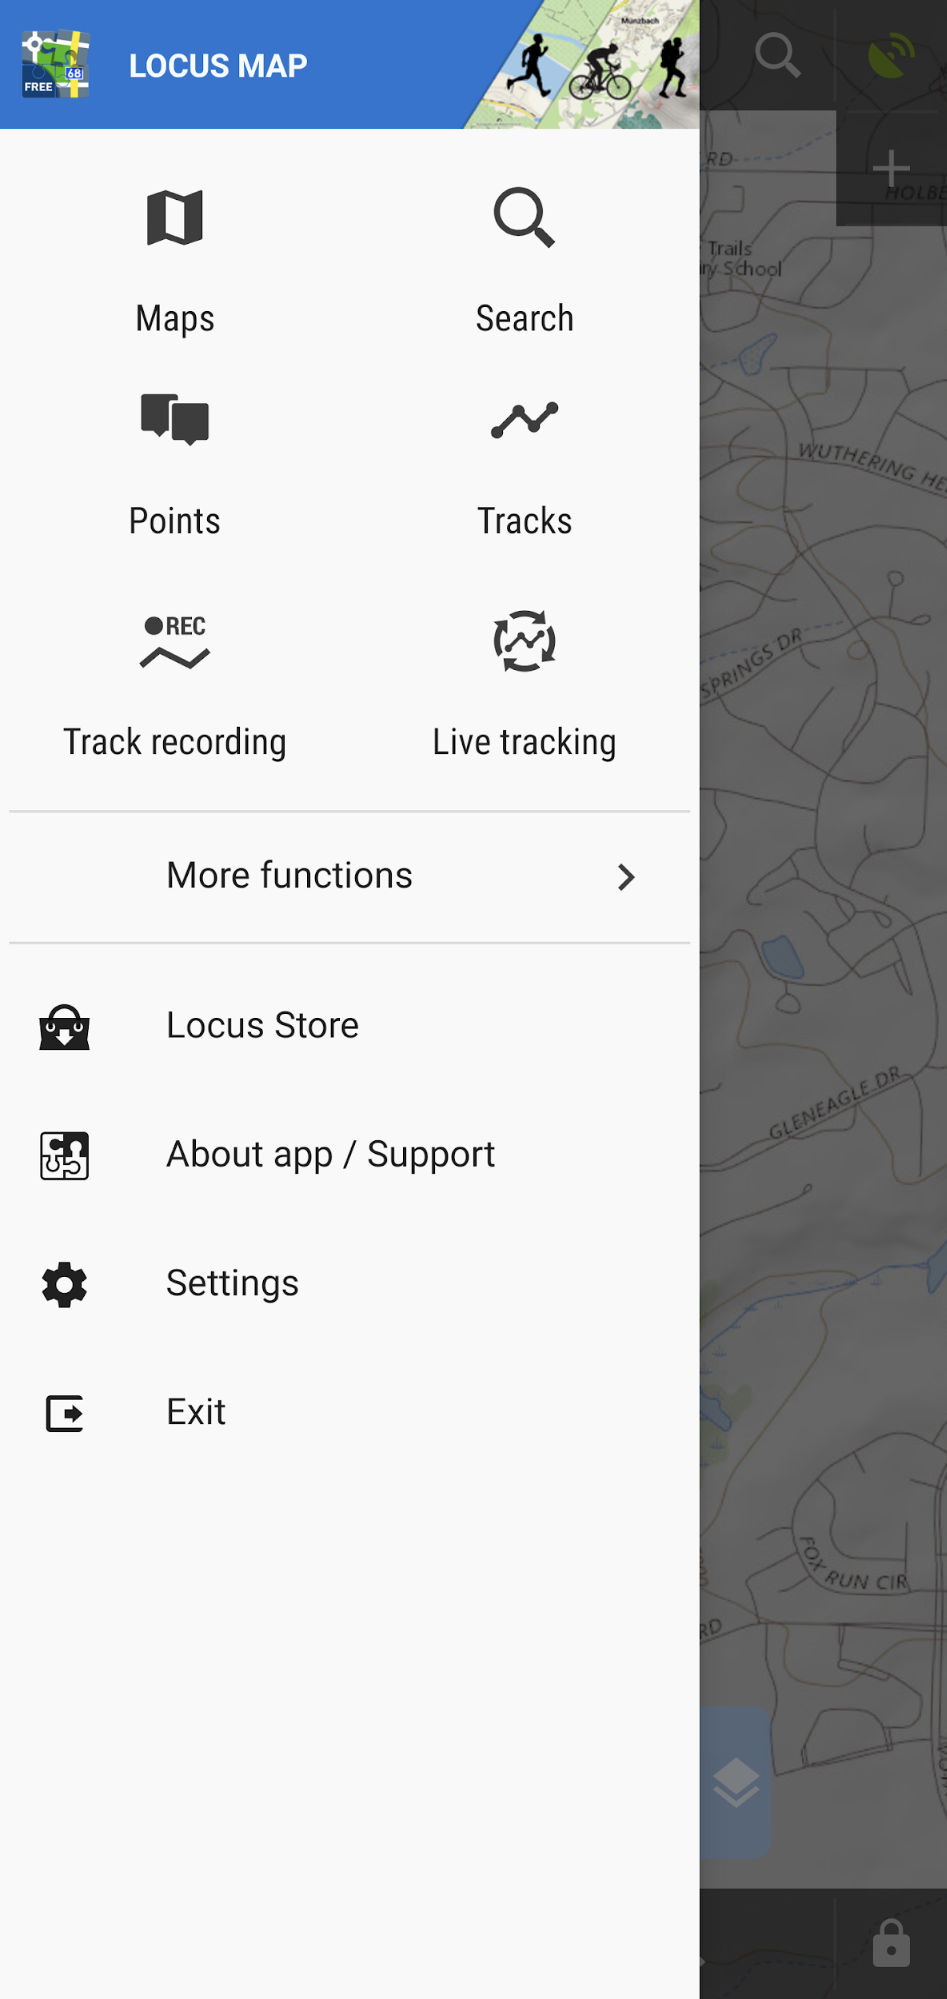
Includes WunderLINQ support for Map Zooming and returning to the WunderLINQ App.
Open the drawer and select Settings.
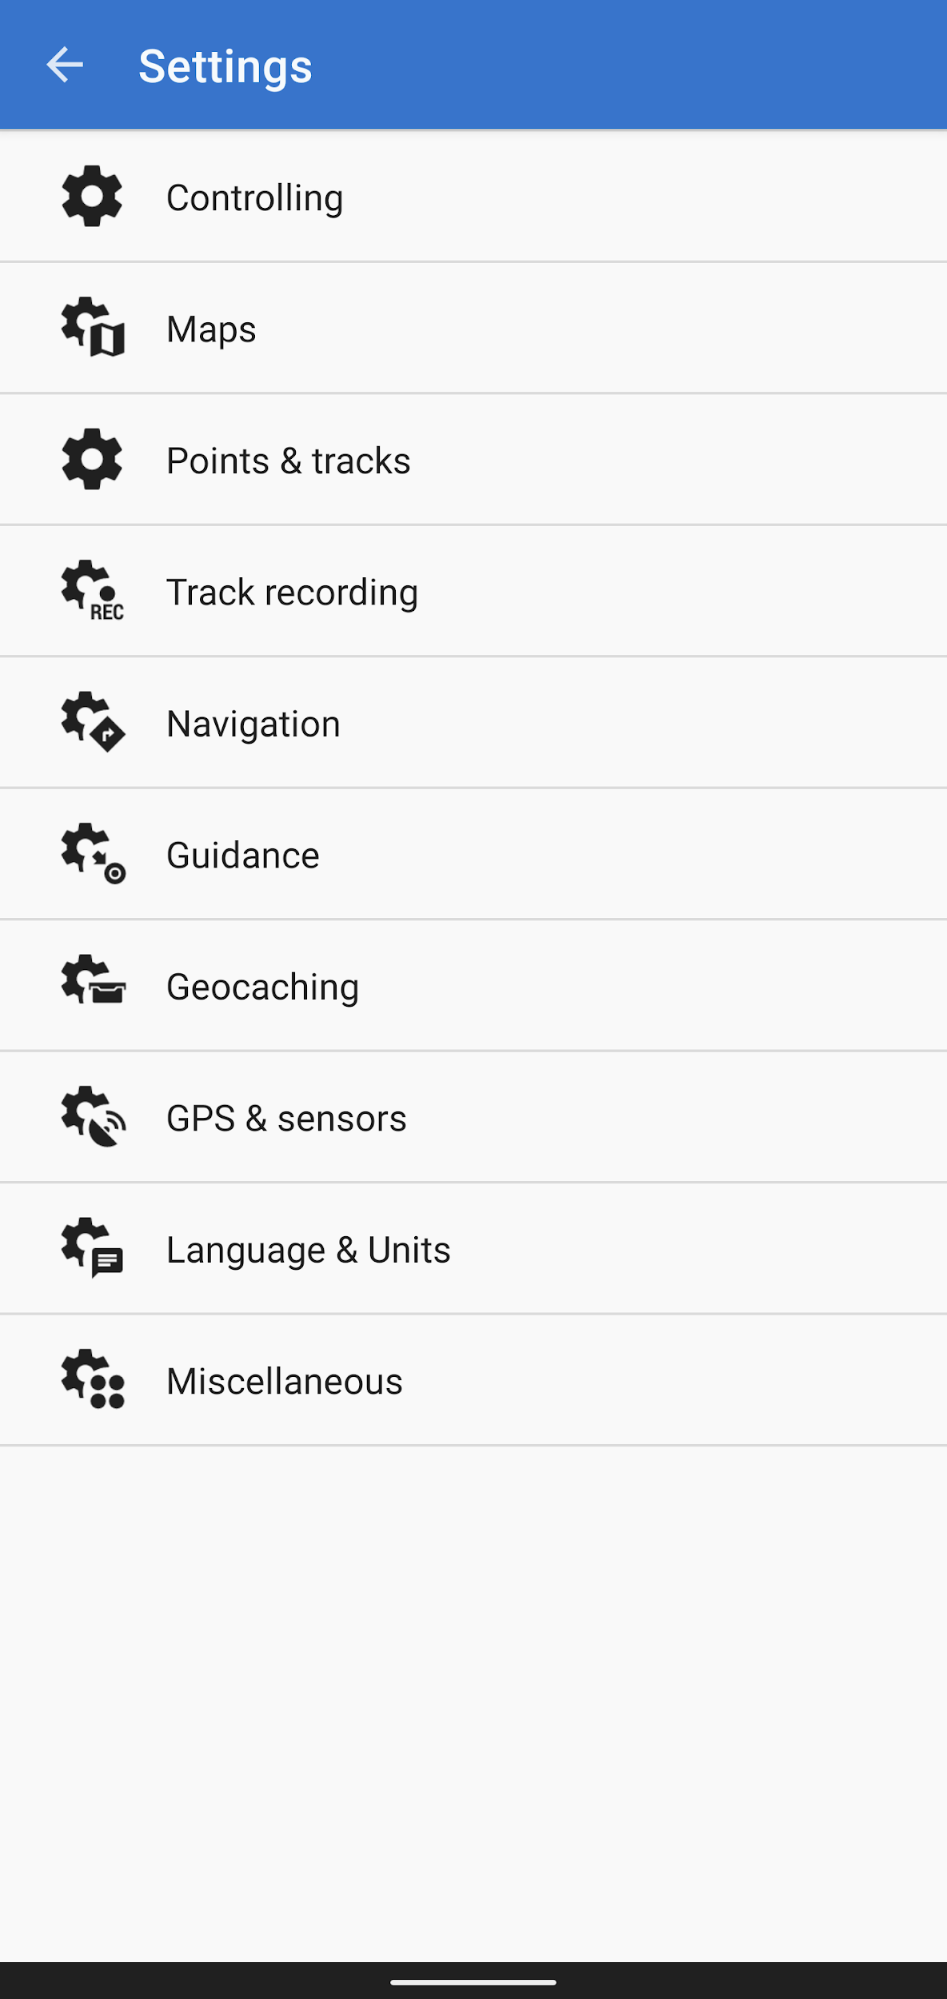
Select Controlling.
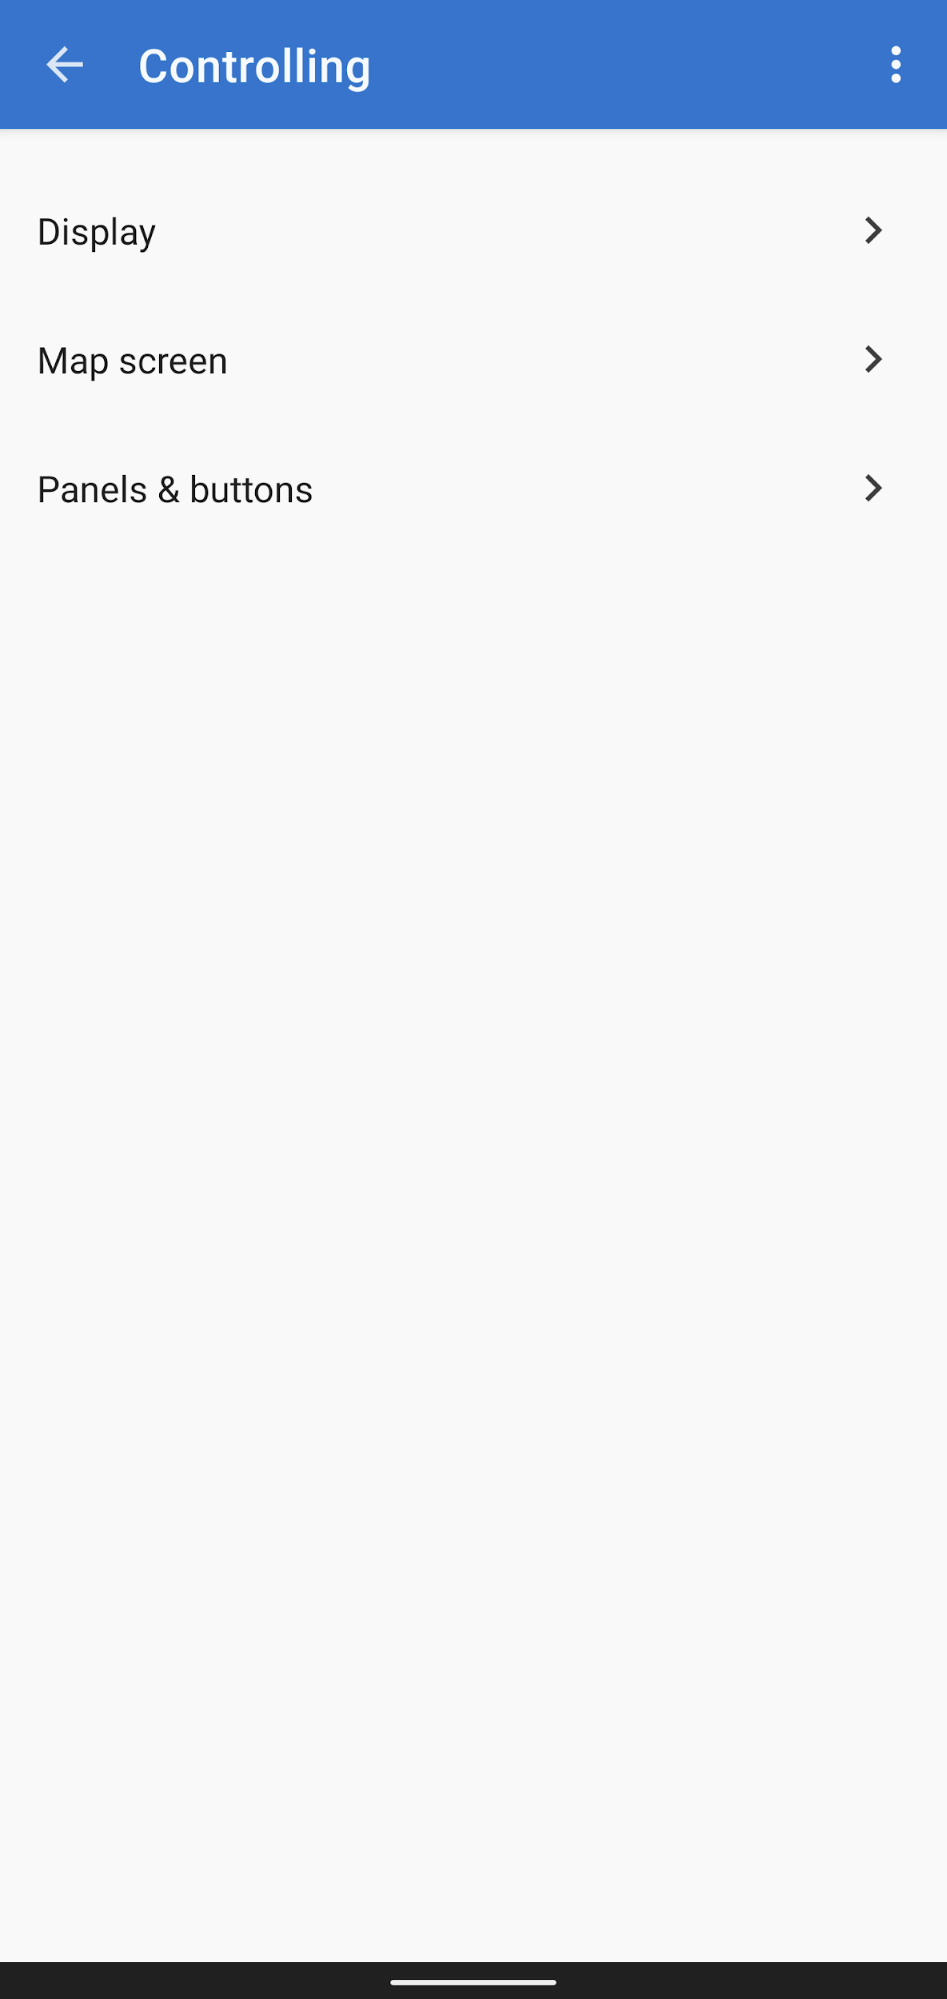
Select Map screen.
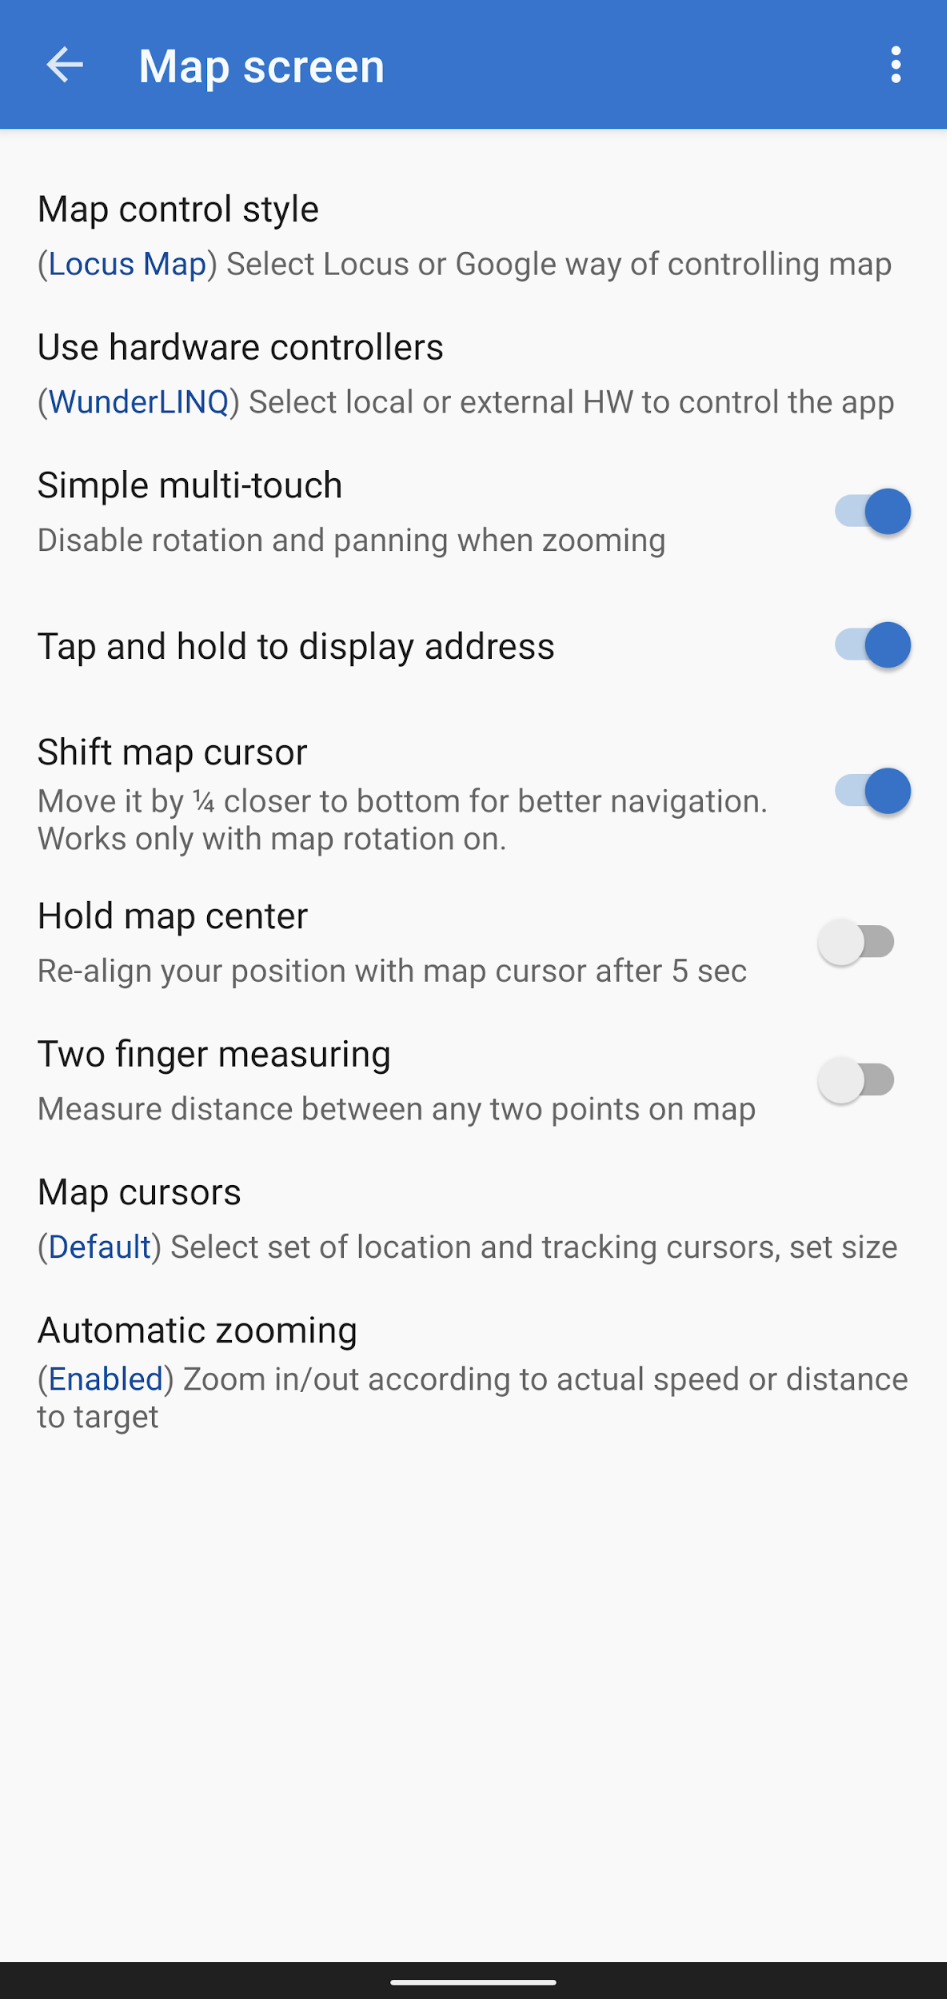
Select Use hardware controllers.
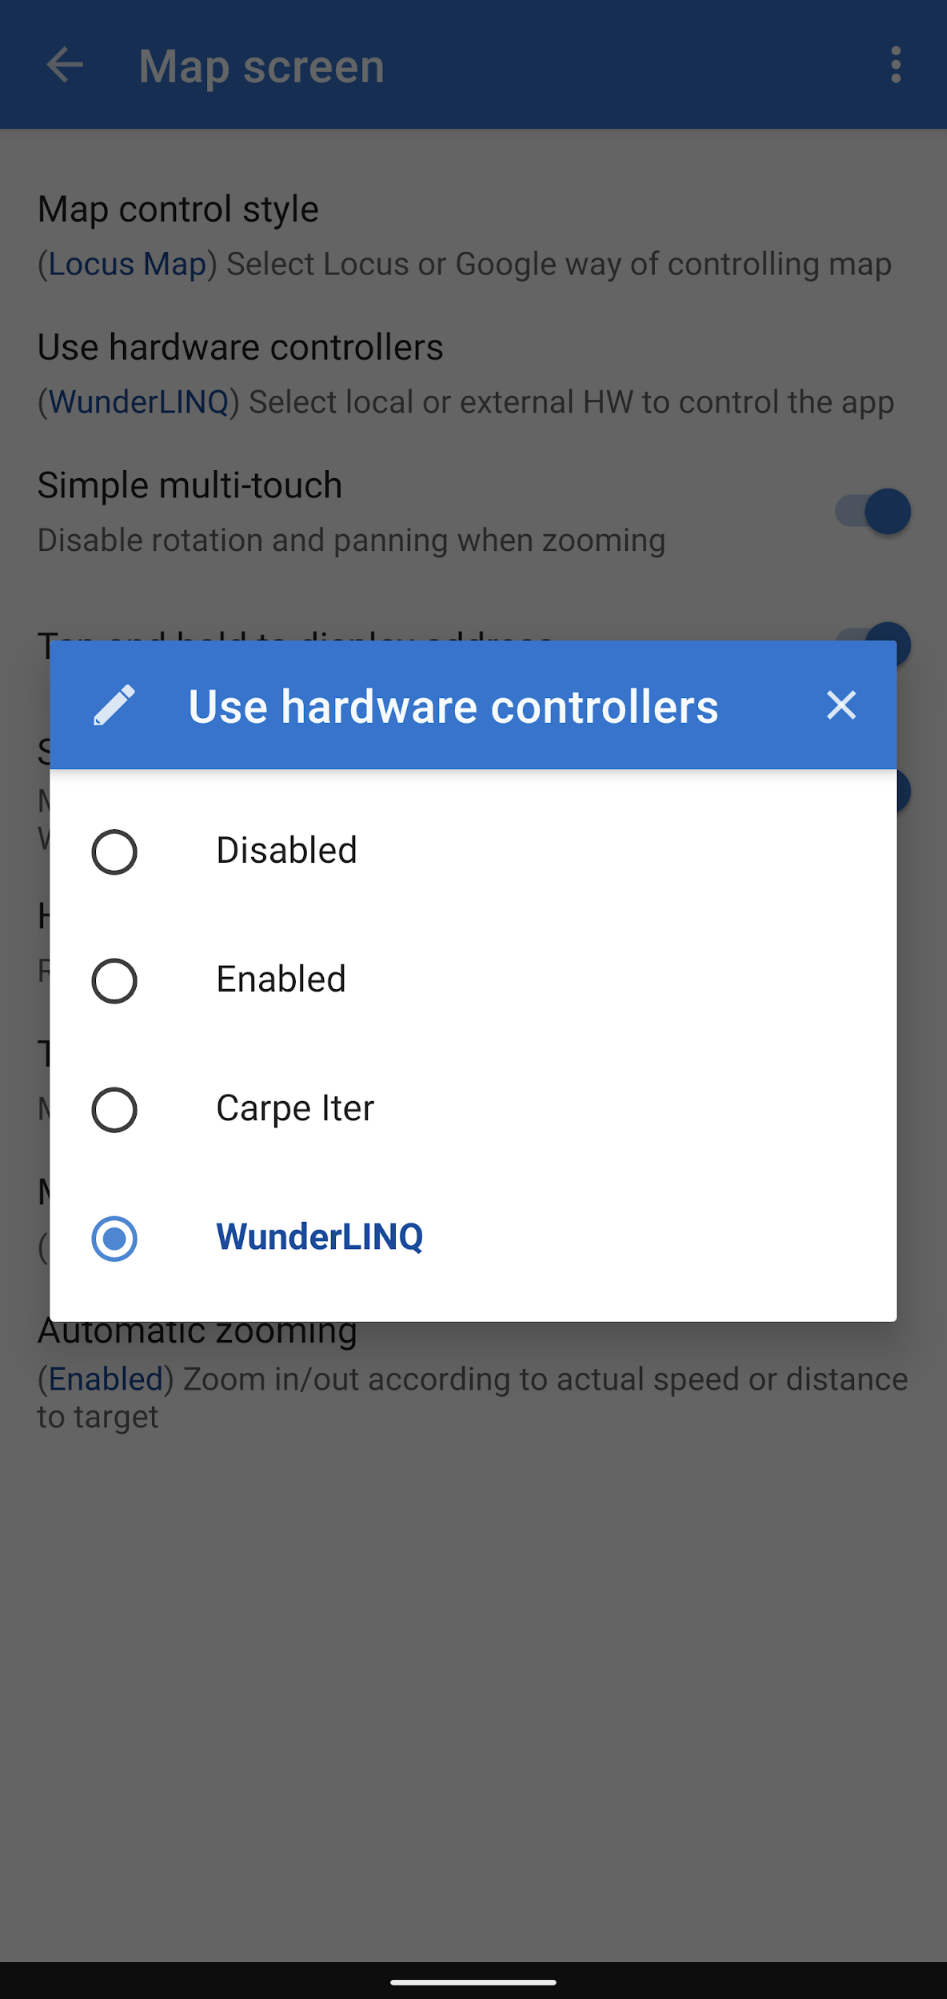
Select WunderLINQ. That's it!
Myroute-app Navigation App

Includes full control of the navigation UI, Map Zooming and returning to the WunderLINQ App.
Open the drawer and select the profile icon at the top left.
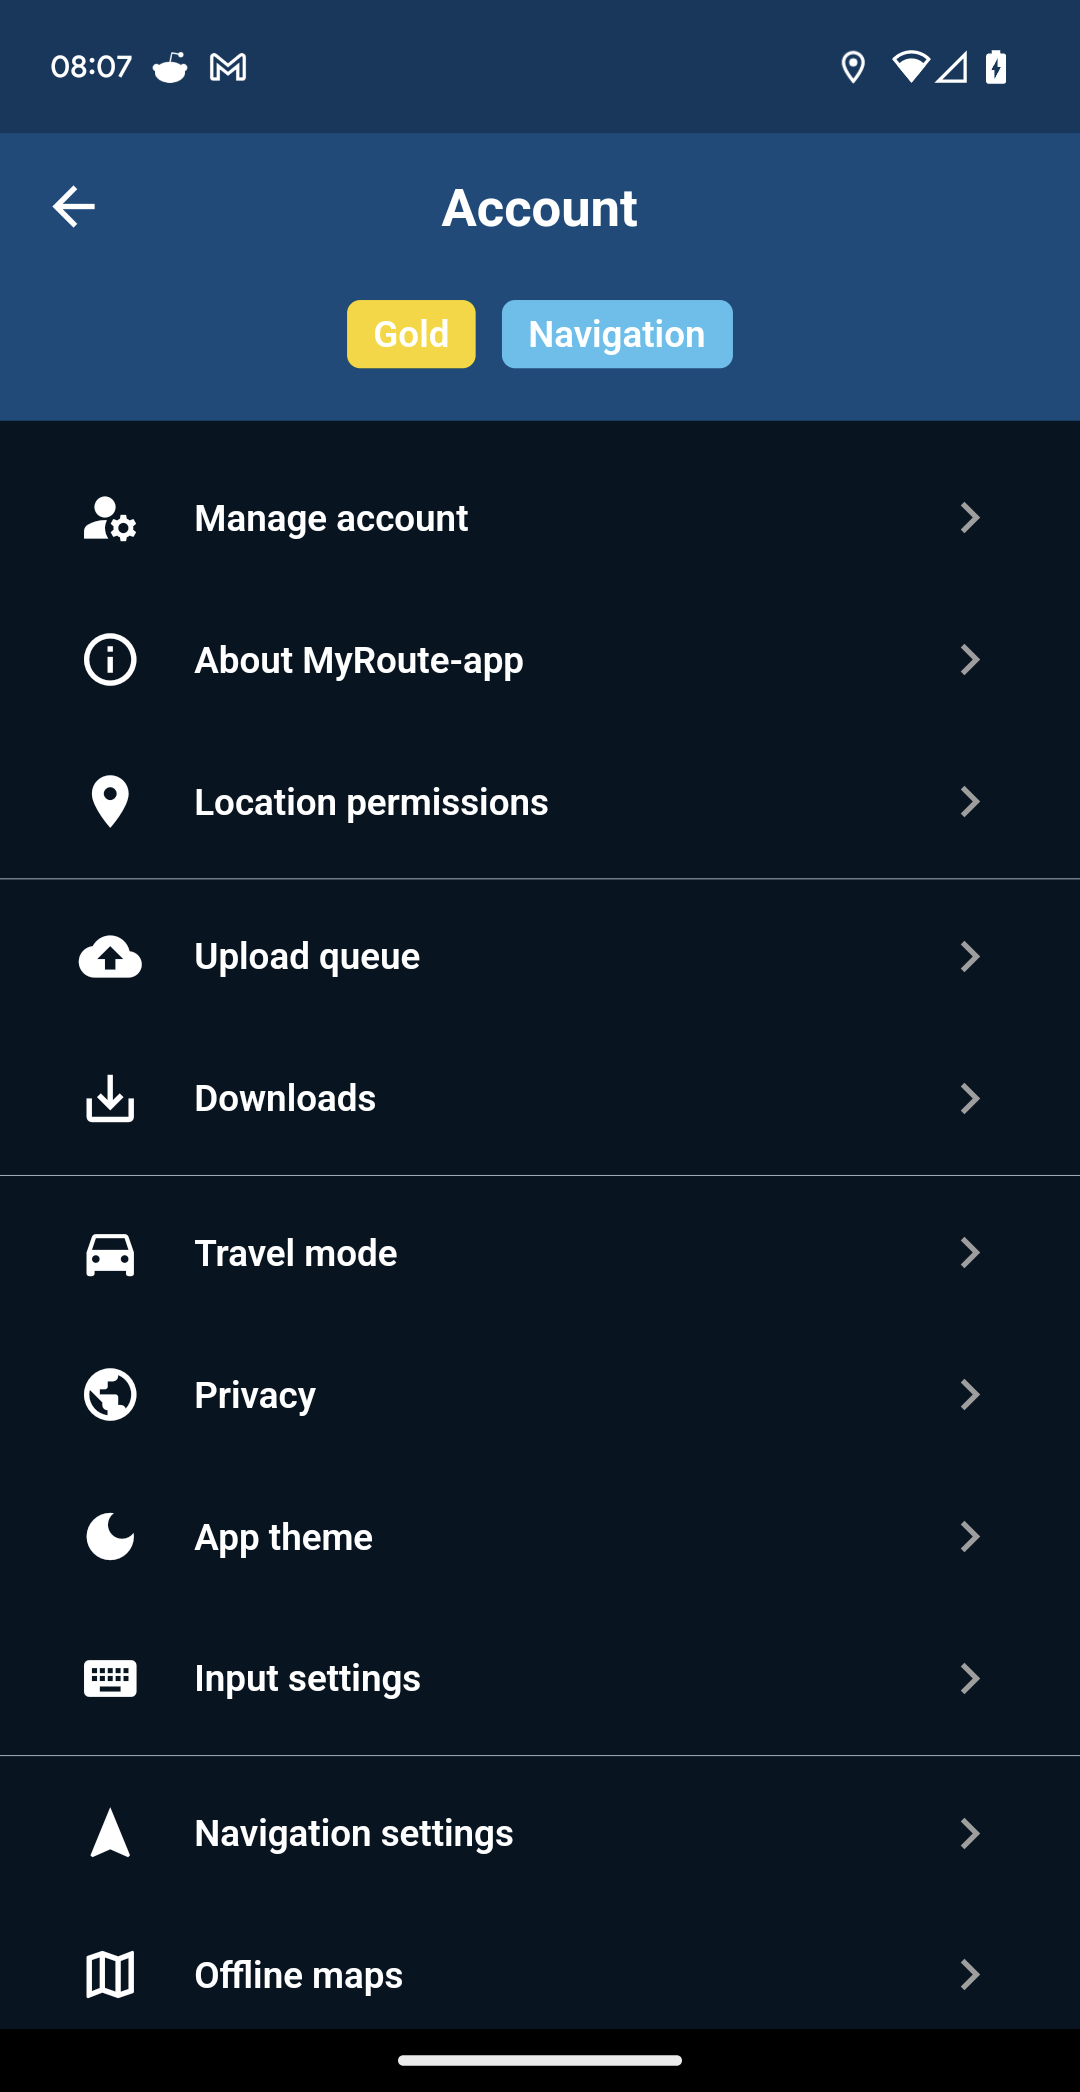
Select Input Settings.
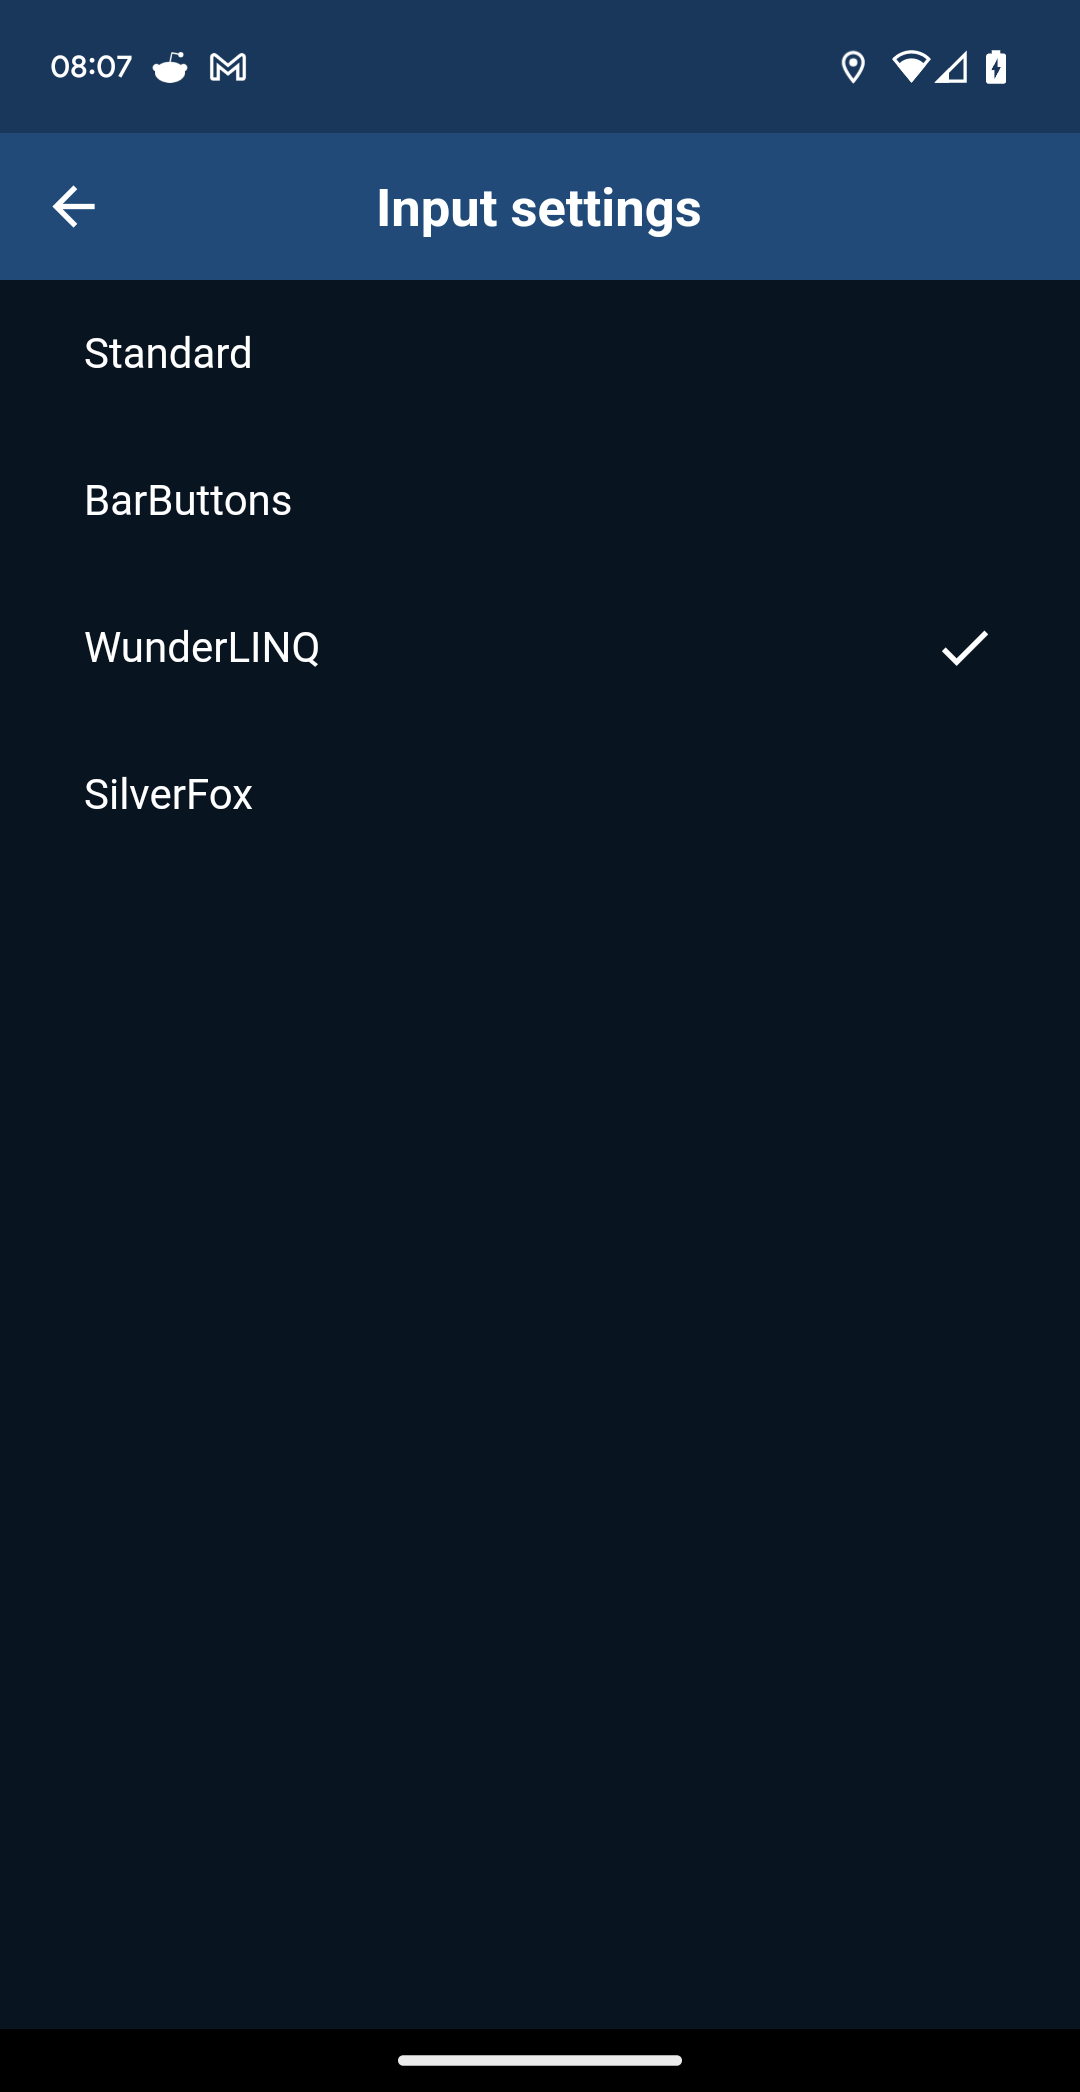
Select WunderLINQ. That's it!
OruxMaps App
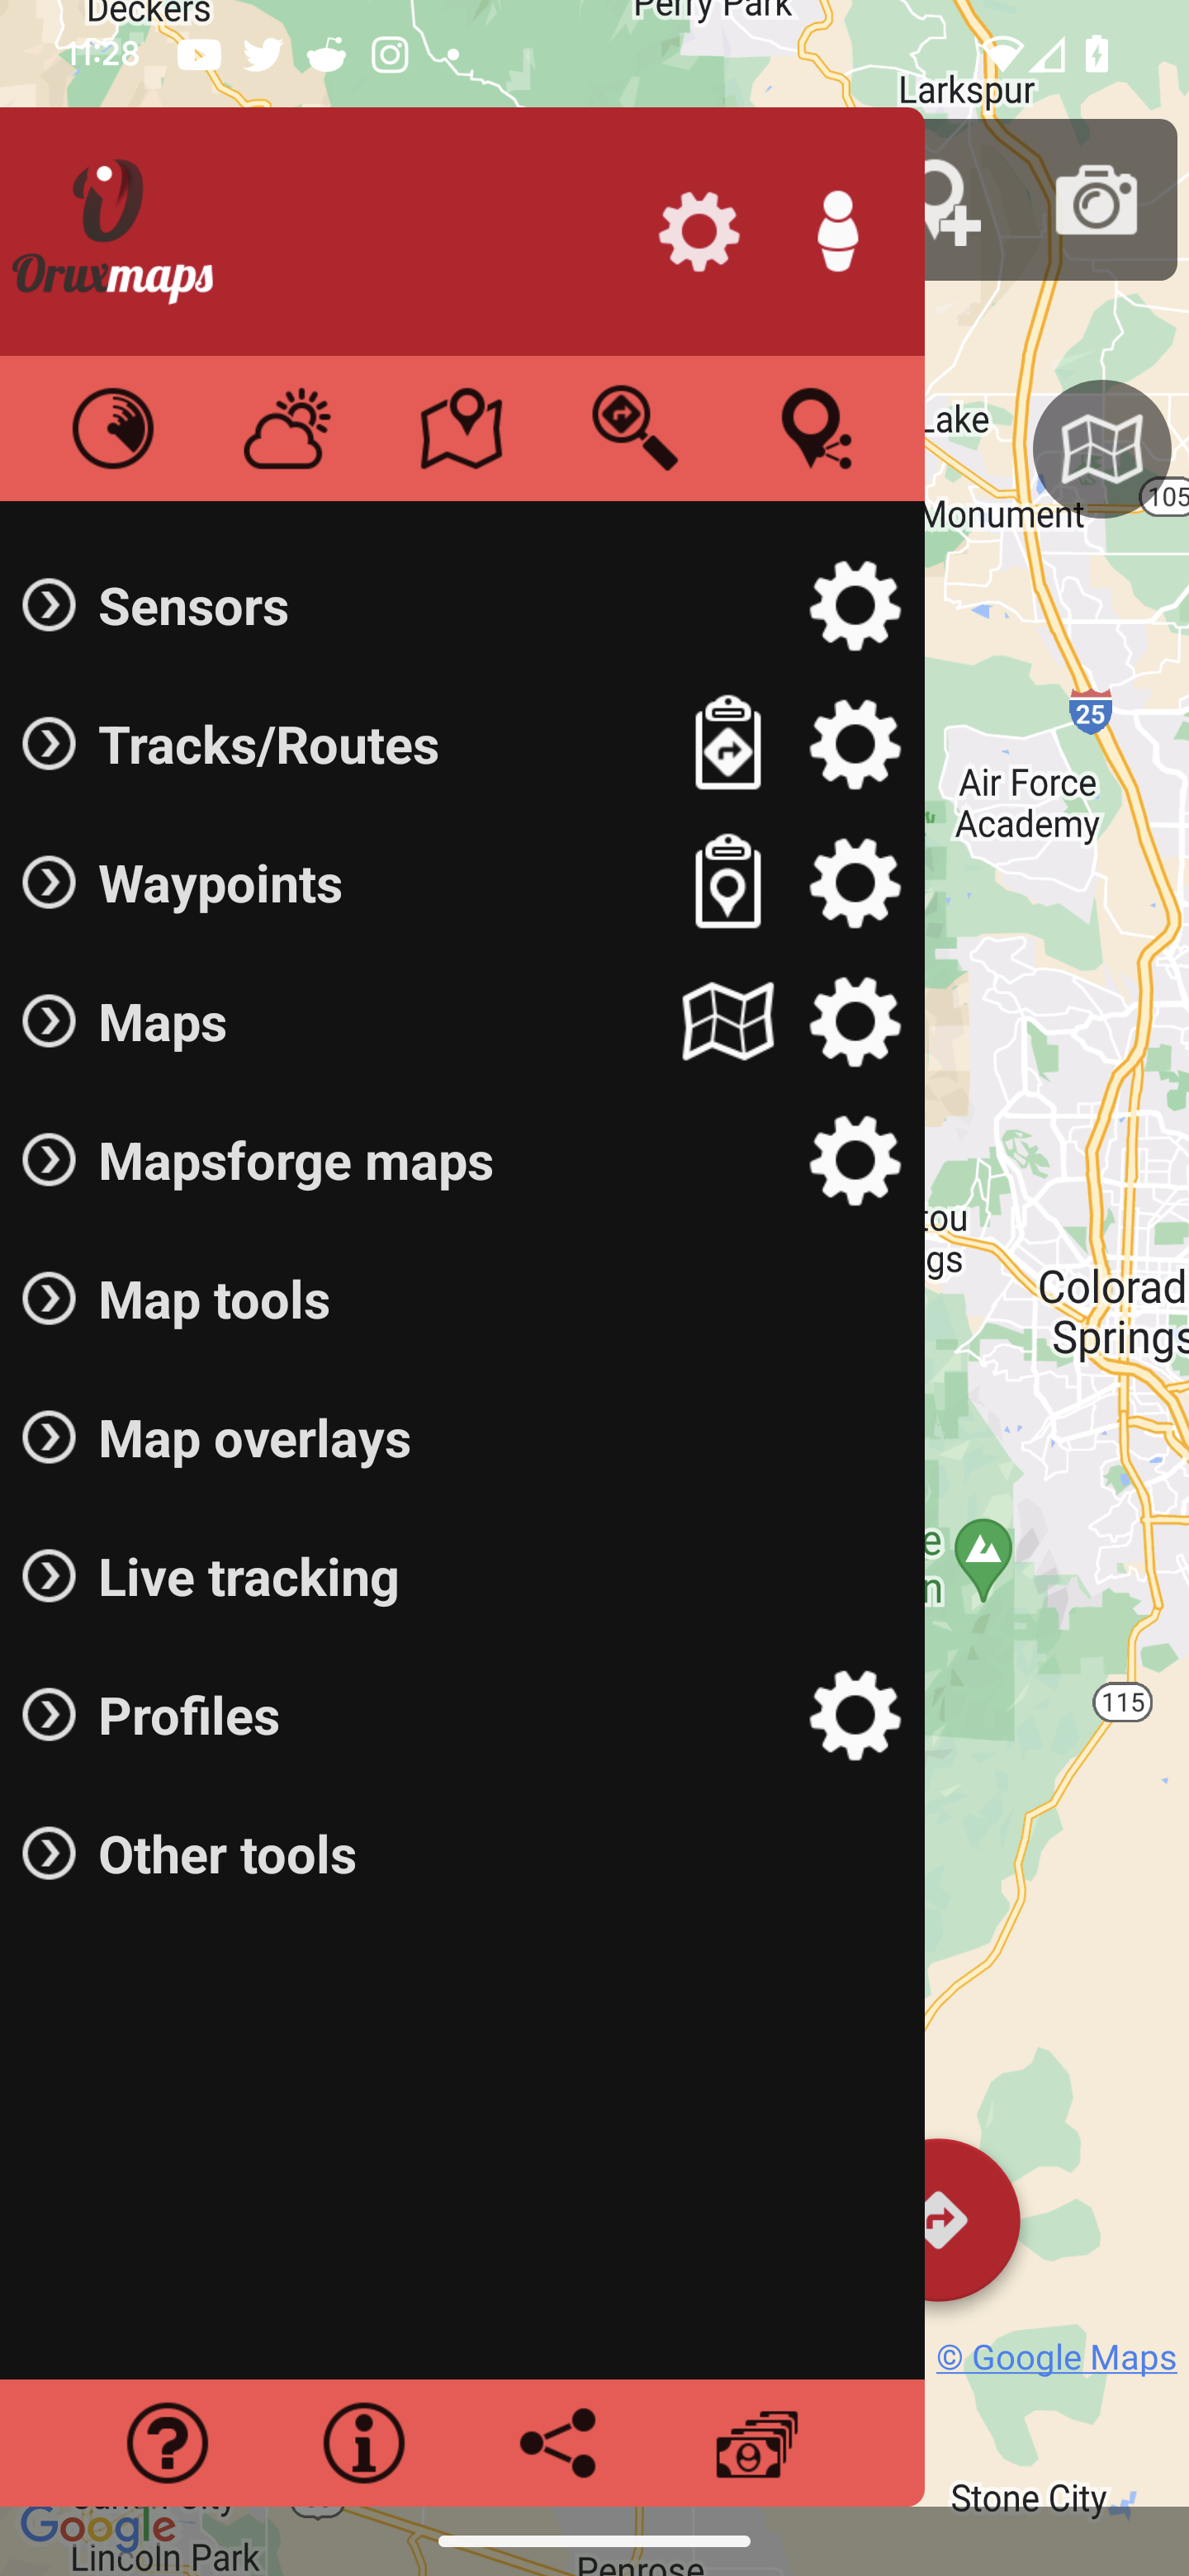
Includes WunderLINQ support for Map Zooming and a variety of different actions.
Open the drawer and select Settings Gear on the top left of the drawer.
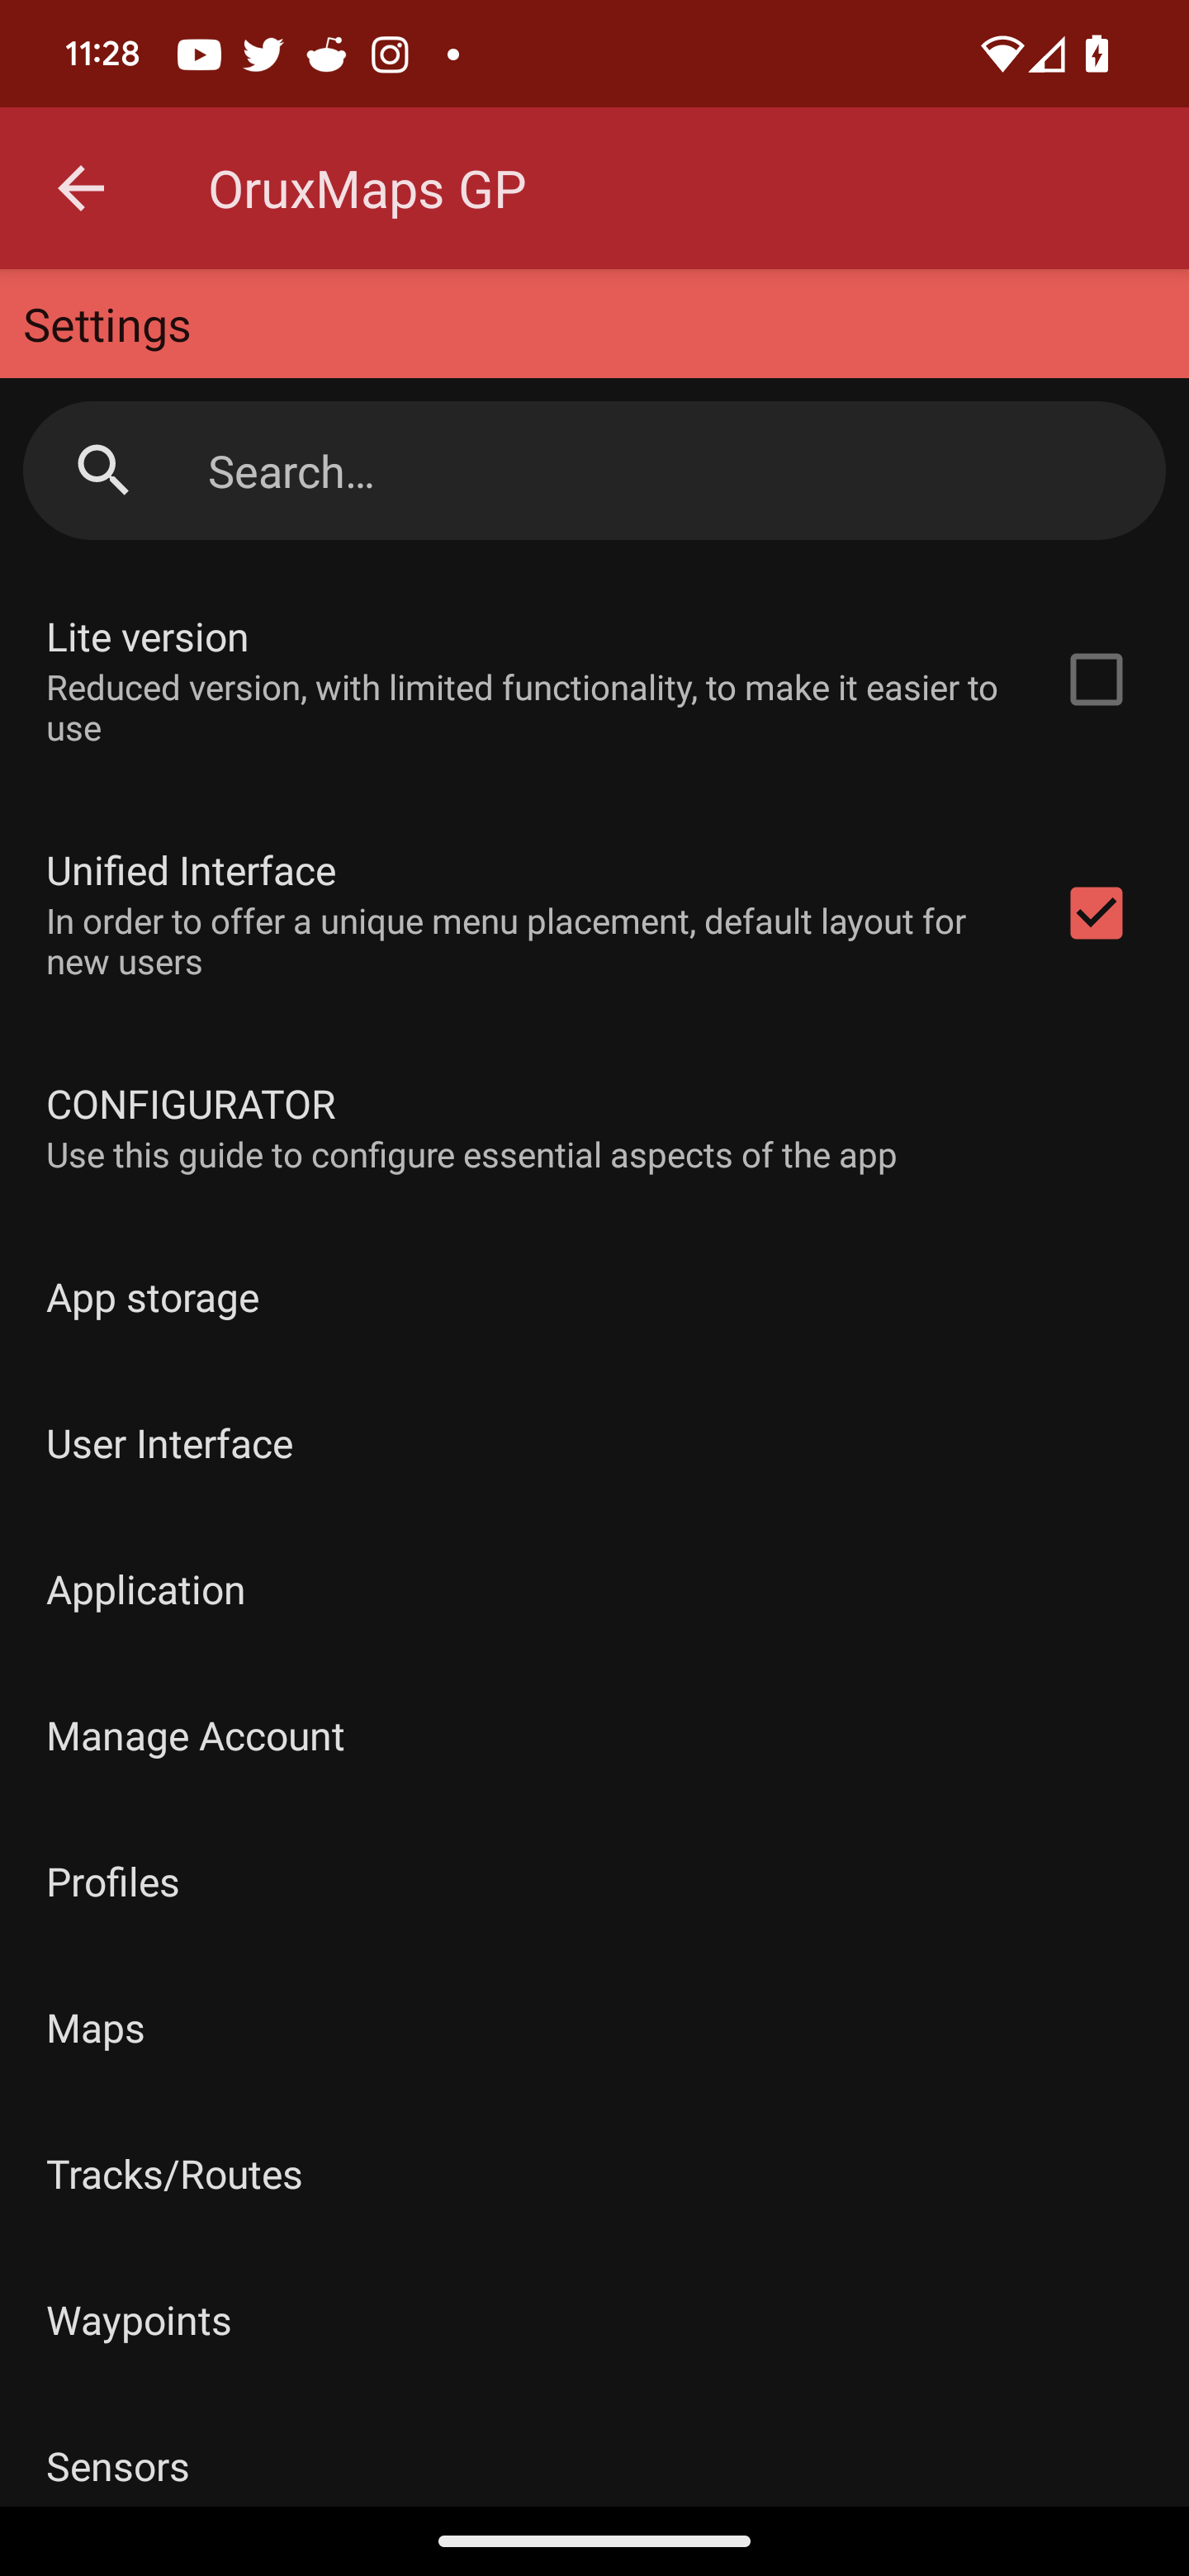
Select Application.
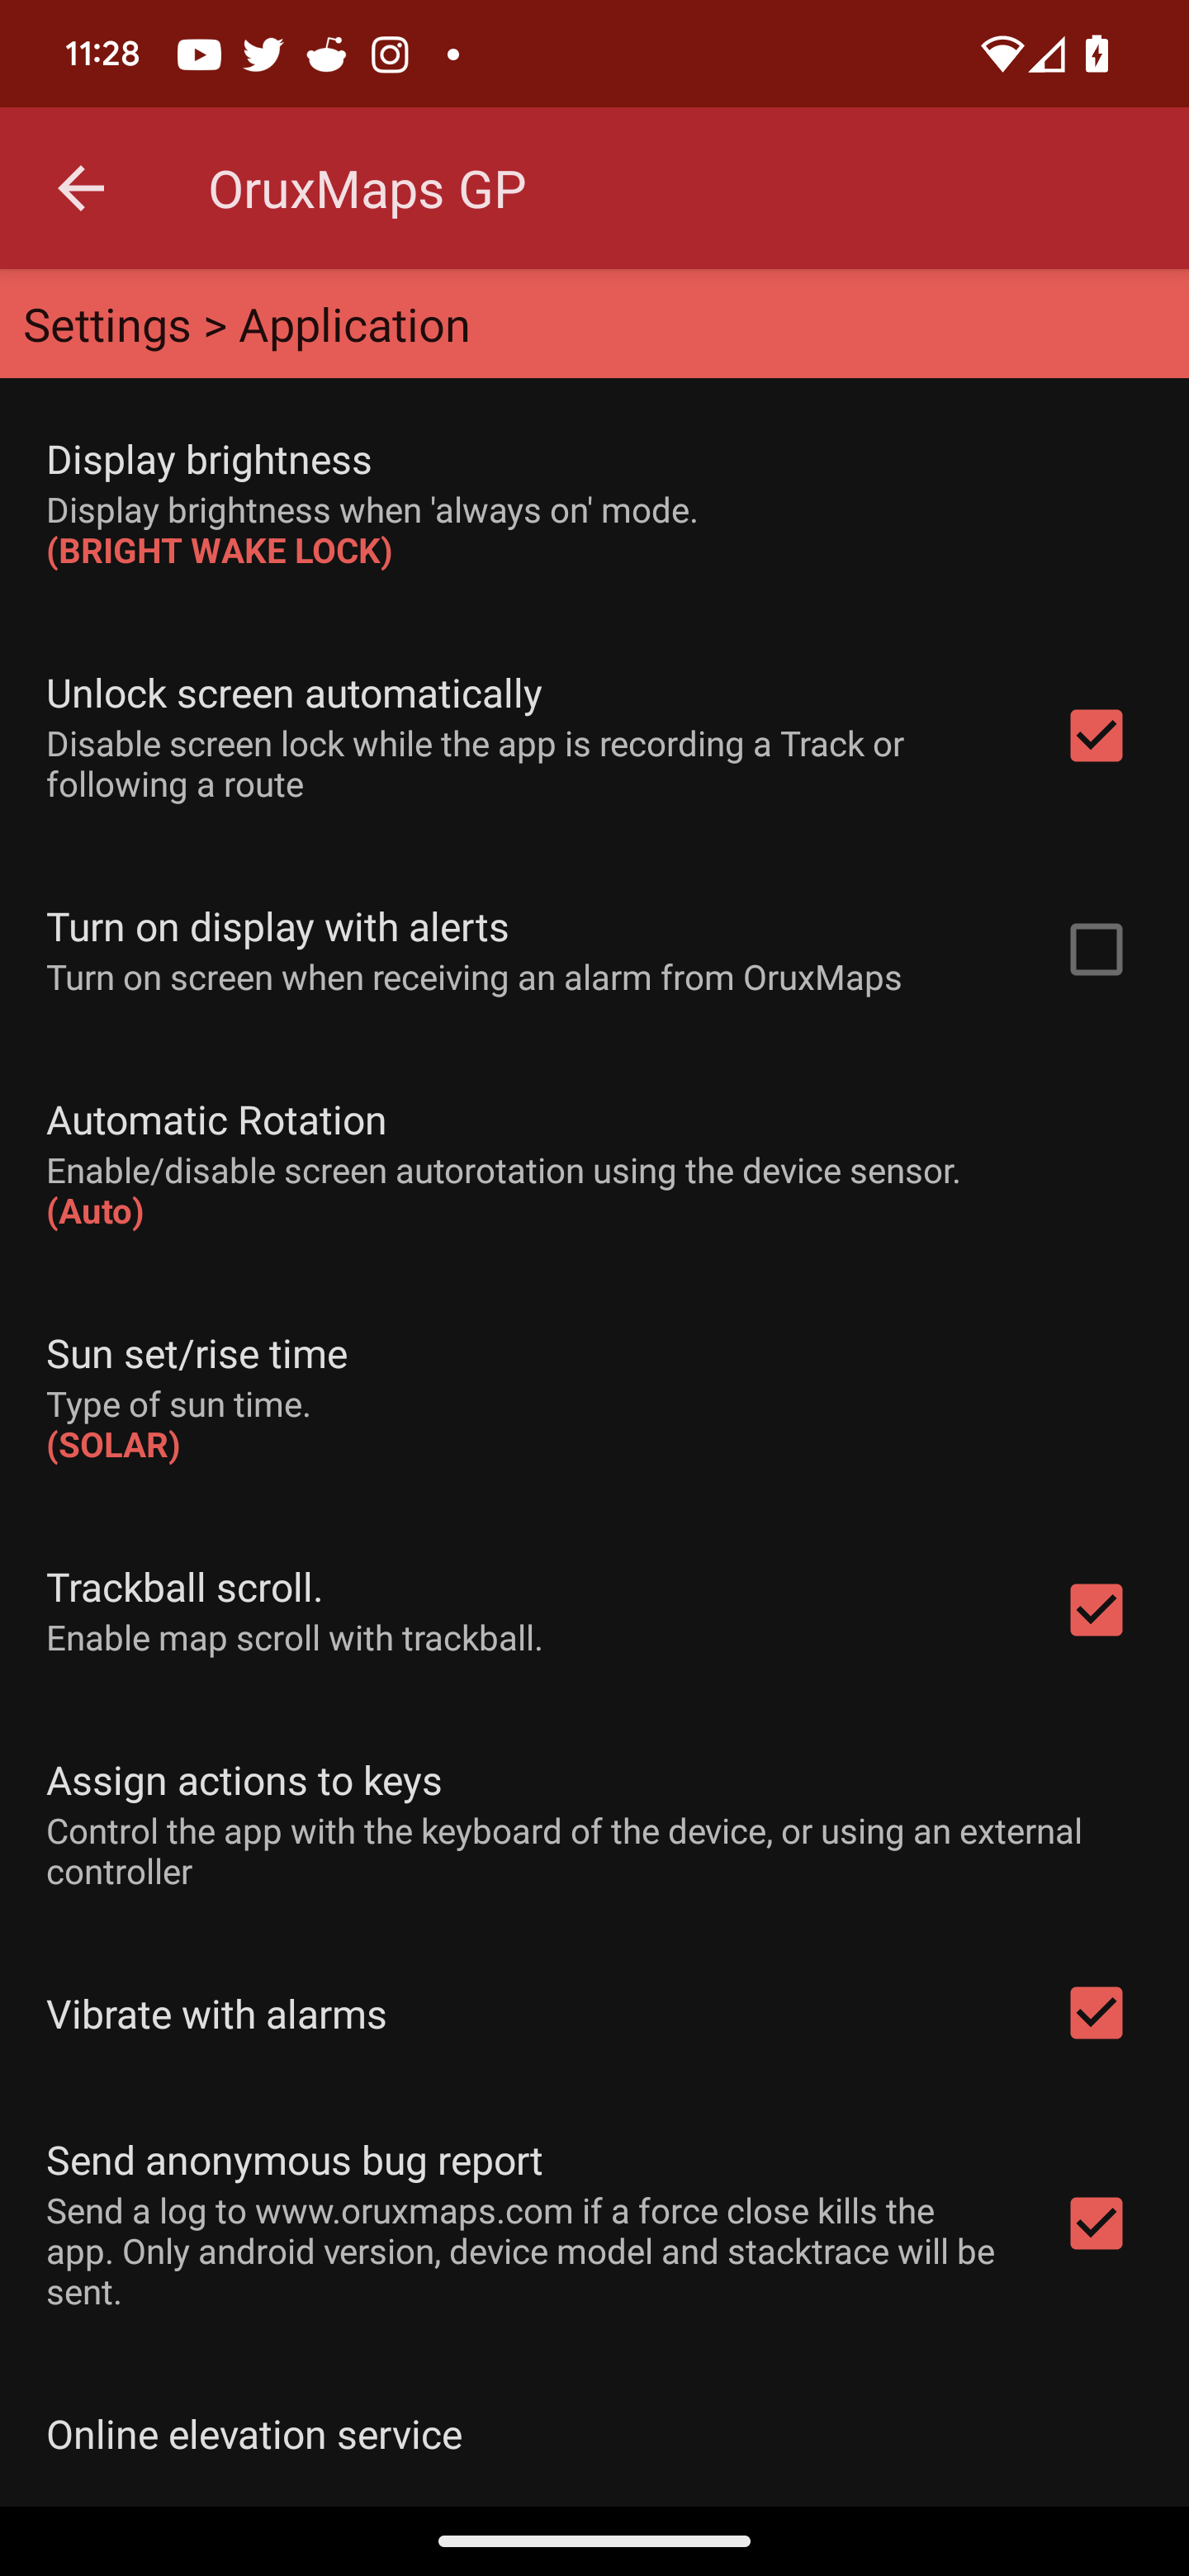
Select Assign actions to keys.
Add key assignments here.
OsmAnd Navigation App
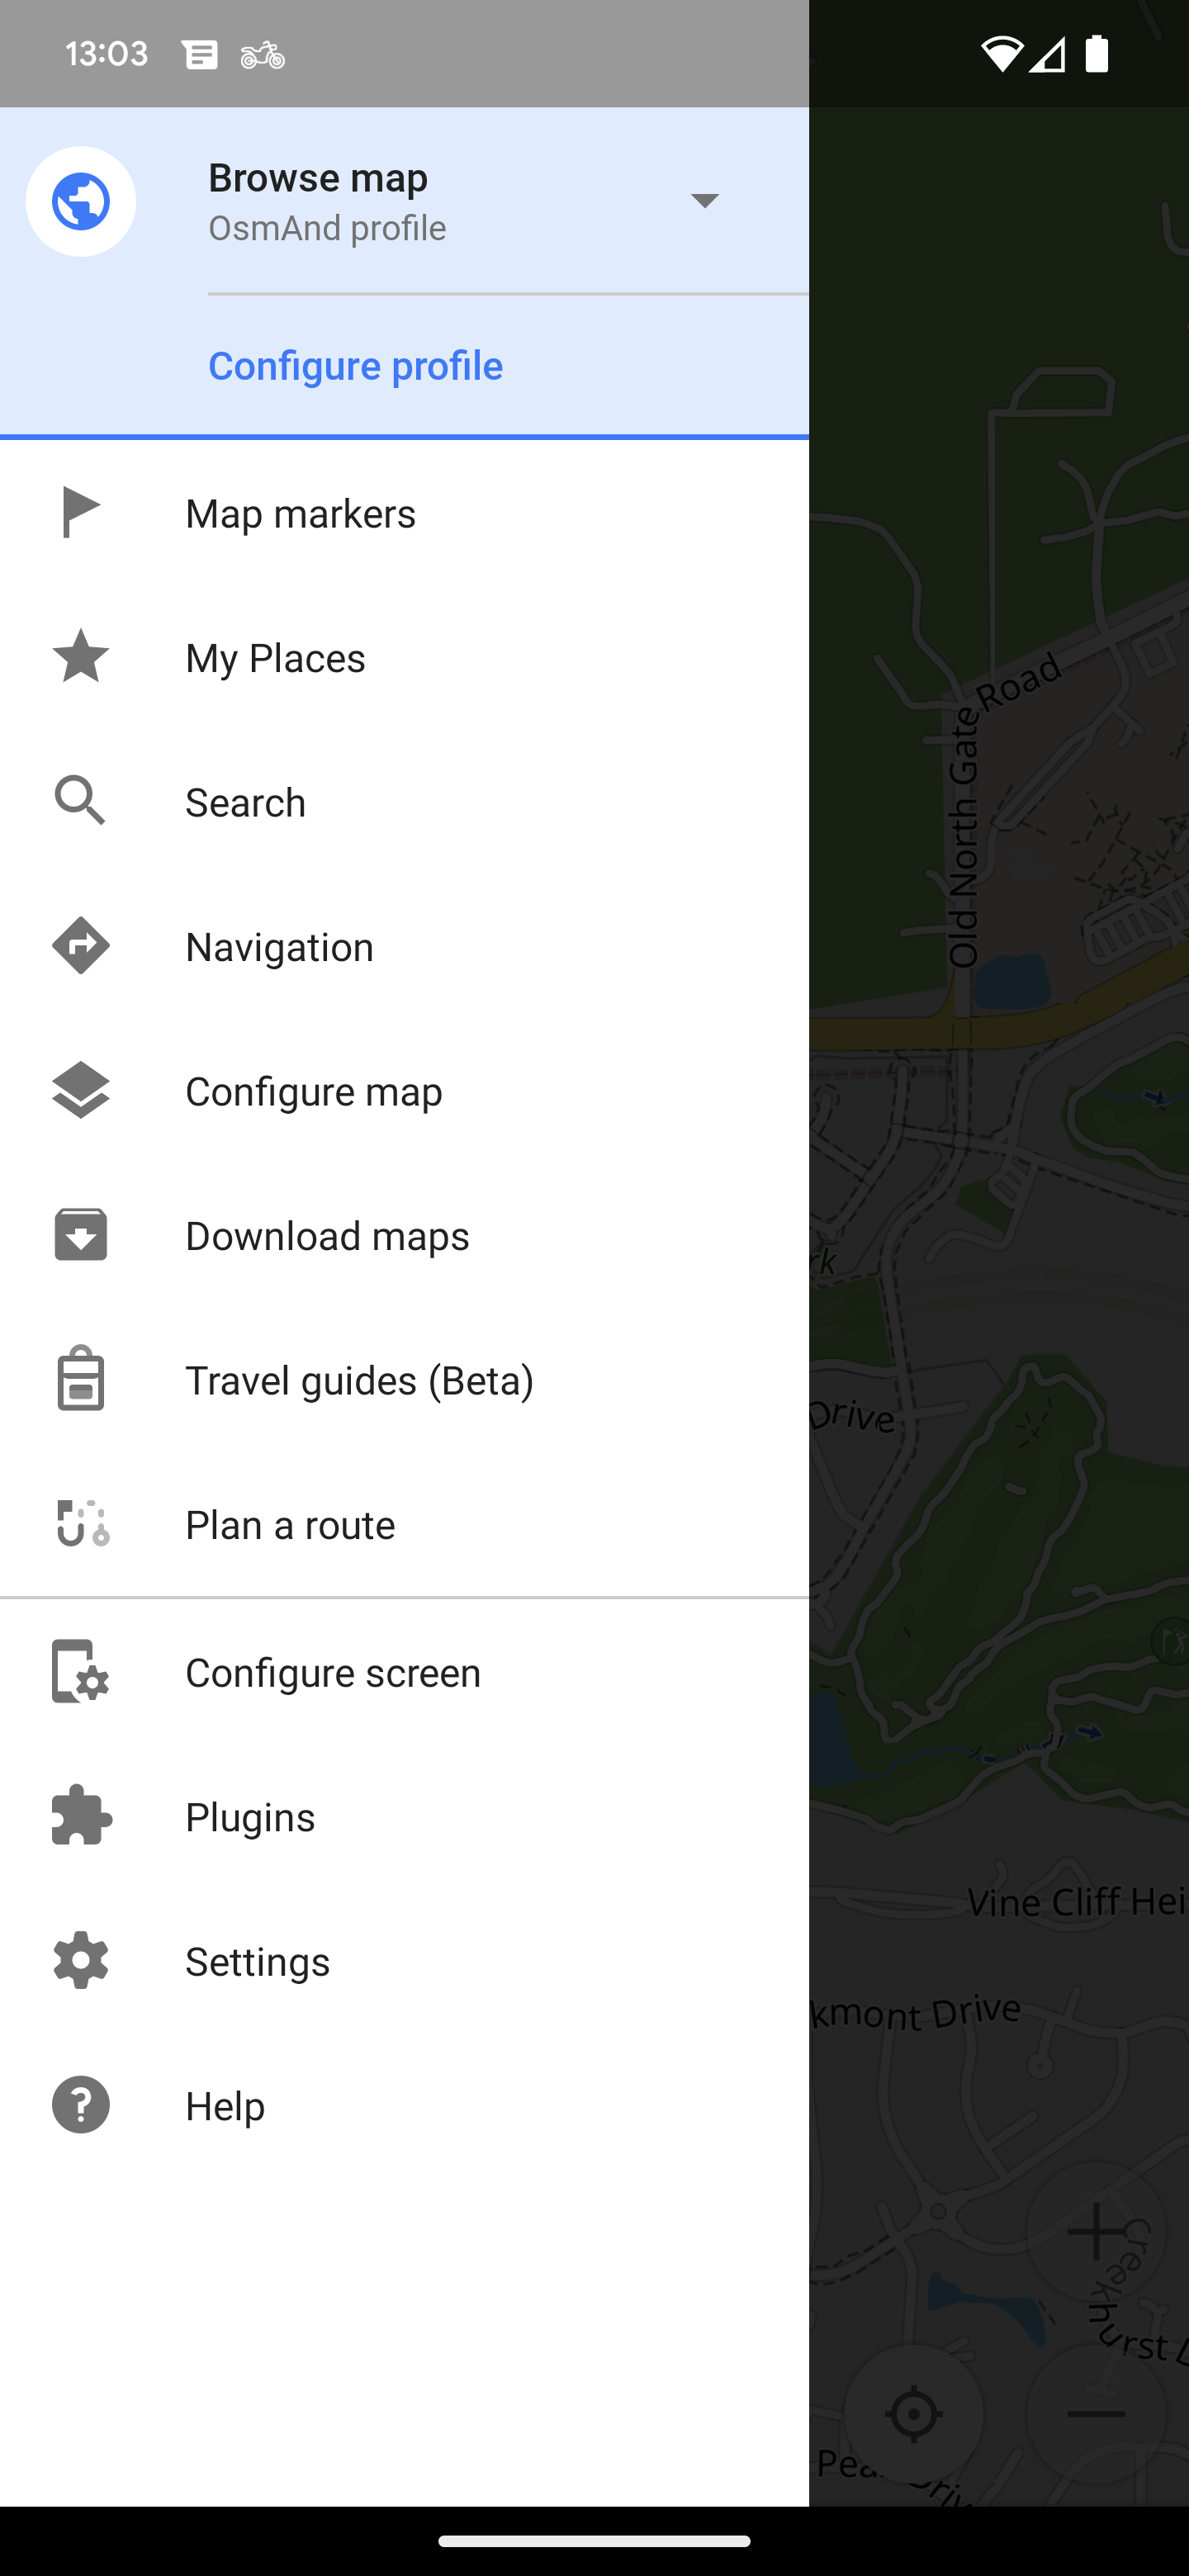
Includes WunderLINQ support for Map Zooming and returning to the WunderLINQ App.
Open the drawer and select Configure profile at the top.
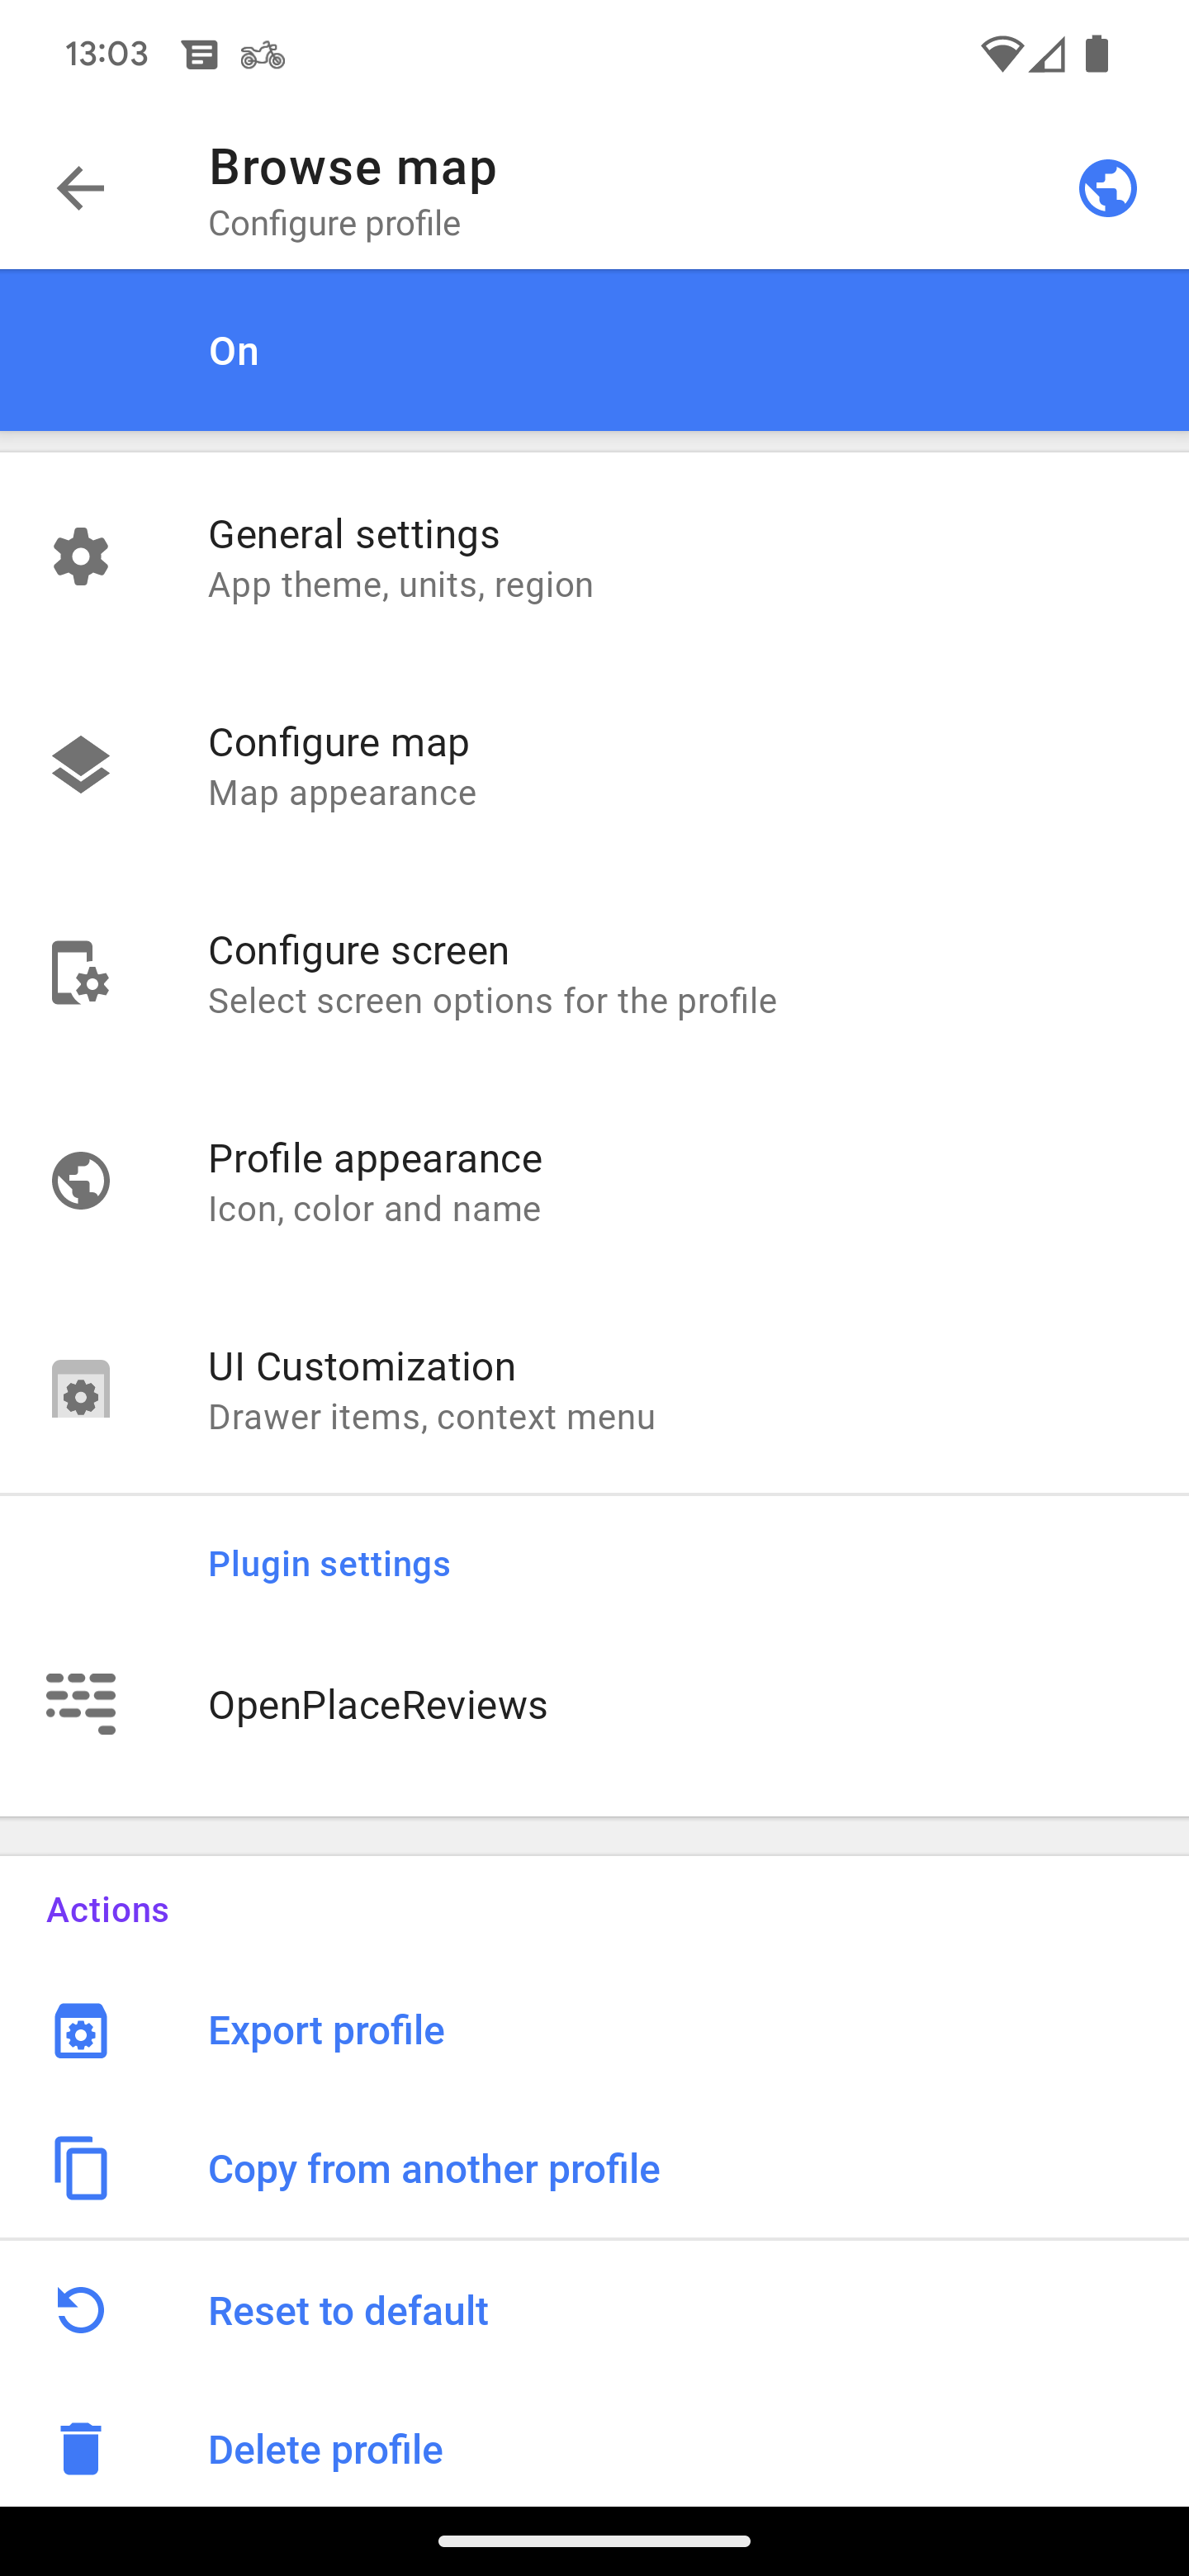
Select General settings.
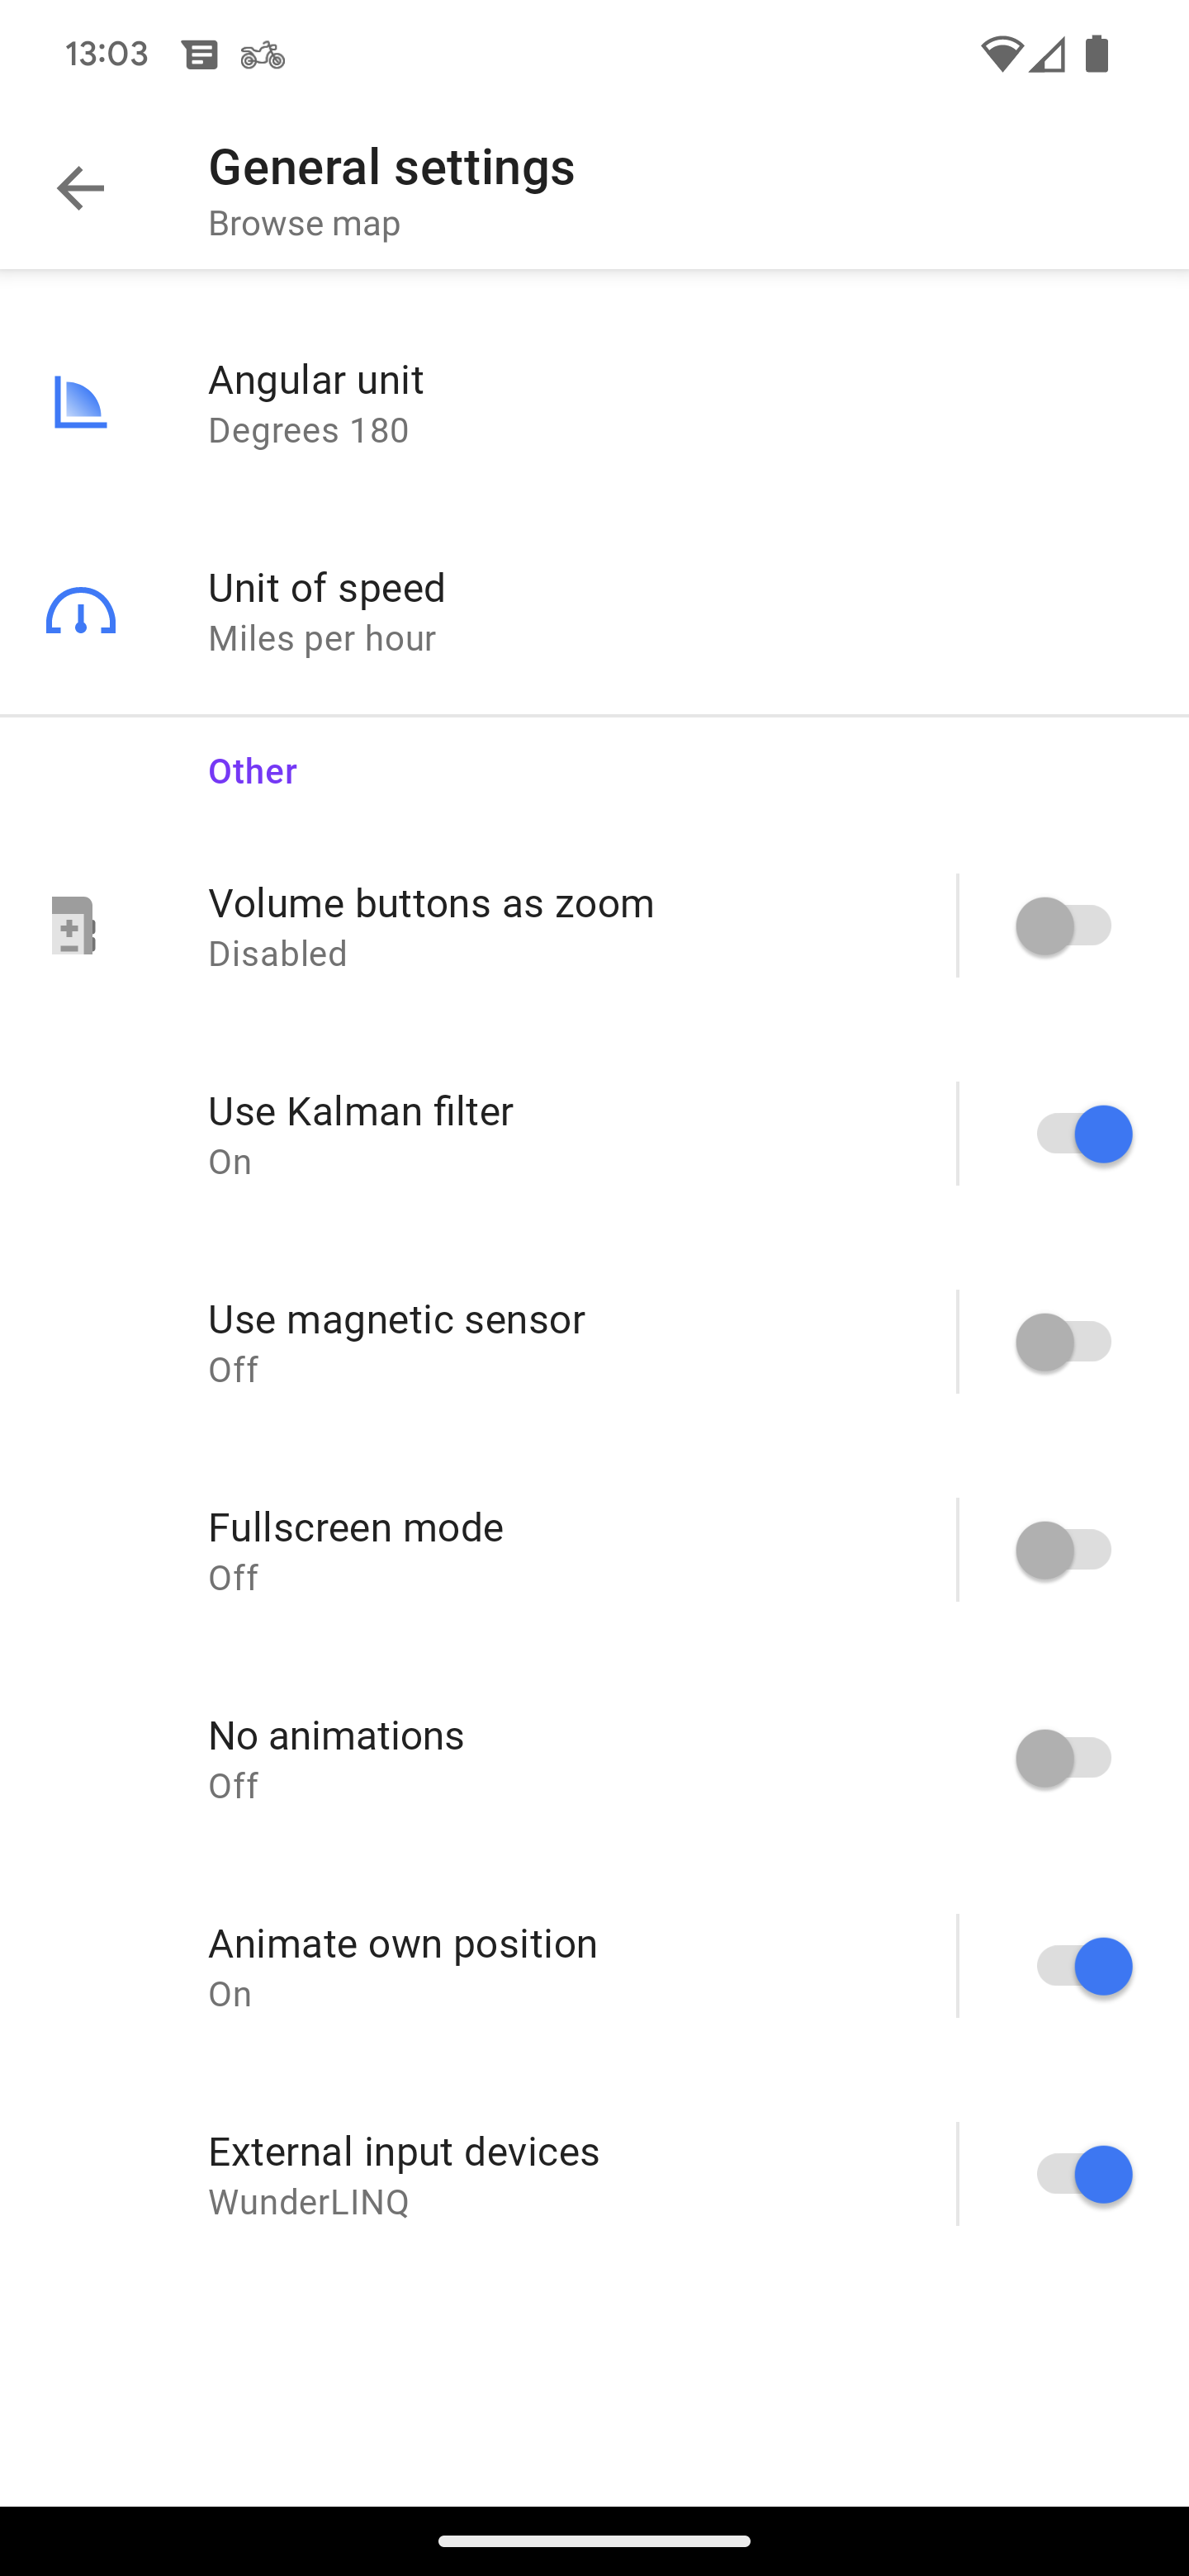
Select External input devices.
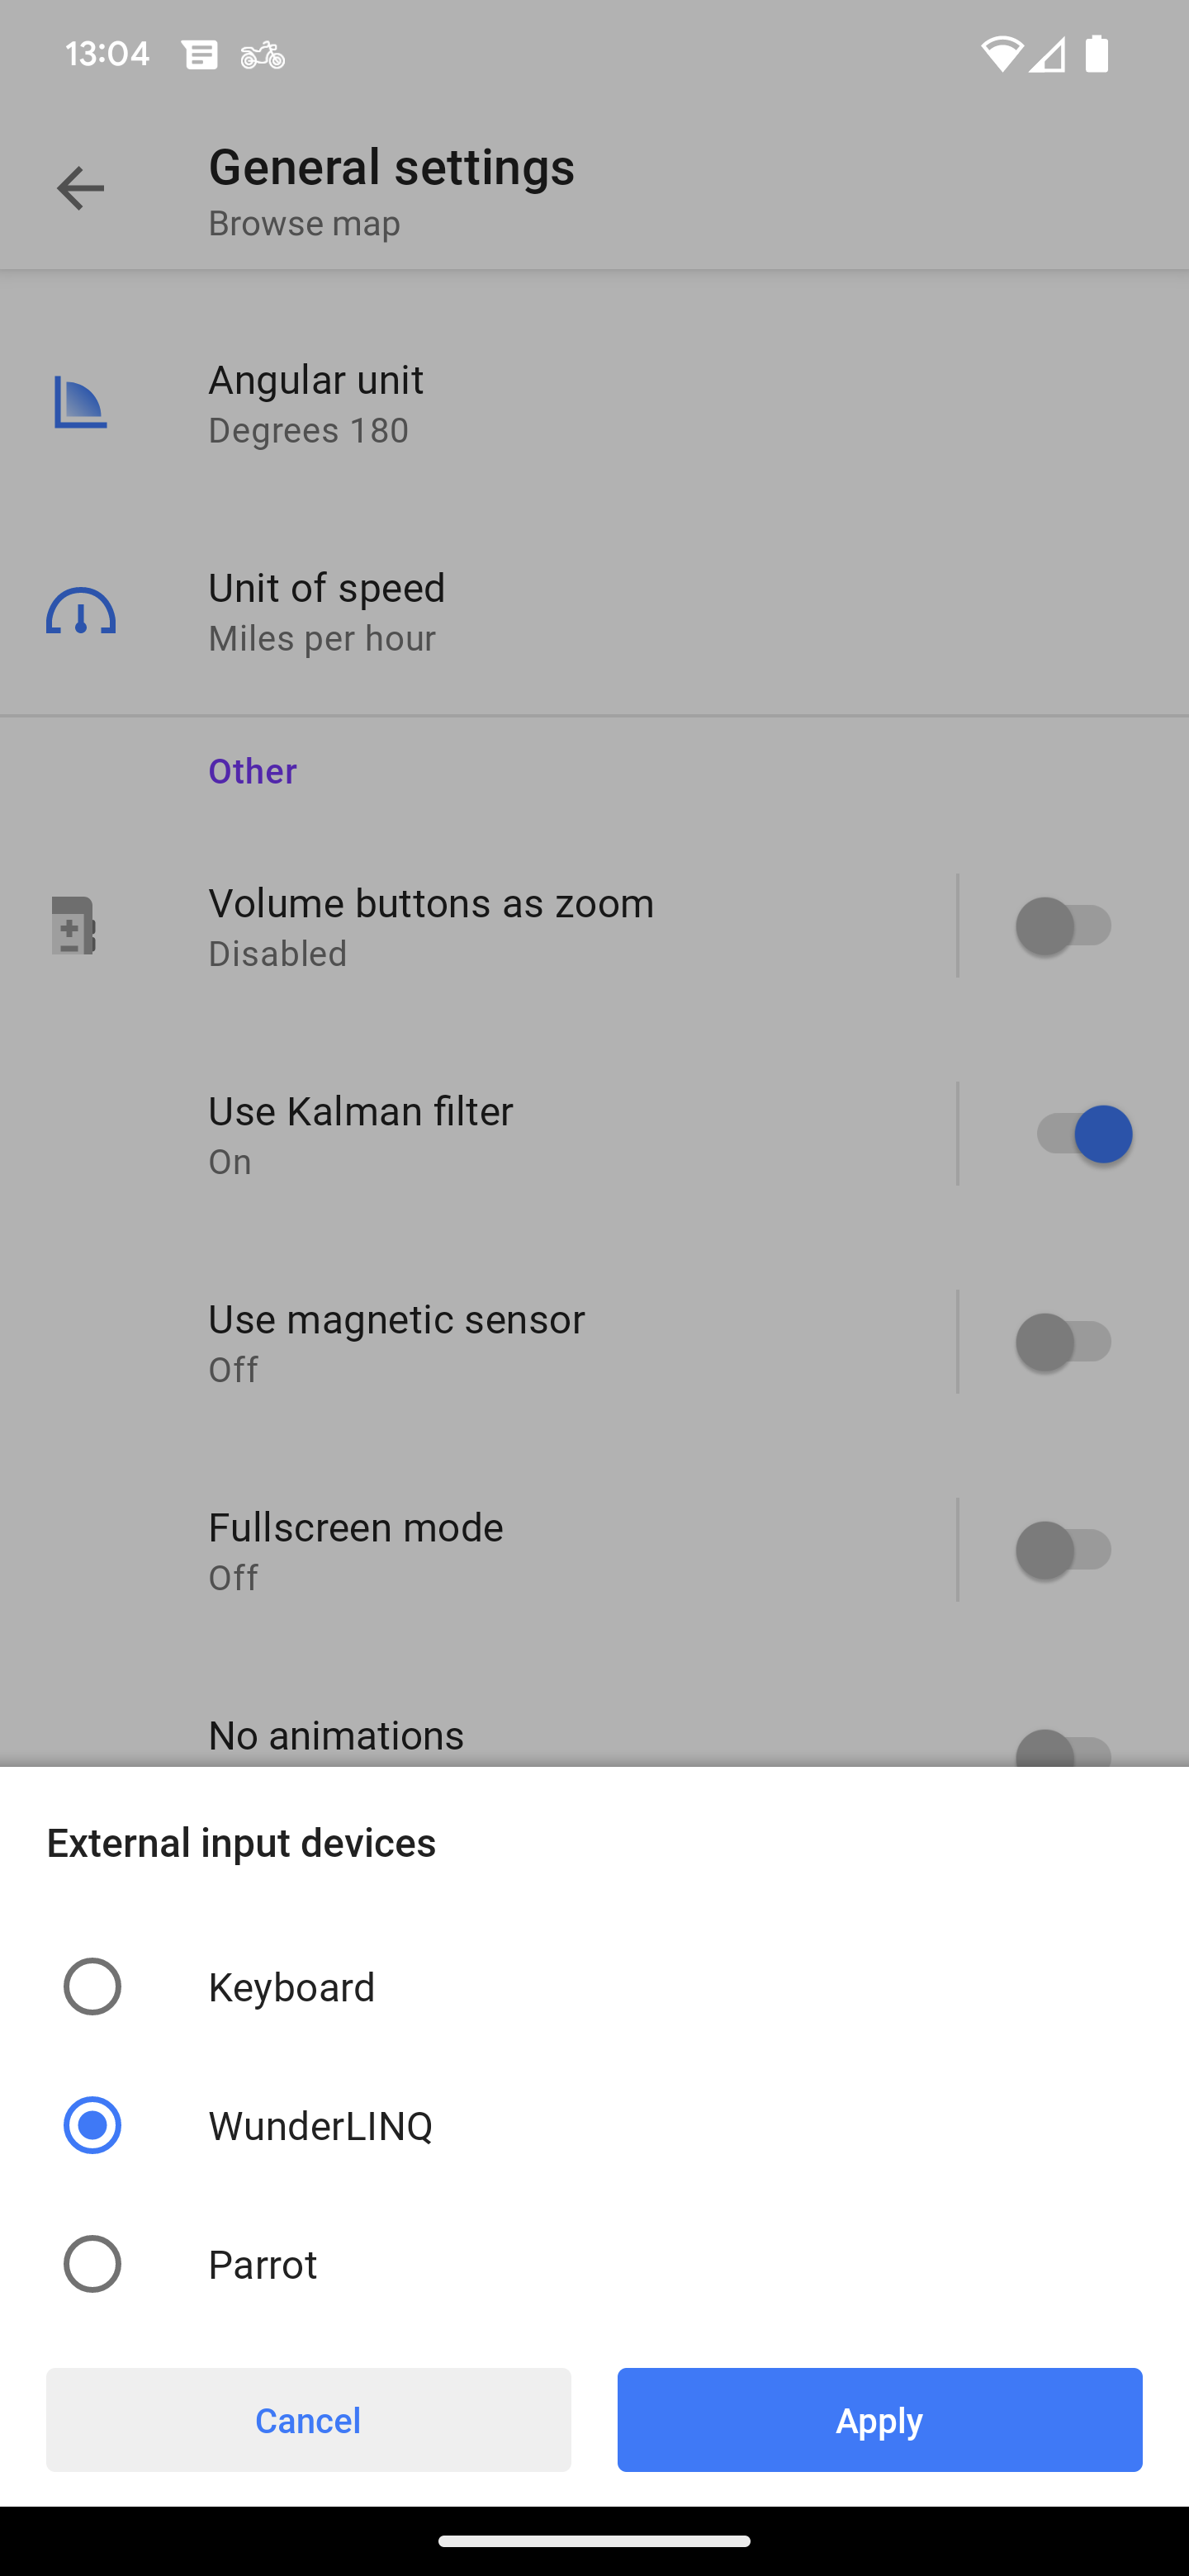
Select WunderLINQ and touch Apply
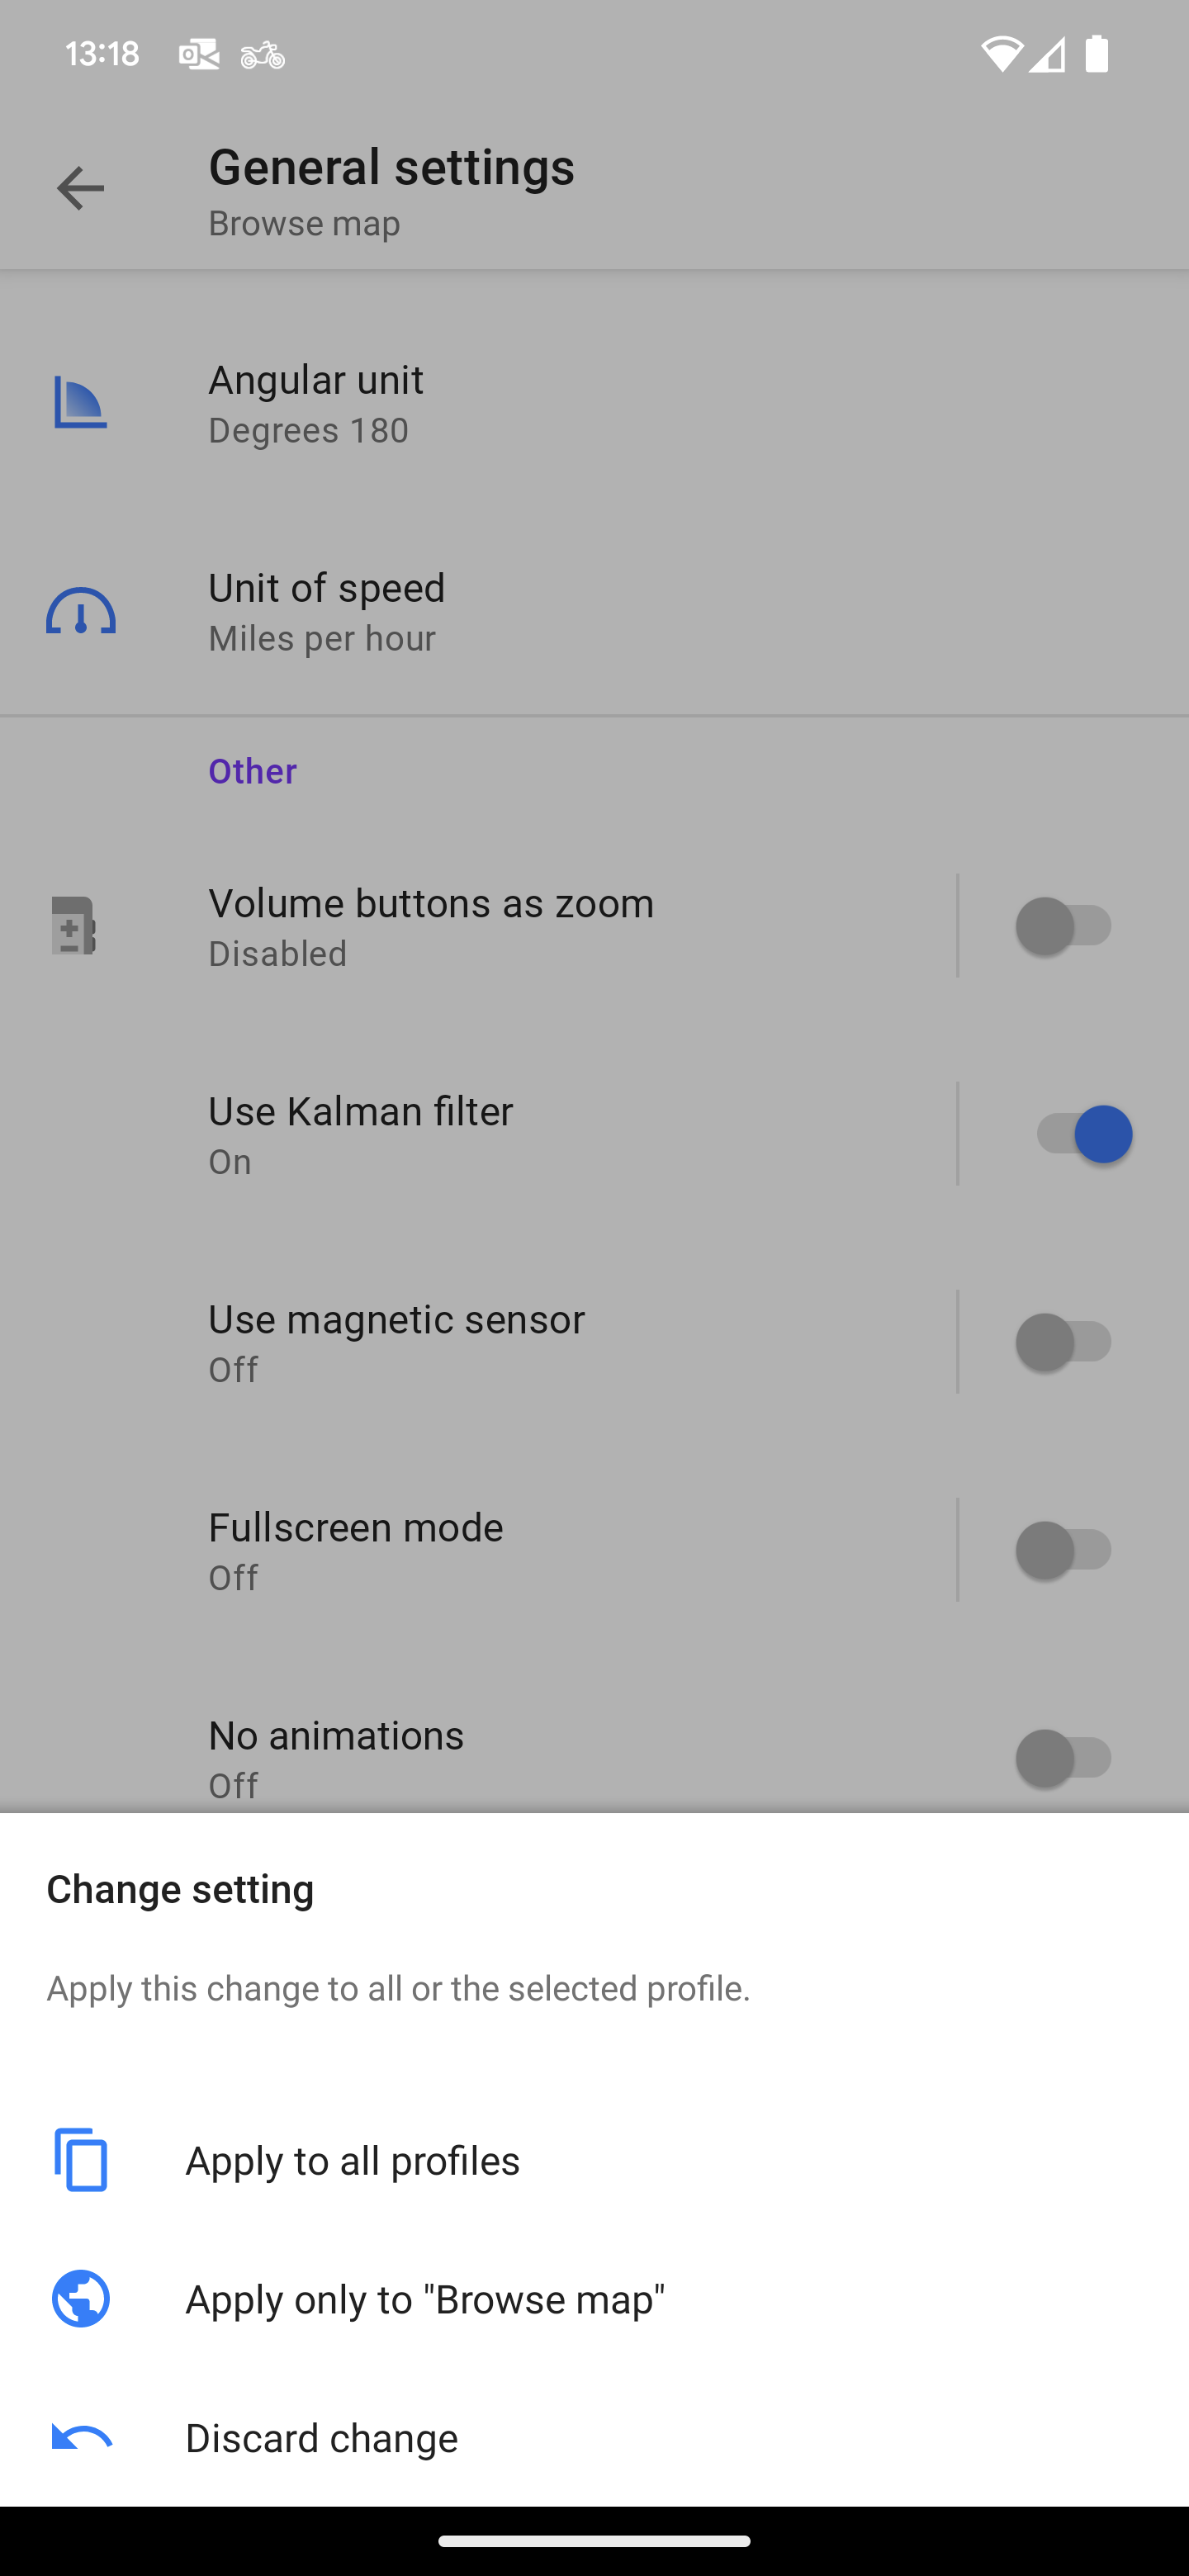
Choose which profiles to apply the change to. That's it!
GoPro Action Cameras
GoPro Hero 5 and newer cameras can be controlled via the WunderLINQ GoPro Remote. Click link below for more information.
Insta360 Action Cameras
Insta360 ONE X, ONE X2, ONE R, ONE R, ONE RS and X3 cameras can be controlled via the WunderLINQ Insta360 Remote. Click link below for more information.
Troubleshooting
No Performance Data
If no performance data is observed in the app, first verify that you have a supported bike. If the bike should have performance data a device Network Reset sequence should be followed.
Partial Wheel Control
If some wheel presses are not registering. First, ensure you're using the default key mapping under HW Settings. If you are running the default key mapping then try a Network reset. If the problem persists after following these steps there is a chance your wheel is failing or partially failed. We’ve observed a small number of cases of the wheel malfunctioning.
No Wheel Control
If your motorbike has a TFT instrument cluster, you must put it in Nav mode or Nav menu on the RT/K1600, to pass the wheel presses to the cradle. Next verify, that you are using the default keymapping under the HW Setting. If you are running the default key mapping then try a Network reset.
How to perform a Network Reset
As a last resort, a Network reset of your mobile device can be performed. We've seen this resolve a number of connection issues. Please note that you will lose all your previous Bluetooth and WiFi pairings after performing these steps.
- Forget the WunderLINQ pairing under the Android Bluetooth Settings
- Reset Wi-Fi, mobile & Bluetooth under the Android Reset Settings
- Reboot the Android device
- Pair the WunderLINQ under the Android Bluetooth Settings
- Launch the WunderLINQ app and test
App Background Problems
If your having issues with auto-launch or background services like trip logging, your device may be aggresively killing the app to save on power. The following site documents the current settings needed for each manufacturers version of Android. Please review and make the suggested changes to your Android device settings.
Problem Reporting
If you think you've found a bug or defect you can submit a report to us by using the Send Logs button on the About screen. If your problem is related to bike performance data or wheel control it can be helpful to enable debug logging under the App Settings while replicating your problem then sending the logs. If you are comfortable using GitHub you can check if the bug has already been logged or submit your bug directly there.